

Do you ever stare at your manicure and feel a sudden wave of boredom, wishing your nails could reflect the vibrant energy you feel inside, or maybe even the energy you wish you had? We’ve all been there—stuck in a cycle of solid colors, safe nudes, or the same tired French tips you’ve been wearing for years. It’s easy to fall into a rut, thinking that intricate art is too difficult, too expensive, or simply not “you.” But what if I told you that a simple change in your nail art could instantly lift your spirits and serve as a tiny, sparkling canvas of self-expression every time you type or text?
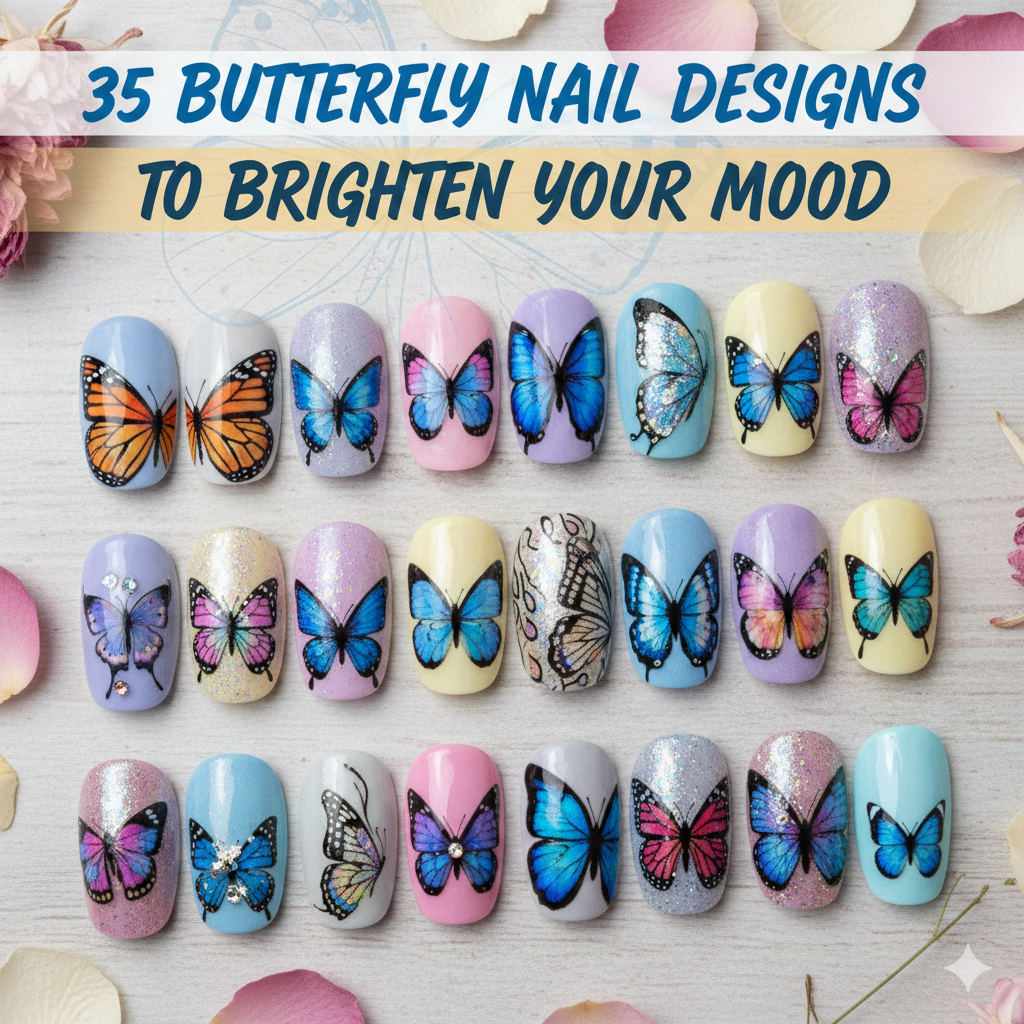
Butterflies are the ultimate symbol of transformation, hope, and joy. They remind us that change is beautiful and that color can exist anywhere, even on the smallest surface. That’s why we’ve curated this massive list of 35 butterfly nail designs that go way beyond the standard wing stamp. Whether you are looking for DIY butterfly nail art you can do at home or high-end 3D butterfly nail art inspiration for your next salon appointment, this guide has something unique for you.
In this post, we are skipping the generic looks you see everywhere. Instead, we’re diving into abstract butterfly nail designs, moody vibes, unexpected textures, and fresh color combinations. Let’s spread our wings and fly into a world of color.
1. The “Cloudy Day” Watercolor

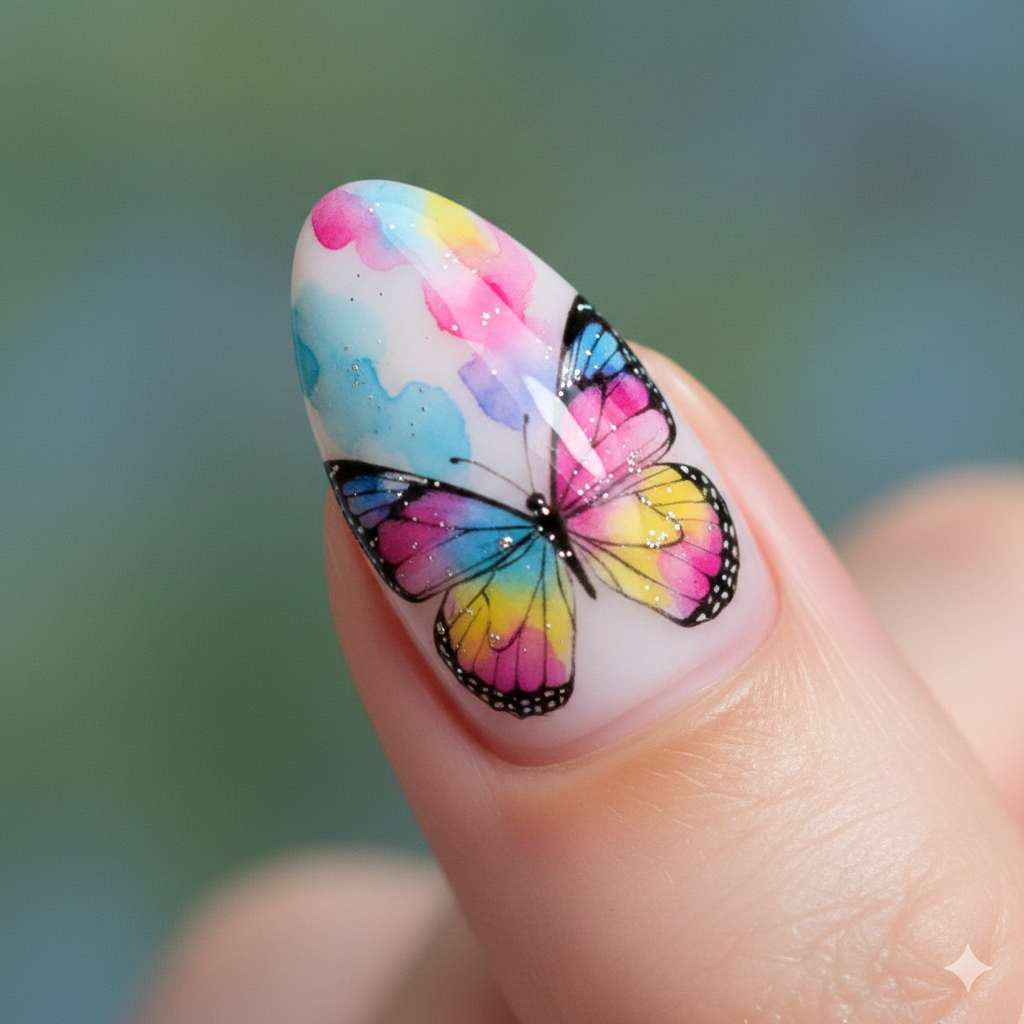
Forget the standard blue sky. This design uses a milky, grey-blue jelly base to mimic a moody, overcast day. On the ring and middle fingers, paint pastel butterfly nails using a watercolor technique—where the edges are blurred and soft, looking like they were painted with a wet brush. Use shades of faint lavender and pale peach for the wings so they pop against the grey. It’s melancholy yet incredibly cheerful, perfect for those who love a rainy-day aesthetic.
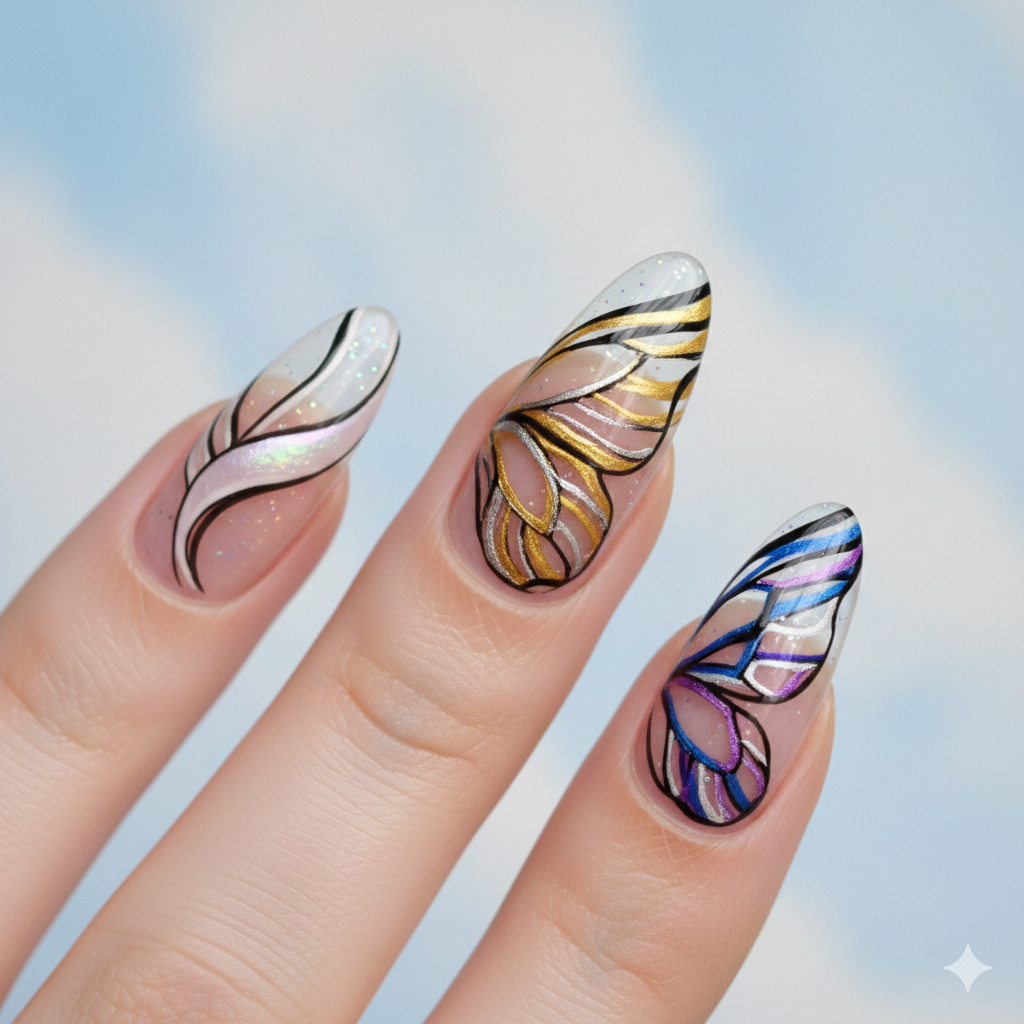
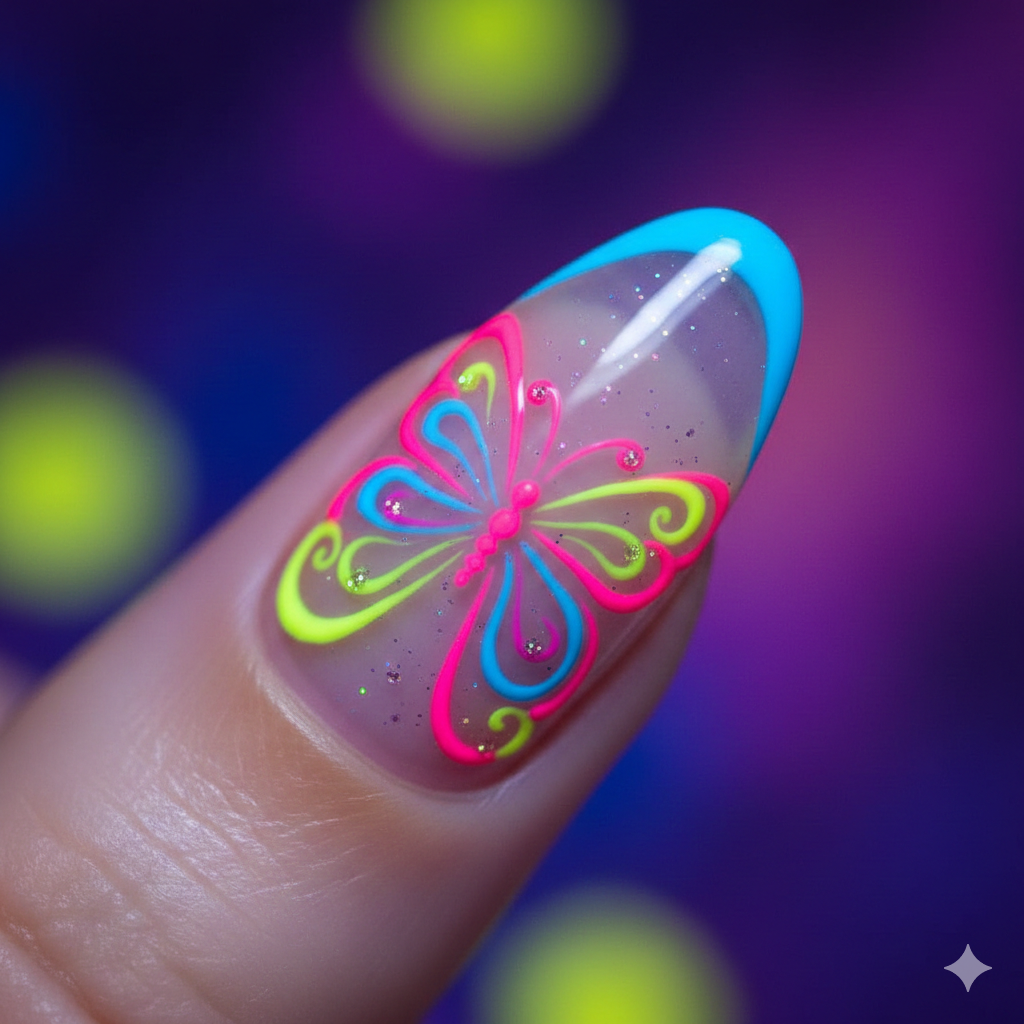
2. Stained Glass Neon
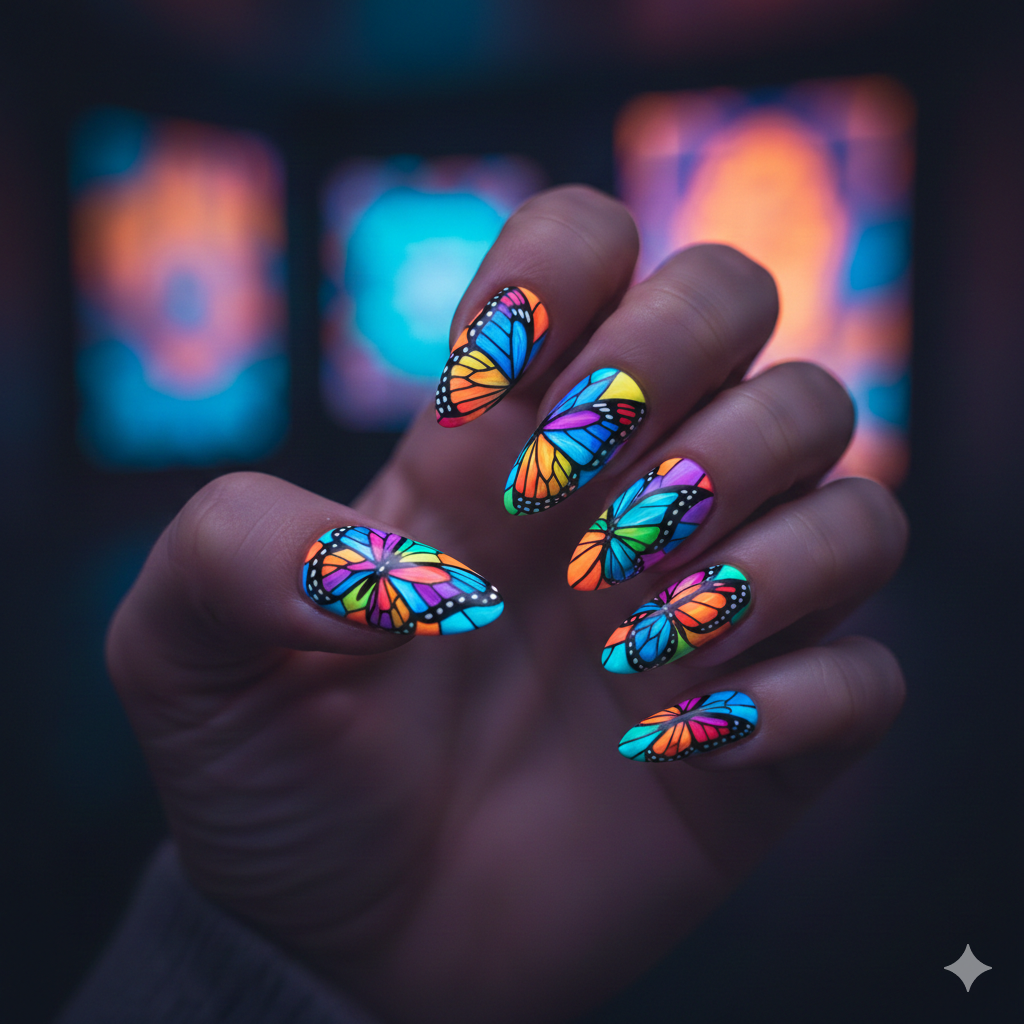
This is where chrome butterfly nails meet vibrant color. Start with a crisp white base. Using black striper polish, draw the “lead” lines of butterfly wings. Then, instead of traditional glass colors, fill the sections with UV-reactive neon polishes—electric lime, hot pink, and blinding yellow. Top it with a high-gloss top coat to make it look like actual glowing glass. This is one of those butterfly nail designs that looks incredible in the sun.
3. The “Taxidermy” Pin Display
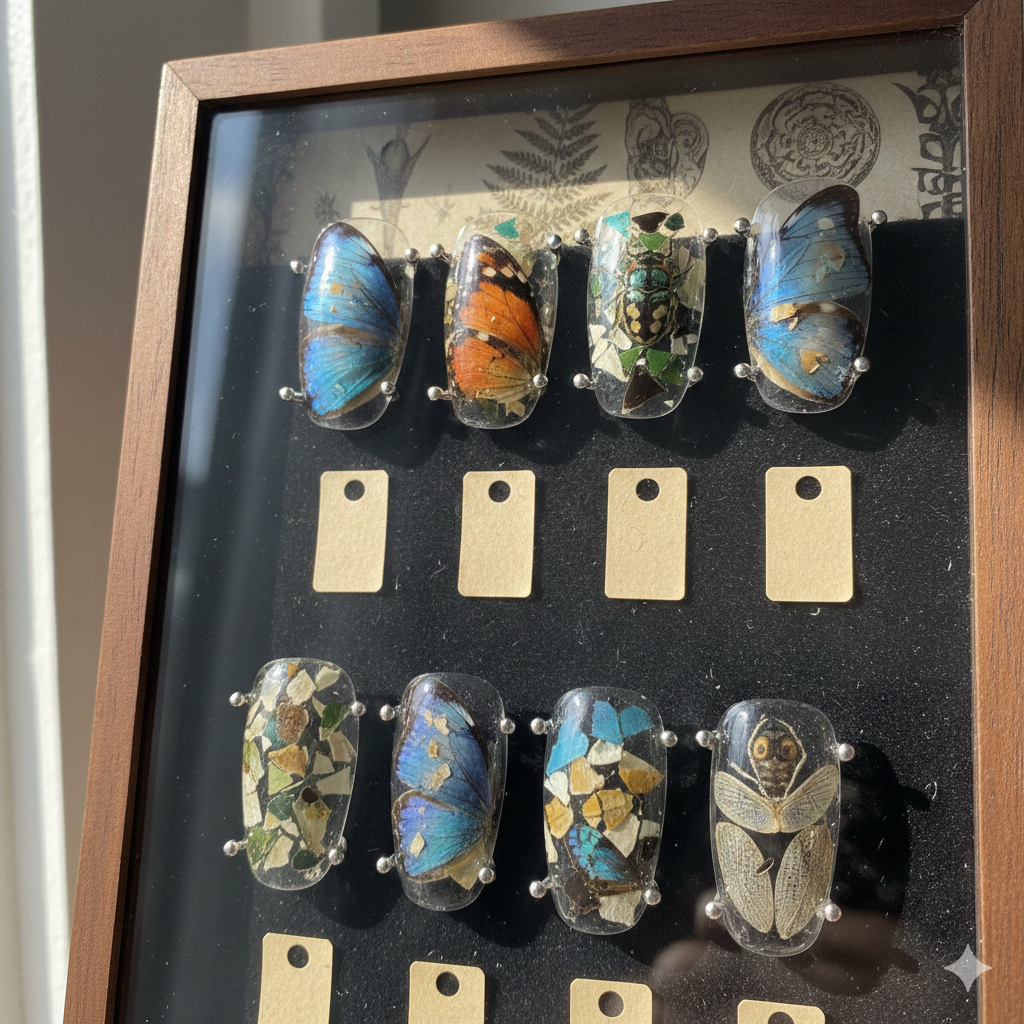
For the lovers of the dark aesthetic, this design is a showstopper. Paint a soft, matte beige or cream base (like an old display box). On the accent nails, create a realistic blue butterfly nails look, but add a tiny black dot or a metallic stud in the center of the thorax to mimic a pin. You can even draw faint scientific labeling numbers next to the wing in a typewriter font. It’s quirky, edgy, and definitely a conversation starter.
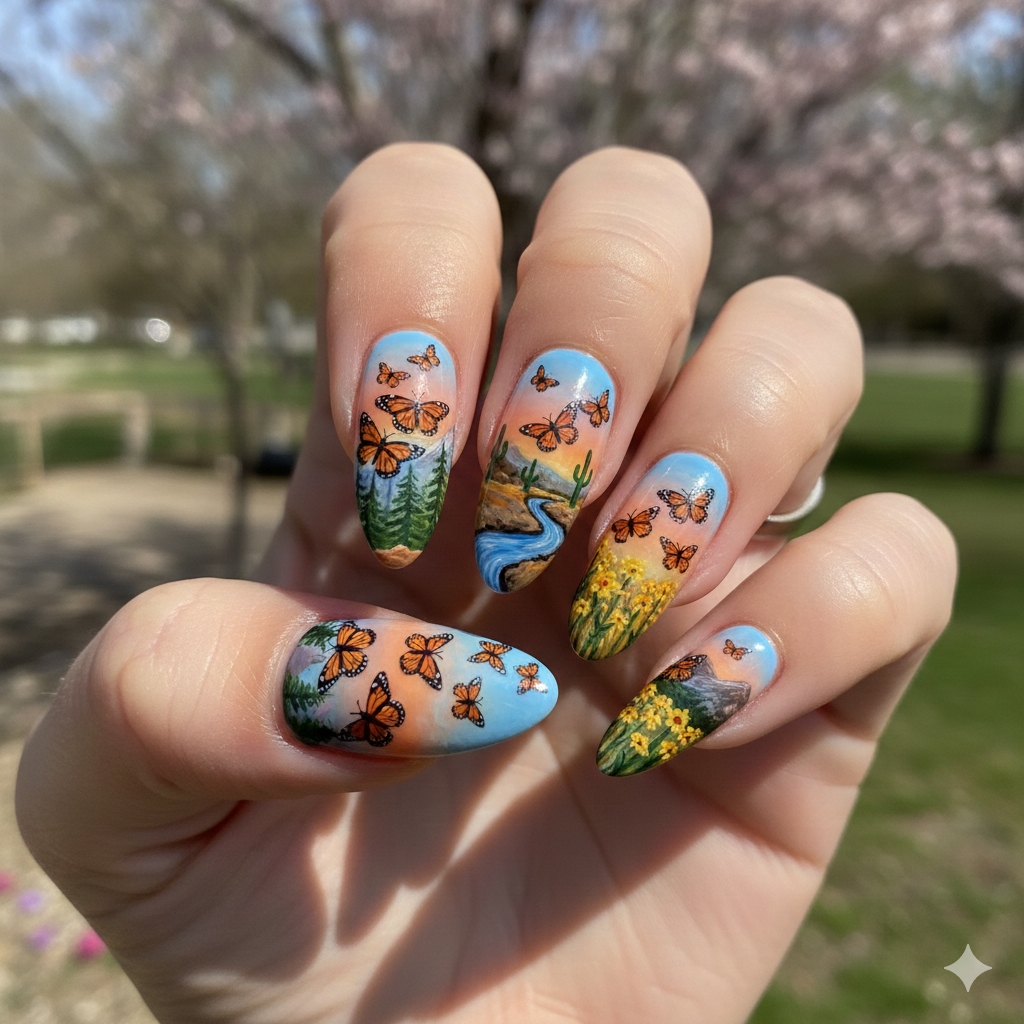
4. Double Exposure Landscape
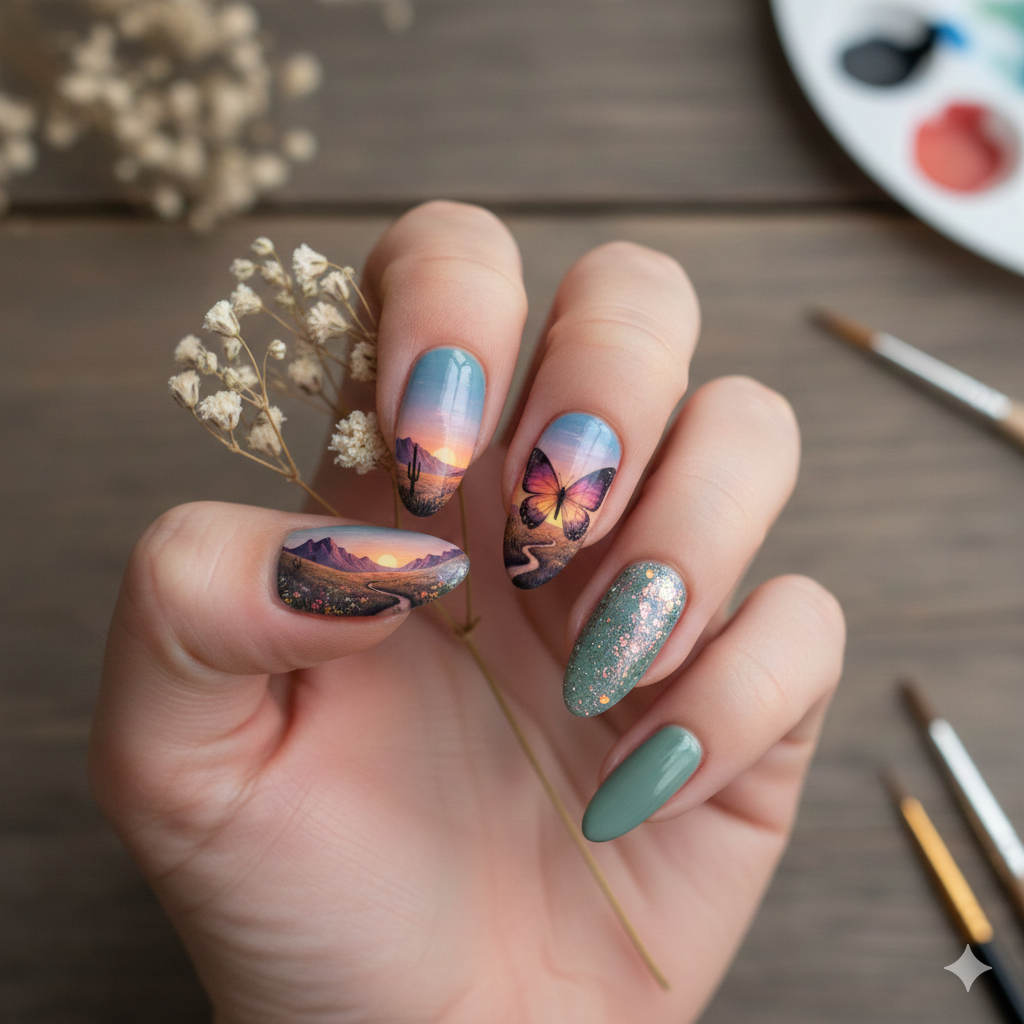
This is a high-level art concept that works surprisingly well on nails. Create a silhouette of a large butterfly wing on the nail using black. Then, inside that silhouette, paint a tiny landscape—think a sunset over the ocean or a mountain range. This turns the butterfly nail art into a window to another world. It works best on longer almond or coffin shapes where you have more canvas.
5. Graffiti Drip Wings
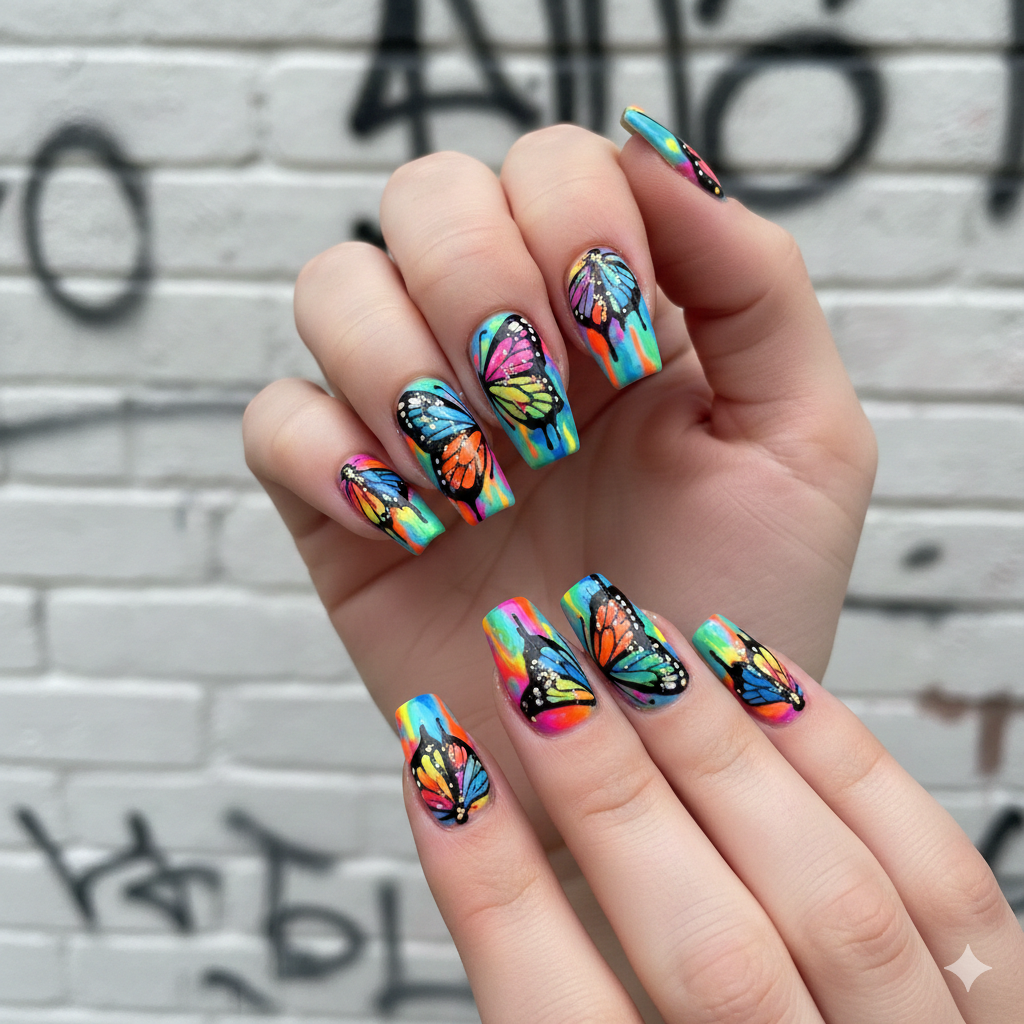
Take inspiration from street art. Apply a white base and splatter various neon colors over it. On the accent nail, draw a butterfly outline, but instead of filling it in, let the paint “drip” down from the wings. It looks like the butterfly is melting into the graffiti. This is a fantastic DIY butterfly nail art project because the messier it is, the better it looks.
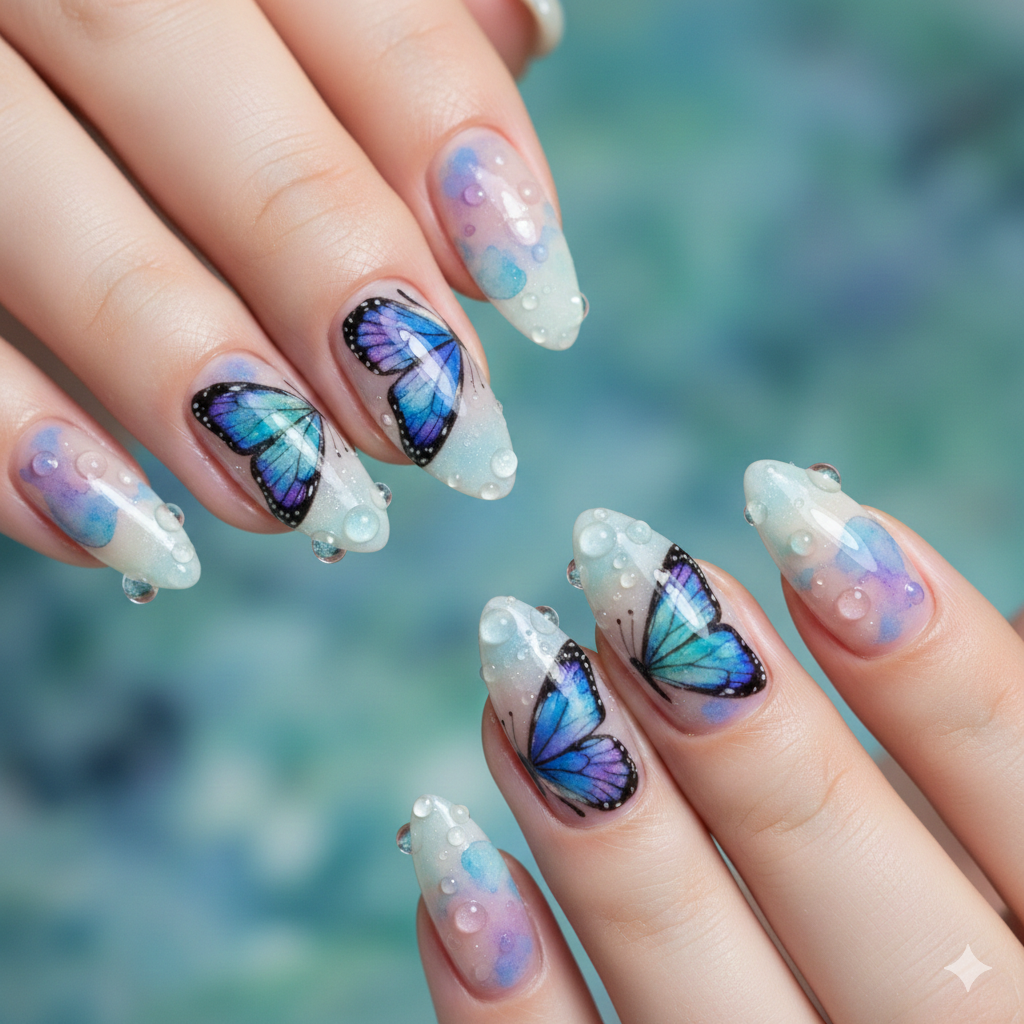
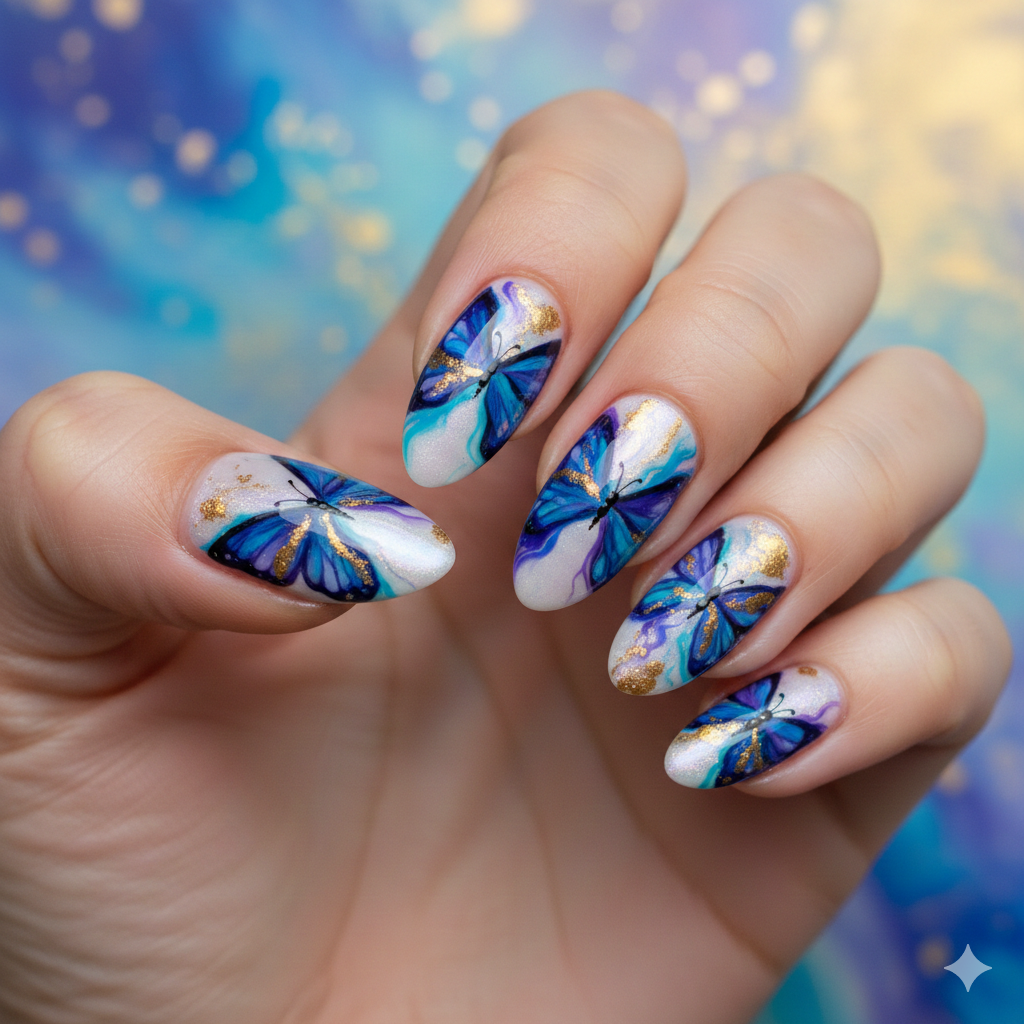
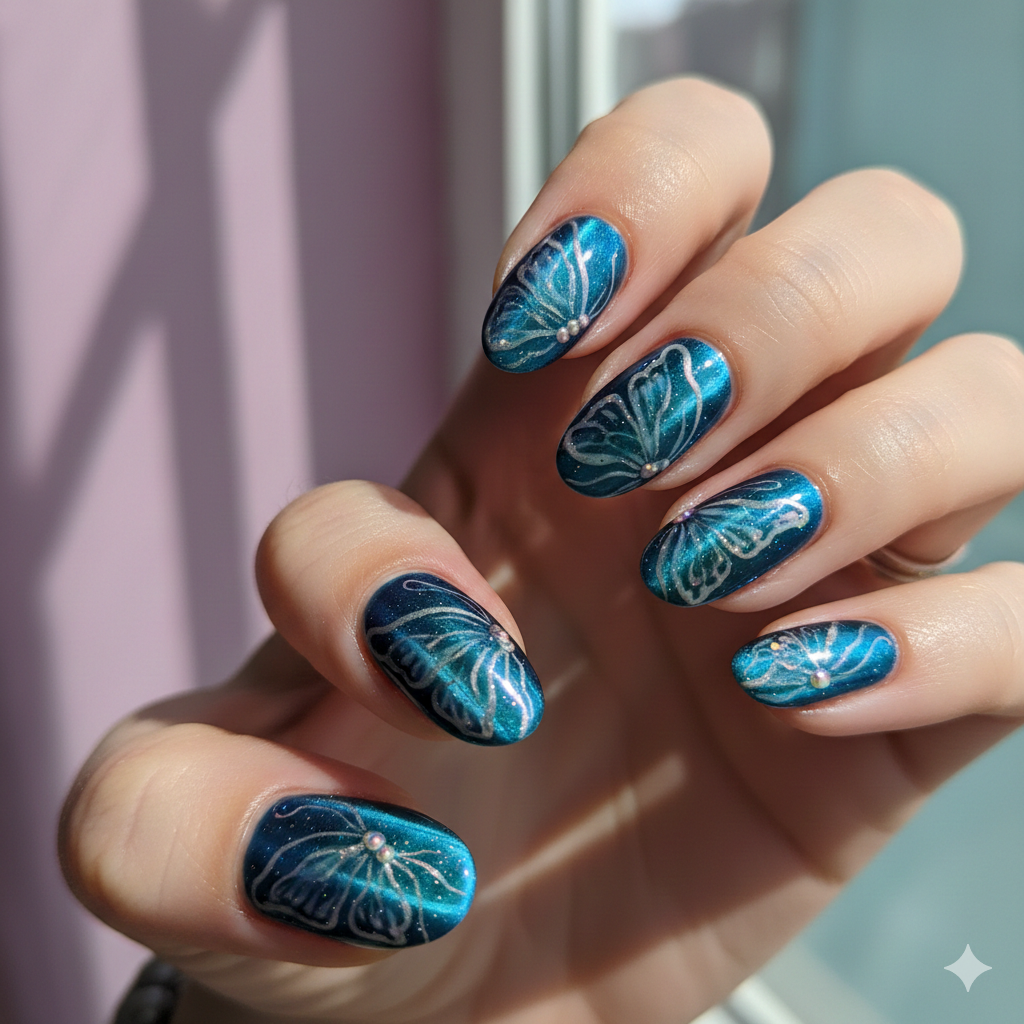
6. Pearlized “Morpho”
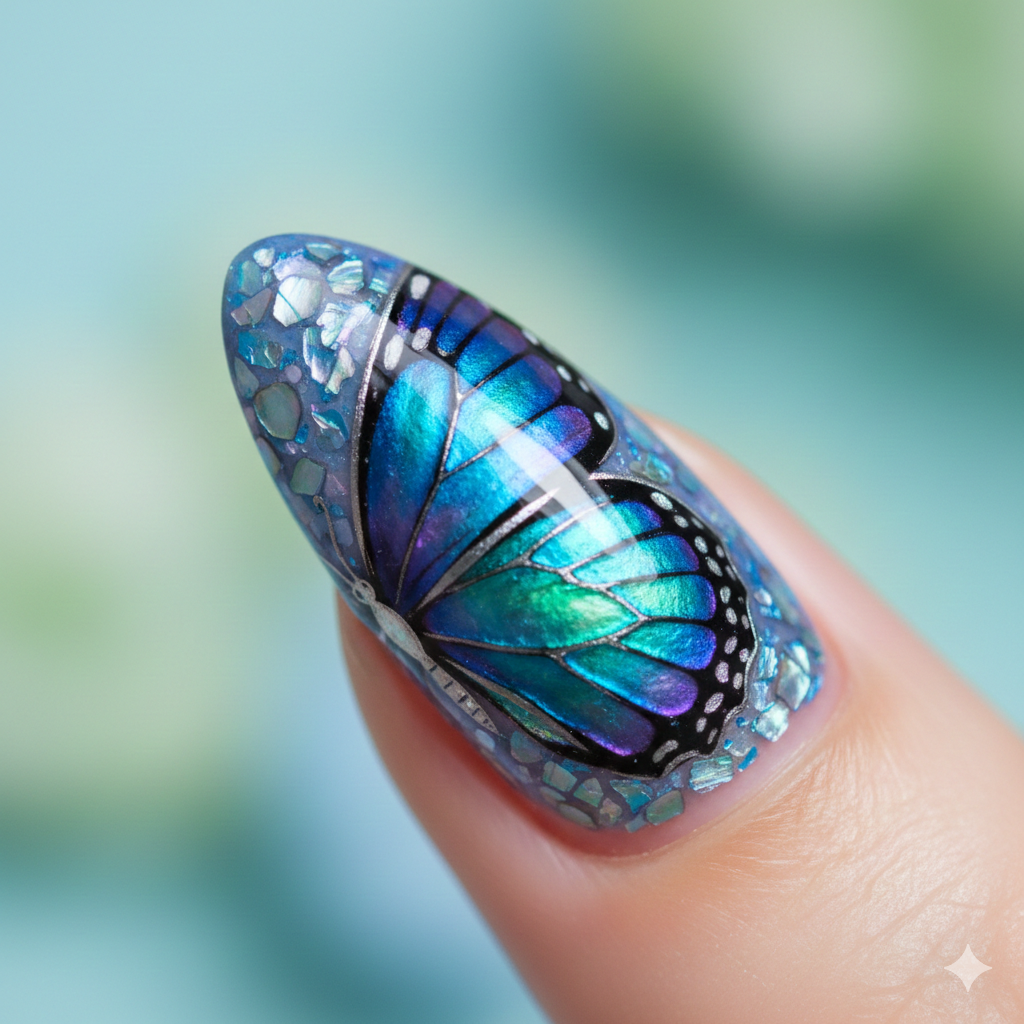
The Morpho butterfly is known for its iridescent blue shine. To replicate this, use a sheer blue base packed with shimmer. Over the top, hand-paint the wing veins in a slightly darker, metallic royal blue. Add a swipe of iridescent powder (like pigment used in chrome butterfly nails) right in the center of the wings. The result is a butterfly nail design that shifts color every time you move your hand.
7. Vintage Decoupage
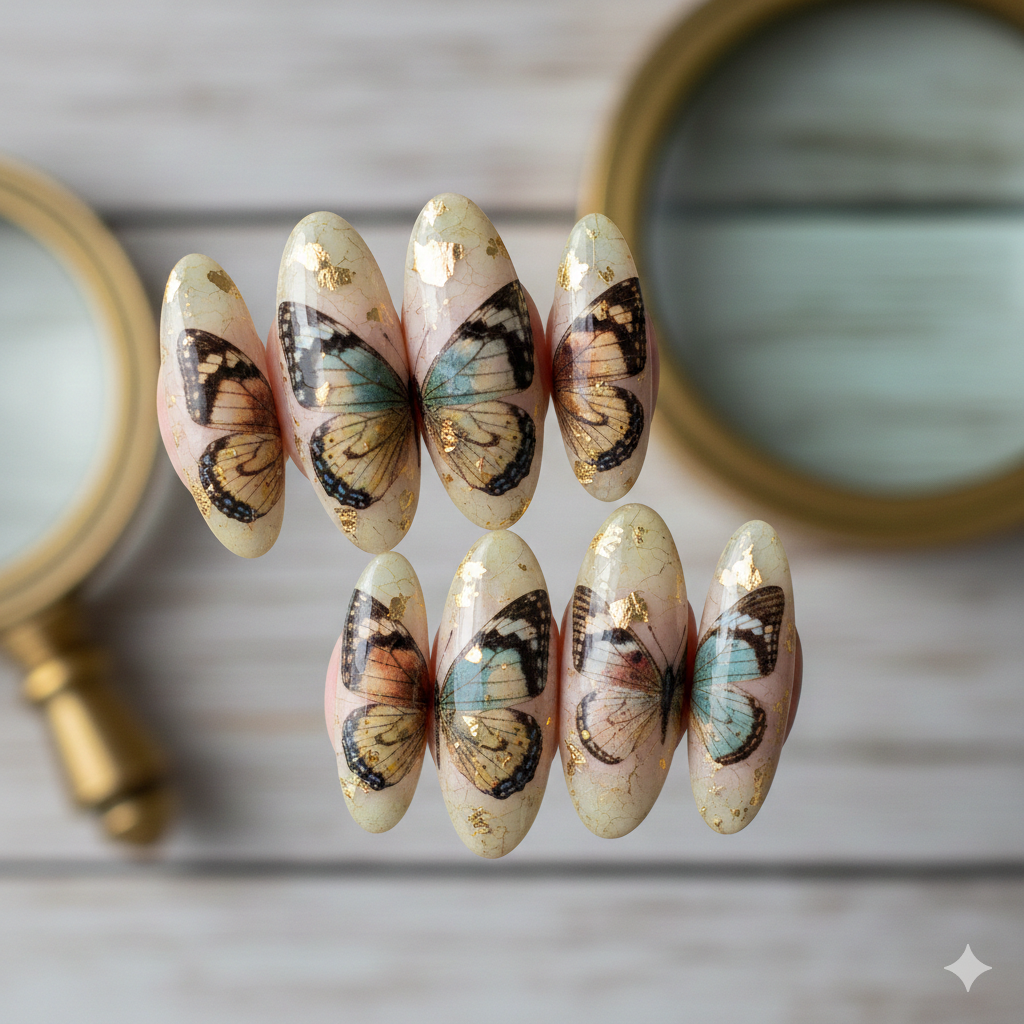
Instead of painting the butterflies, use actual butterfly nail stickers or cut-outs from delicate paper napkins. Apply them to a milky white background and seal them heavily with a thick gel top coat. The texture of the paper gives it a vintage, crafted feel. You can even tear the edges of the sticker before applying it so it blends seamlessly into the nail, looking like a scrapbook page.
8. Smoky Quartz Overlay
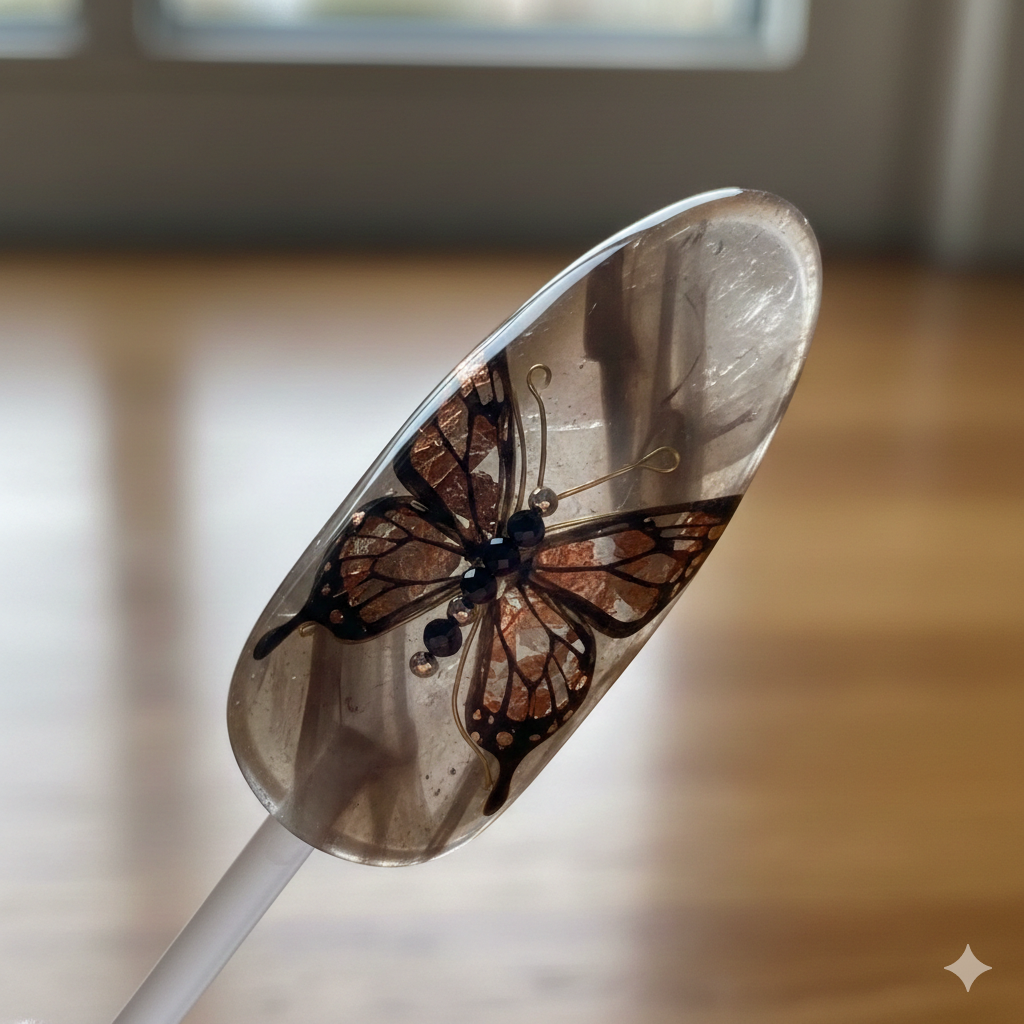
This is a moody, luxe take on butterfly themed nails. Paint a deep, dark charcoal base. Using a makeup sponge, dab a translucent, shimmery purple polish over the cuticle area and fade it out toward the tip. Then, stamp a detailed butterfly image in a metallic gunmetal grey over the smoky area. It looks like a butterfly flying through smoke.
9. Geometric Wireframe
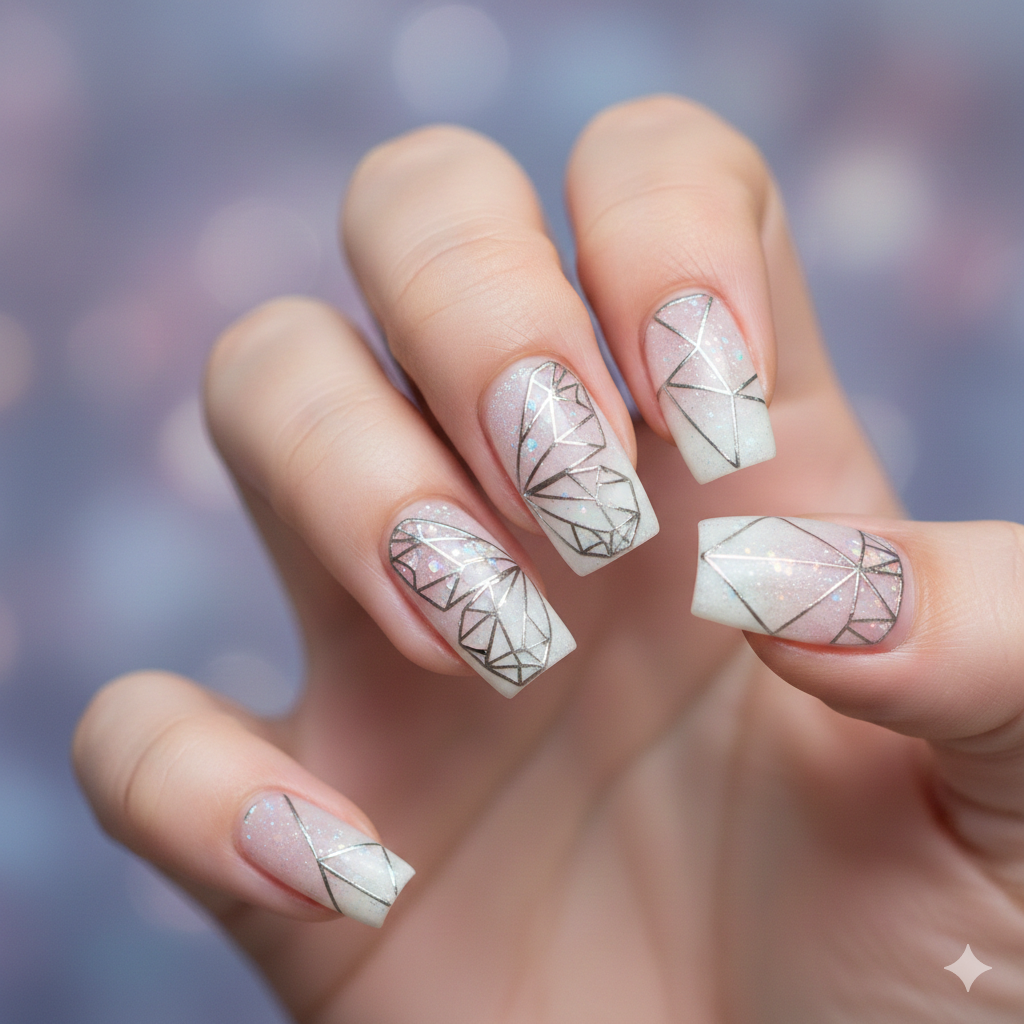
Minimalism meets nature. On a nude or soft pink base, use a fine liner brush to draw only the edges and veins of the butterflies. Don’t fill in the wings. Leave the rest transparent. To make it pop, place a single rhinestone right in the center of the empty wing. This is an elegant option for simple butterfly nail designs for short nails because the lines don’t require much length to look good.
For more nature inspired nail looks, Pin It Today.
10. The “Broken Wing” Gold Kintsugi
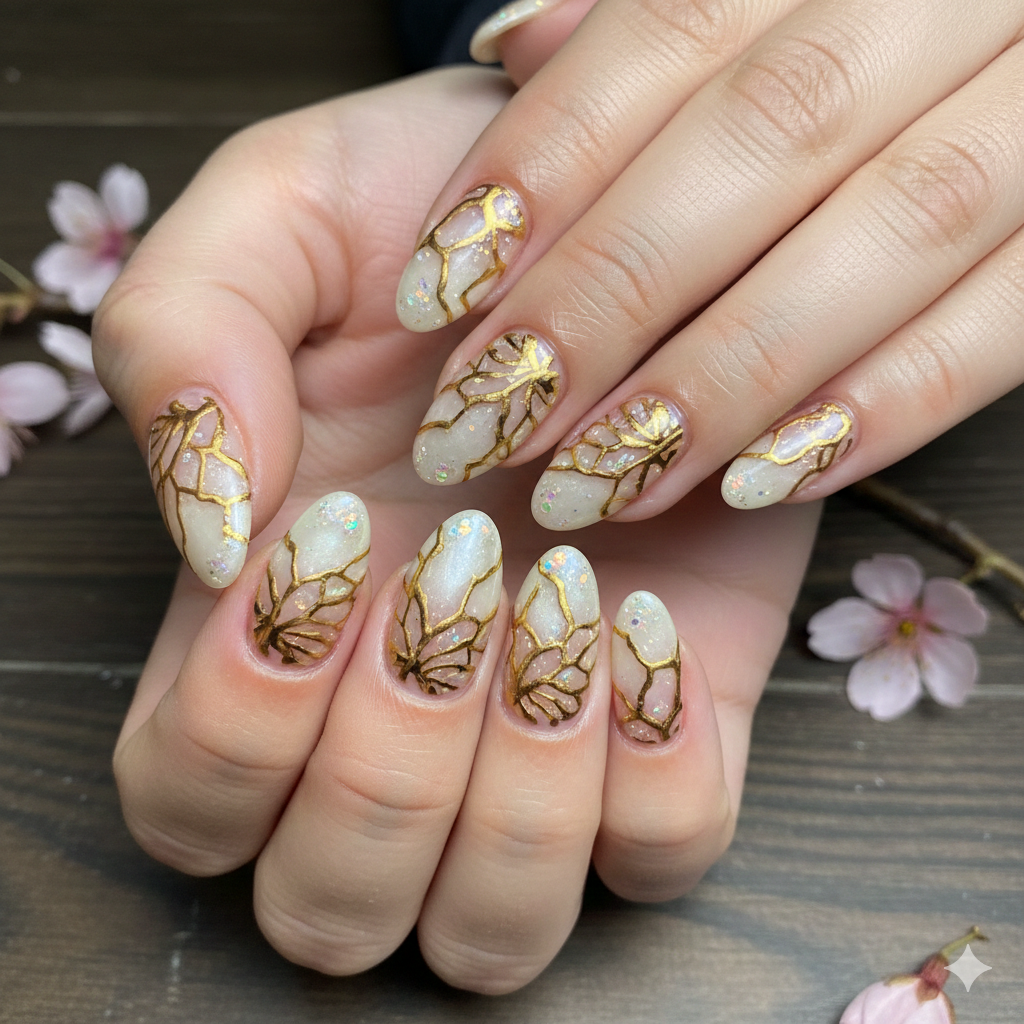
Kintsugi is the Japanese art of repairing broken pottery with gold lacquer. Paint a butterfly wing on your nail, but “break” the image—leave a gap in the wing. Fill that gap with gold leaf or thick gold glitter polish. It symbolizes that beauty can be found in imperfections. It’s one of the most meaningful butterfly nail art ideas you can try.
11. Galaxy Swirl
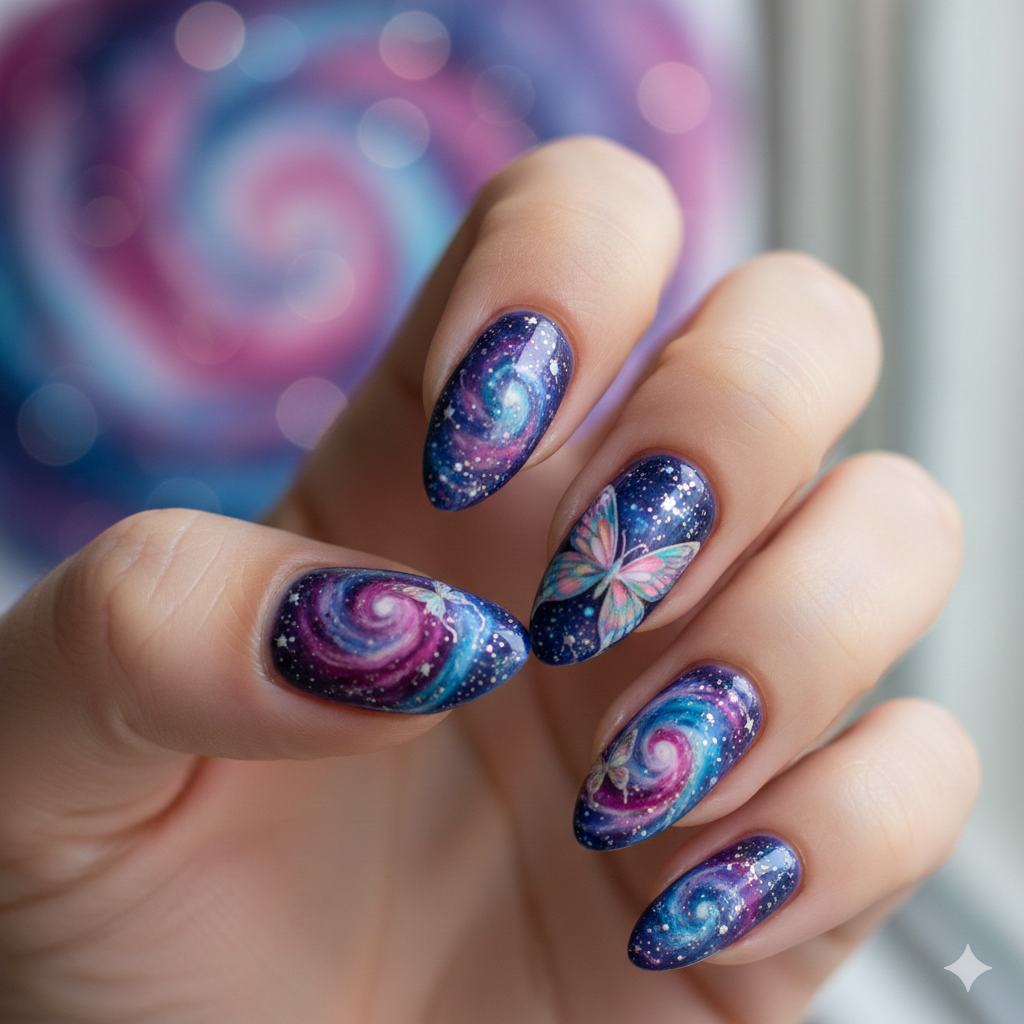
Galaxy nails are classic, but adding a butterfly makes them ethereal. Create a deep purple and black galaxy base with white sponged stars. Then, add a holographic butterfly nails sticker or hand-painted silhouette over the galaxy. The trick here is to make the butterfly wings opaque white or bright pink so they contrast sharply against the dark space background.
12. Abstract Oil Slick
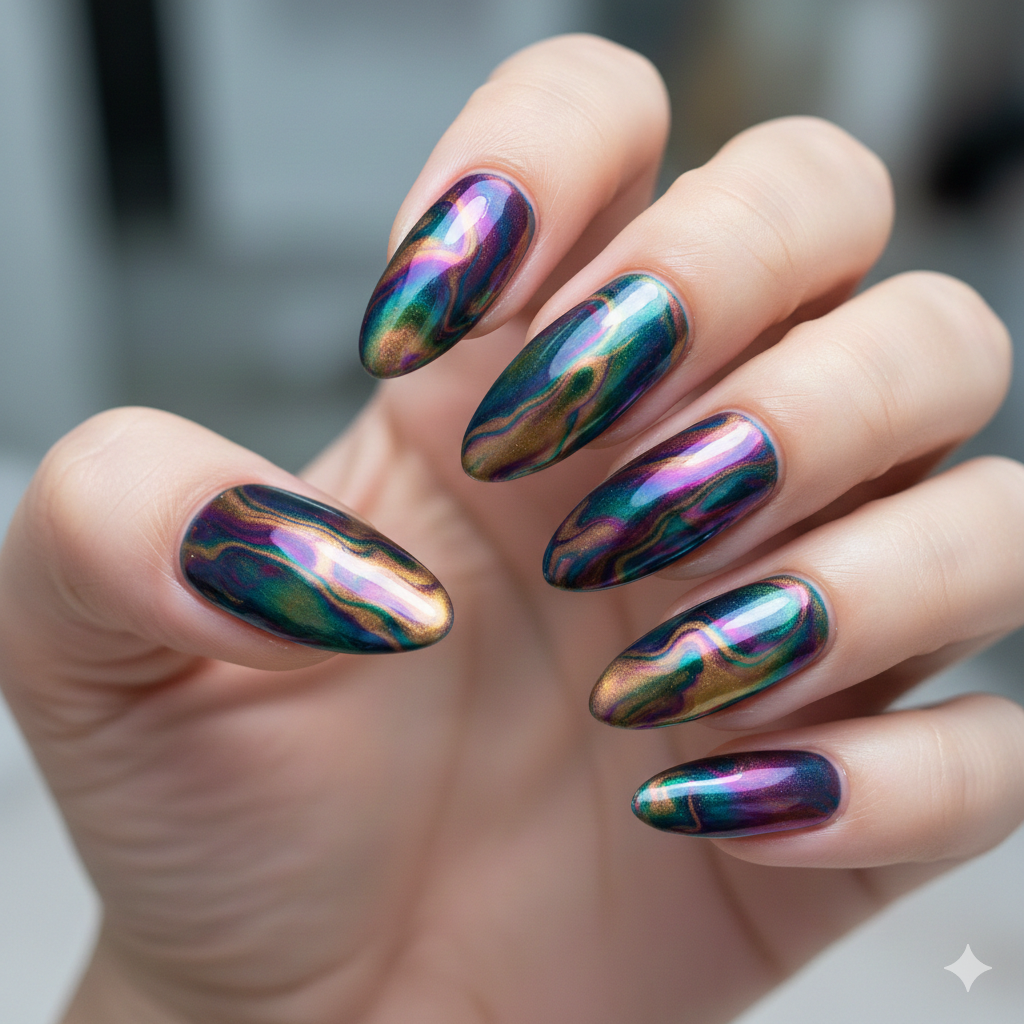
Instead of a literal butterfly, use the shapes of wings to create an abstract pattern. Use swirling metallic polynomials—greens, purples, and blues—that look like an oil spill on the road. Arrange the colors in the vague shape of butterfly wings on each nail. It’s a modern, artistic take on abstract butterfly nail designs that doesn’t look like a cartoon.
13. Floral Infusion
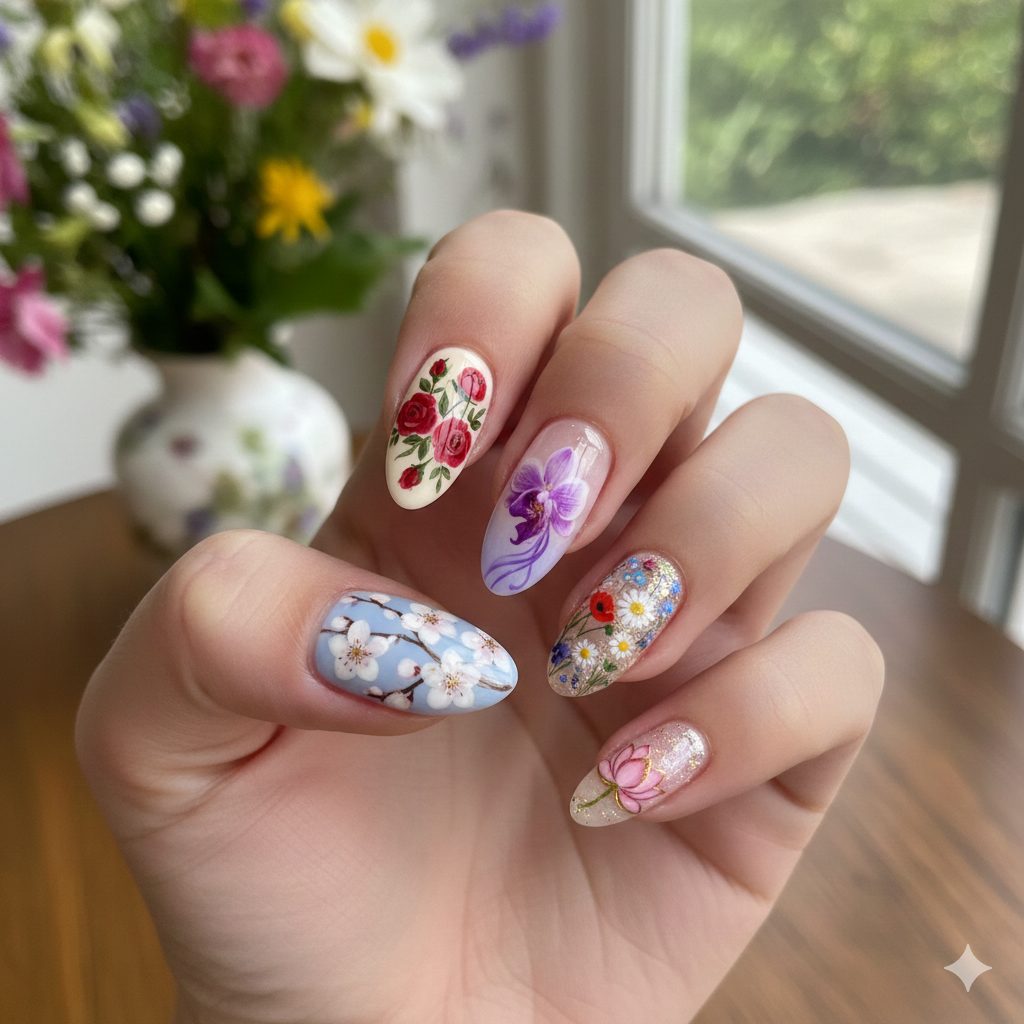
Combine your garden loves. Paint a soft yellow base. On the accent nails, create large tropical flowers (like hibiscus). Then, have a tiny, delicate butterfly landing on the petal of the flower. This connects two trends and is perfect for spring butterfly nail designs. Ensure the butterfly is a contrasting color, like a bright orange against the pink flower.
14. Gothic Cameo Silhouette
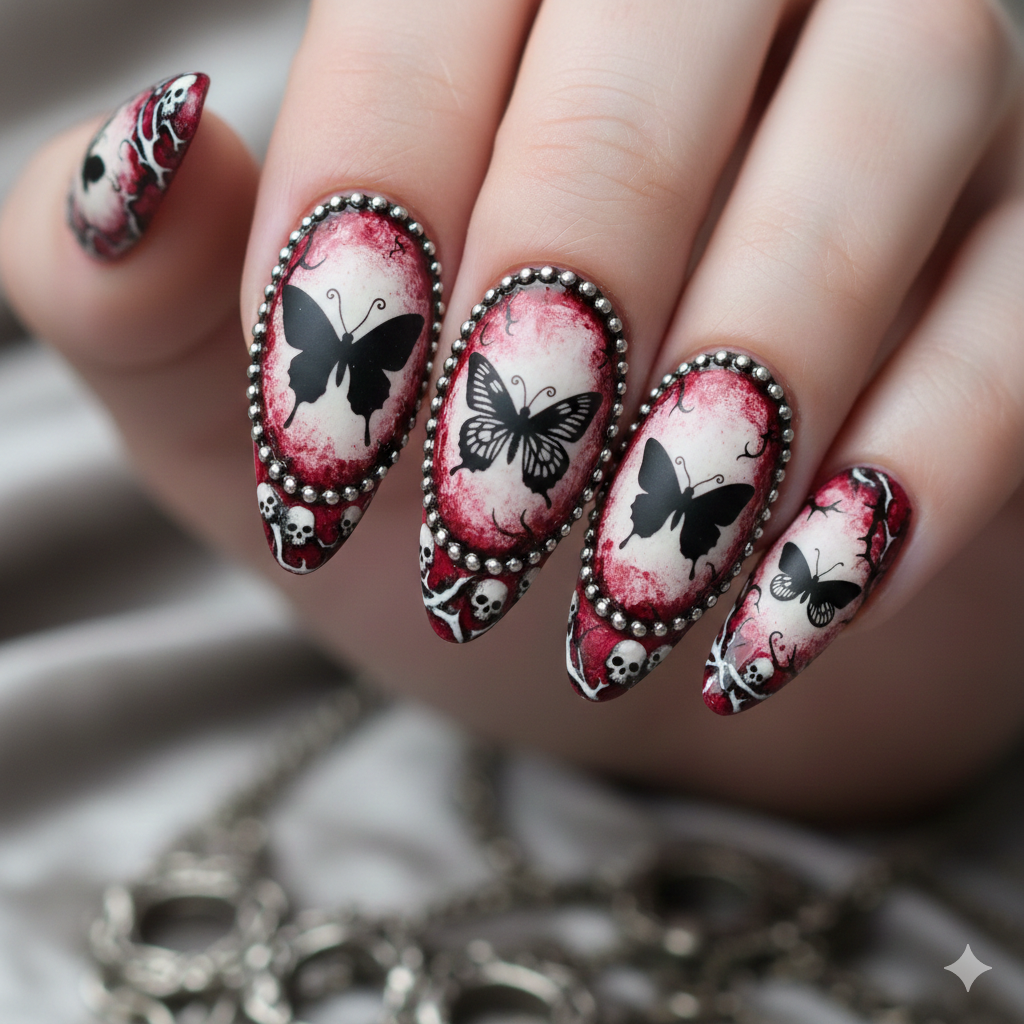
For a Victorian vibe, paint a creamy, off-white base (like old porcelain). On the ring finger, paint a black silhouette of a butterfly. Inside that black silhouette, paint tiny white scrollwork or lace patterns. This makes the butterfly look like a carved cameo brooch. It’s sophisticated and works great for butterfly nails for wedding events or formal dinners.
15. Negative Space Floating Wings
Leave the majority of your natural nail clear. Near the cuticle area, paint just the tips of butterfly wings fading out into nothingness towards the tip of your nail. It looks like the butterflies are flying right off your nail bed. This is a very trendy, light look for summer that works well as butterfly nail designs for almond shape.
16. Chunky Glitter Migration
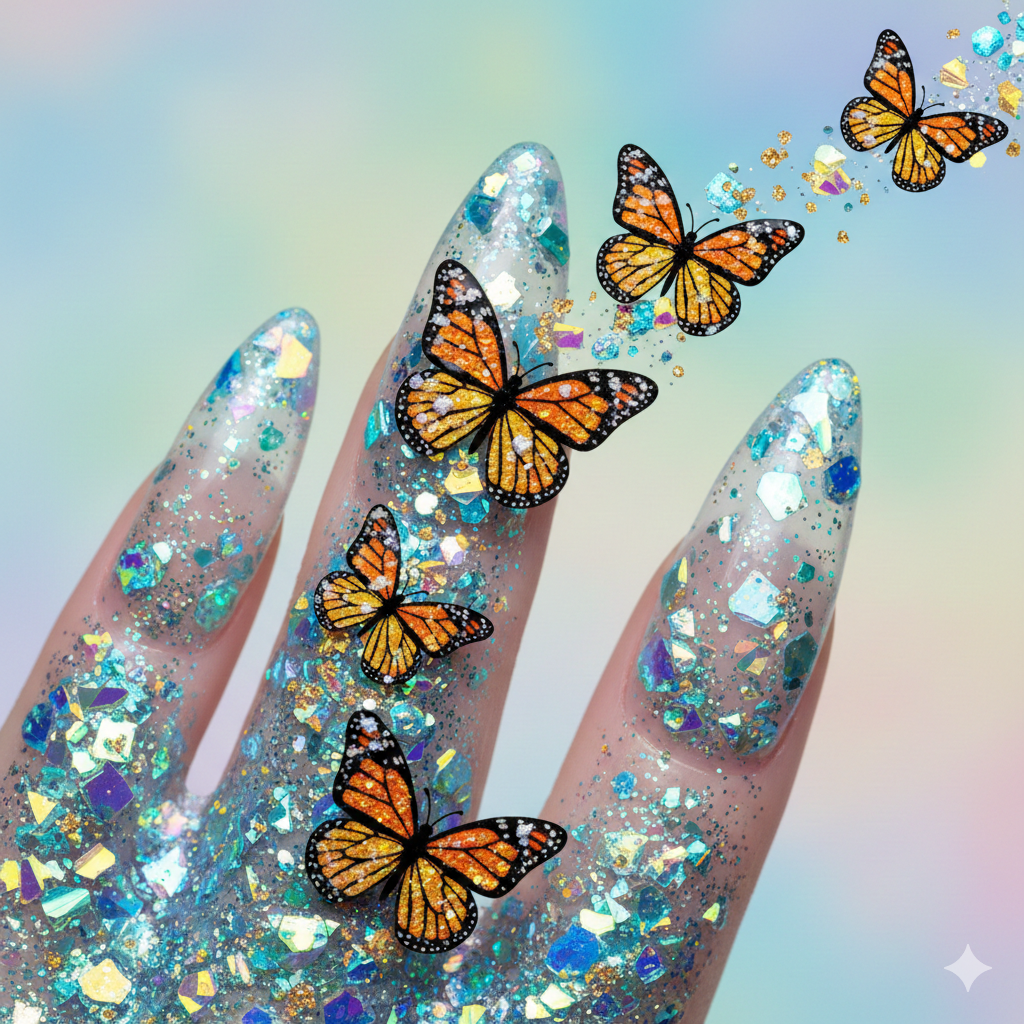
Butterflies migrate, so show that movement! Use a clear base. On the thumb, put one small butterfly. On the index finger, two. On the middle, three, and so on, creating a trail of butterflies flying up your hand. Fill the background around them with different colors of chunky glitter. It’s a party vibe perfect for New Year’s or festivals.
17. The “Blueprint” Sketch
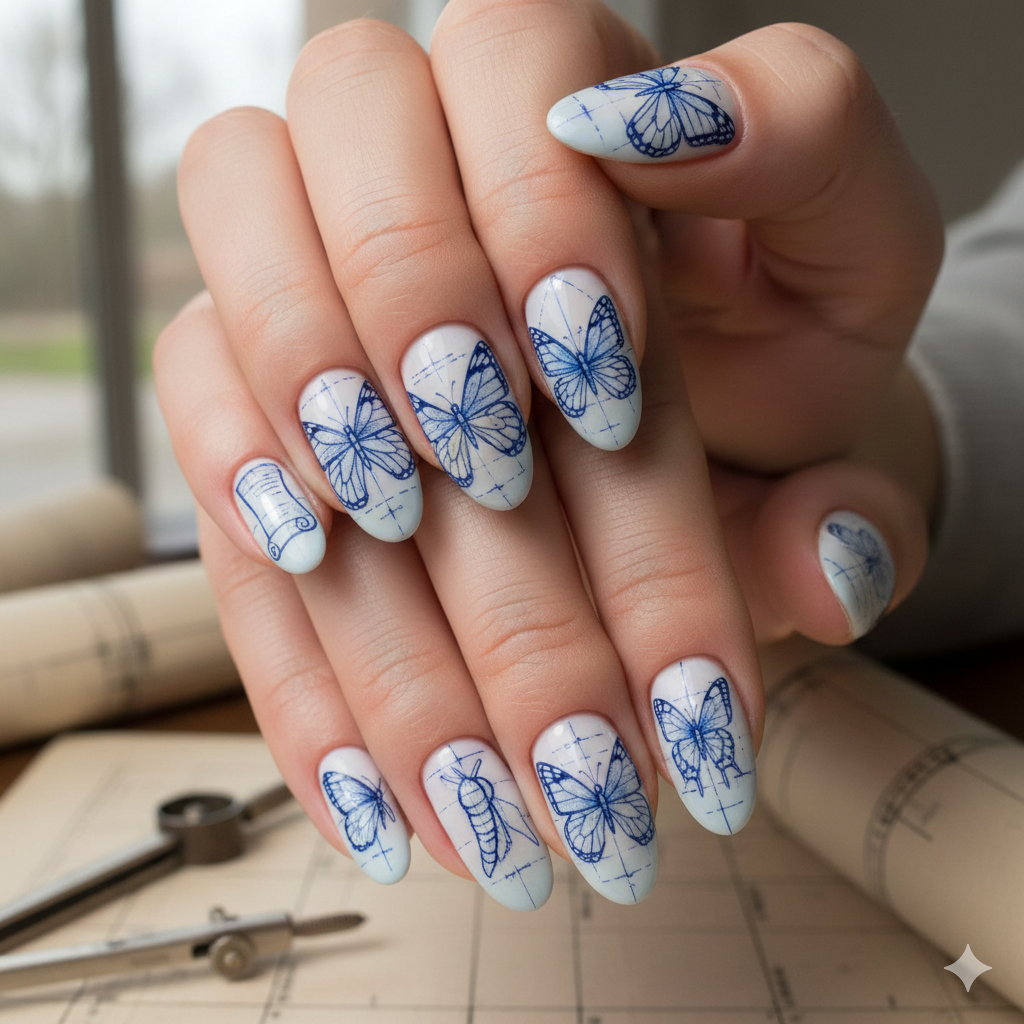
Make your nails look like an architect’s or entomologist’s sketch pad. Use a pale blue base (like blueprint paper). Draw the butterflies in thin white lines, and include measurement marks, little notes like “specimen A,” and dotted grid lines. It’s nerdy, chic, and incredibly unique among butterfly nail designs.
18. Velvet & Crystal
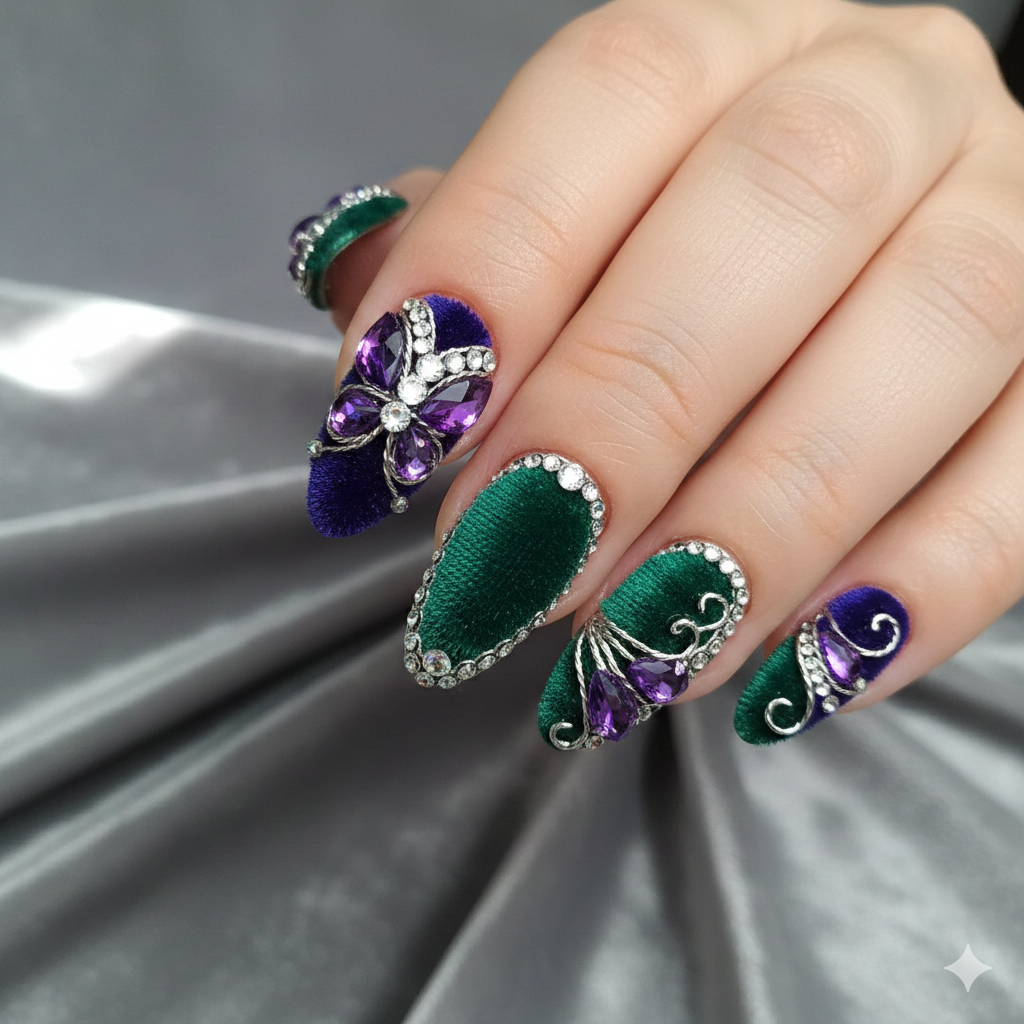
Texture is huge right now. Paint a matte black base. Use a flocking powder (velvet powder) to make the actual butterfly wings soft to the touch. Then, outline the velvet wings with sharp, clear crystals. The contrast between the fuzzy, dark wings and the sharp, sparkling stones is visually stunning and a great example of 3D butterfly nail art using mixed media.
19. Watercolor Bleed
This is messy in a good way. Paint a dense white butterfly on the nail. While the polish is still wet, drop a single drop of acetone or nail polish remover in the center of the wing. Watch the color bleed and create a tie-dye effect. You can intensify the colors by adding tiny dots of pigment before the bleed. No two nails will look alike.
20. Sugar Spun Wings
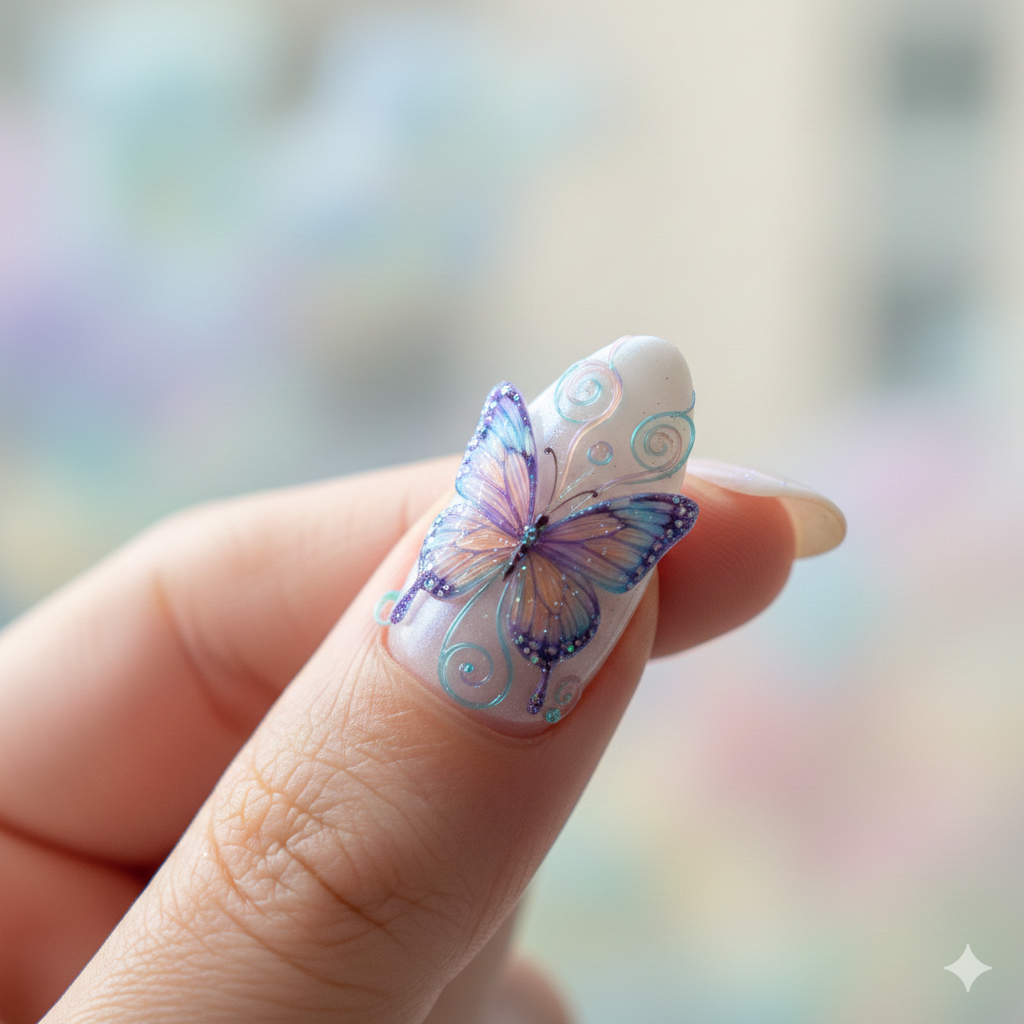
This technique uses acrylic powder and monomer to create “balls” that look like spun sugar or cotton candy. Build up tiny butterfly wings using this textured 3D technique. It adds immense height and looks like a candy land fantasy. These are definitely statement butterfly acrylic nails that are best saved for special occasions.
21. Neon French Tips
A modern twist on the classic. Apply a sheer pink base. Instead of a white tip, paint the free edge of your nail in a vibrant neon green or orange. Then, just at the junction where the tip meets the pink, paint a delicate, thin black butterfly wing. It’s a “peek-a-boo” style that is professional enough for work but fun enough for the weekend.
22. Ombre Wings to Geometric
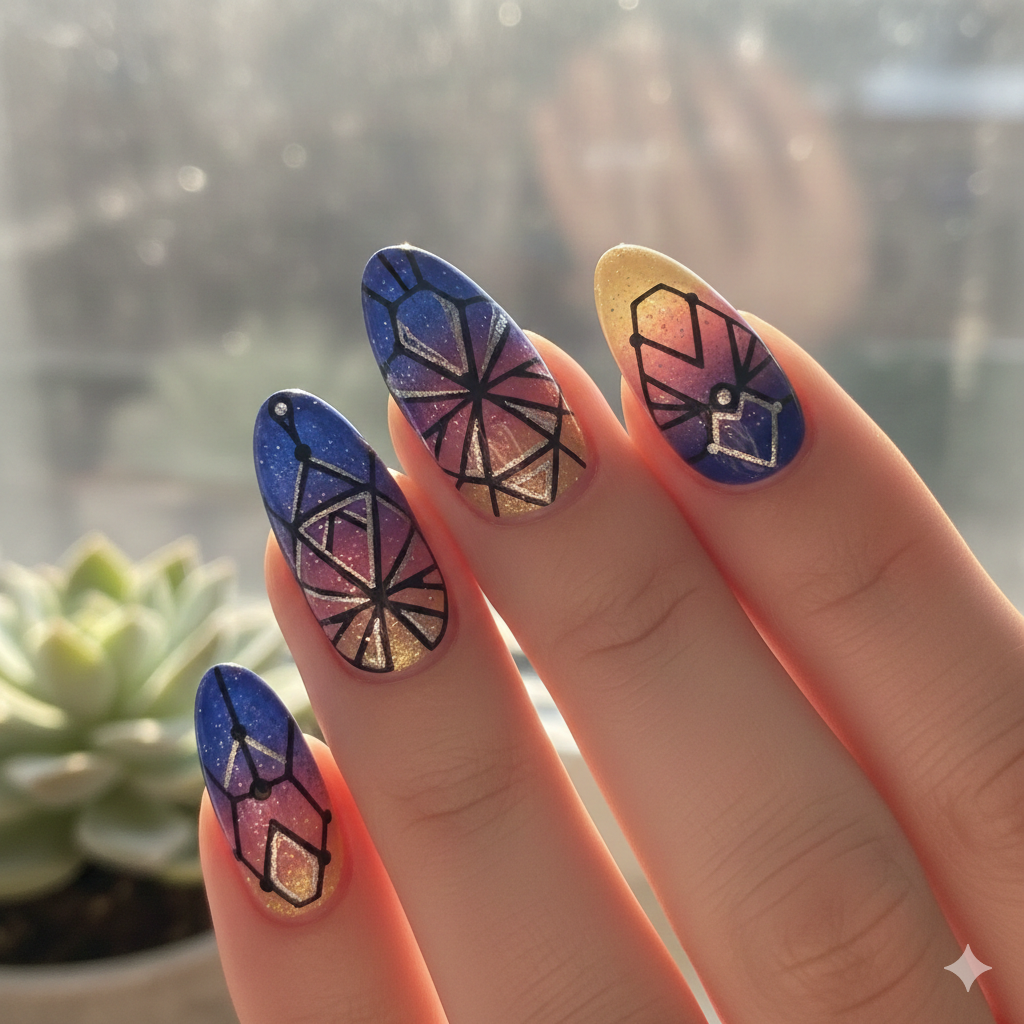
Split the nail diagonally. On the bottom half, do a soft ombre butterfly nails look with pinks fading to clear. On the top half, paint a sharp, geometric black and white triangle pattern. The contrast between the soft organic wing and the hard geometric line is very high-fashion.
23. The “Wet Look”
Use a thick, glossy gel top coat over a base that looks like a rainy windowpane. Paint the base in a blurry grey-blue. On top, adhere flat sticker butterflies that look like they are pressed against the glass. The glossiness makes it look wet and real. This is a subtle, moody take on blue butterfly nails.
24. Foil Transfer Confetti
Use a nail foil adhesive to apply random patches of gold foil all over the nail bed. Over the foil, draw a simple black butterfly outline. The foil showing through the “empty” spaces of the butterfly wings creates a complex, textured look without needing advanced painting skills. It’s a quick hack for easy butterfly nail design.
25. Pixel Art Butterfly
Retro gaming is in style. Instead of smooth curves, paint your butterflies using small squares (pixels) of color. Think 8-bit graphics. Use bright, primary colors like red, yellow, and blue against a black background. It’s a fun, nostalgic twist on cute butterfly nail designs.
26. Abstract Fluid Art
Use two or three colors of nail polish (like white, pink, and gold) on a silicone mat. Swirl them together slightly with a toothpick, then press your nail into it to pick up the marble pattern. Once dry, paint a simple black silhouette of a butterfly on top. The fluid background looks like swirling magic behind the creature.
27. Half-Moon Migration
Paint your nails a deep, vampy red or burgundy. In the lunula (the half-moon white area at the base of your nail), paint tiny gold butterflies. It looks like a secret garden hiding at the base of your nails. This is a sophisticated way to wear butterfly nail designs for fall or winter.
28. Tribal Markings
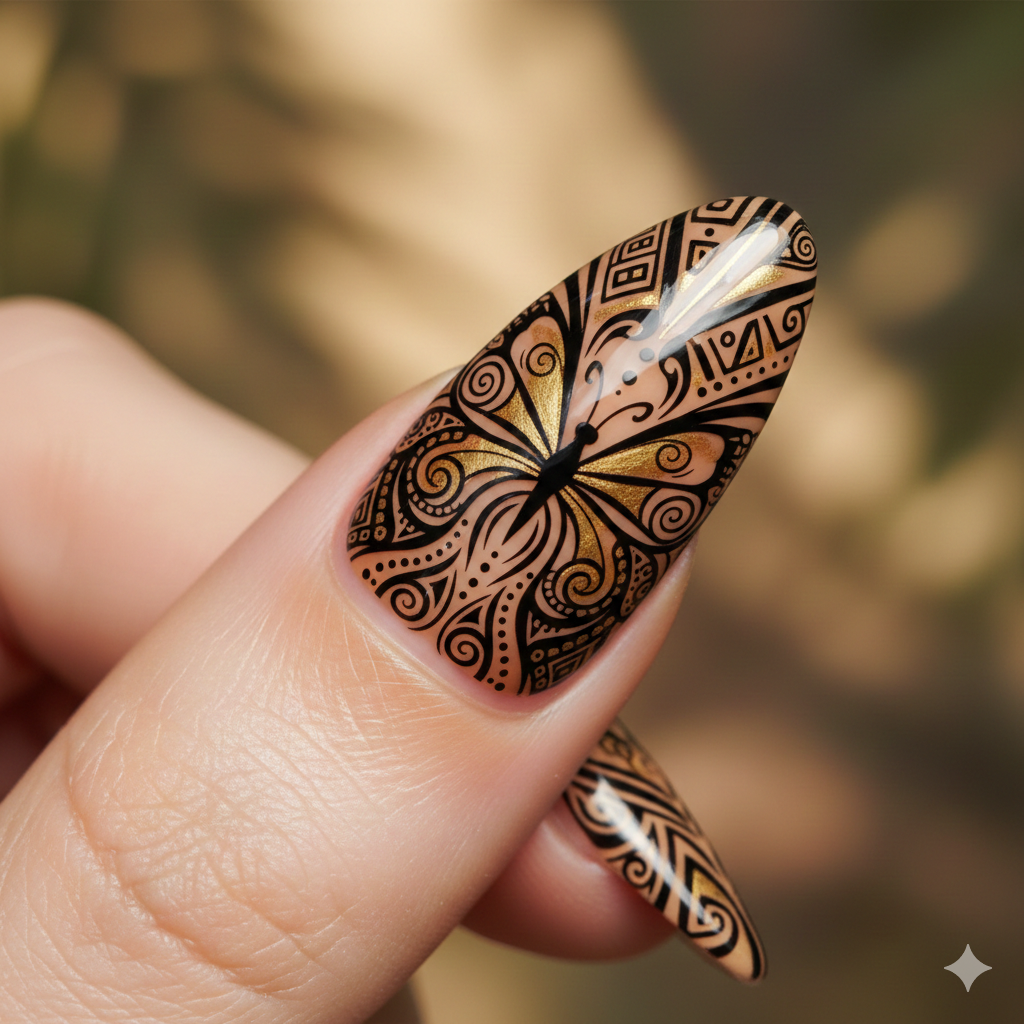
Instead of realistic wings, take inspiration from tribal tattoos. Use thick black lines and sharp angles to create the shape of a butterfly. Fill the negative space between the black lines with dots of white or teal. It’s a bold, striking look that pairs well with butterfly nail designs for short nails.
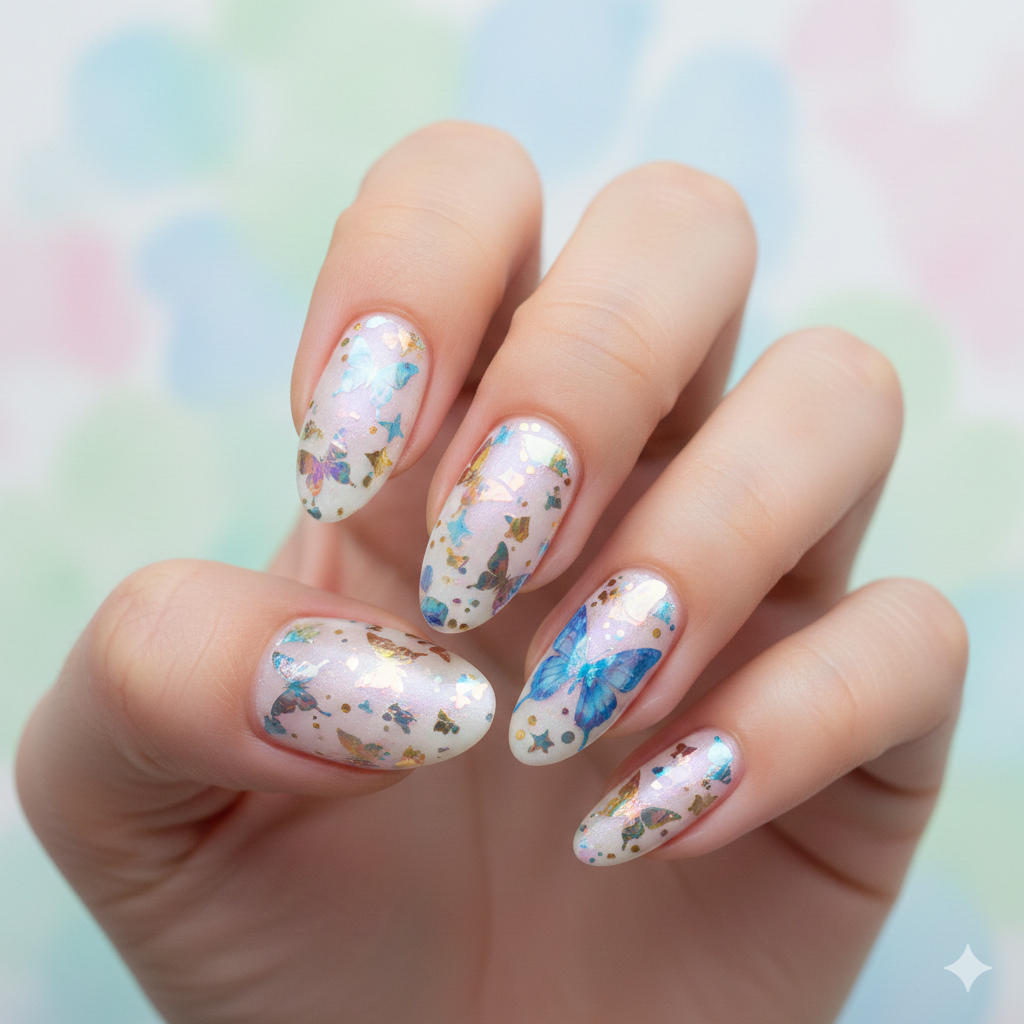
29. Micro-Butterfly Scatter
Don’t do big nails. Do tiny ones. Paint a nude base. Using the finest dotting tool you have (or a toothpick), create dozens of microscopic butterflies all over the nail in different pastel colors. From a distance, it looks like a confetti pattern. Up close, people realize they are all butterflies. It’s meticulous and adorable.
30. The “Burnt Edge”
Create a butterfly that looks like paper that’s been singed. Paint the wings in a cream or parchment color. Then, use a dark brown or black polish to sponge the edges, making them look charred and curling inward. It adds a grungy, textured element to the design that is very unique.
31. Holographic Outline
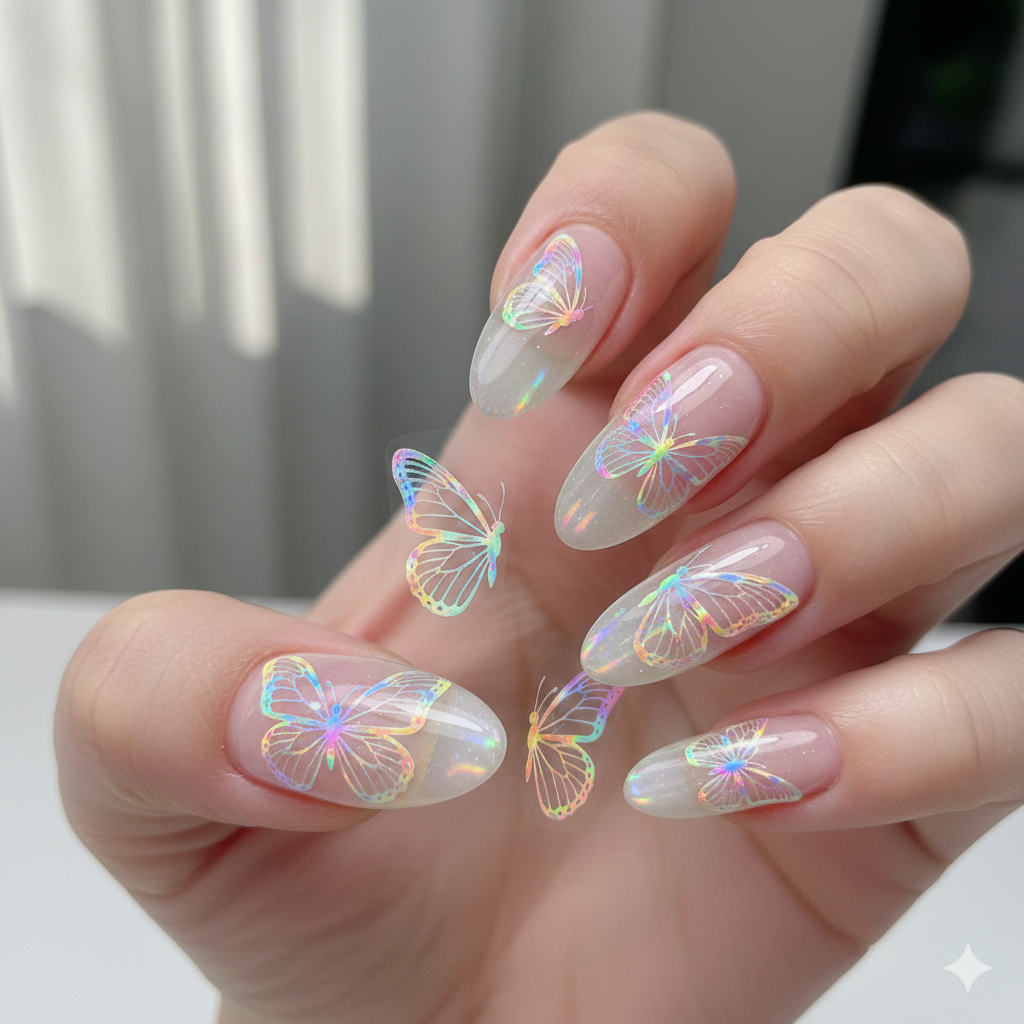
Paint a black base. Using a holographic liner polish (or one filled with rainbow glitter), draw the outline of the butterflies. Do not fill them in. The rainbow shimmer against the black is mesmerizing when it catches the light. This is a staple for anyone looking for holographic butterfly nails.
32. Cat Eye Mystique
Use magnetic gel polish to create the shifting “cat eye” effect in a deep emerald green. Once the pattern is set, use a thin white brush to paint delicate filigree butterfly wings over the top. The shifting green background gives the white wings an eerie, magical depth.
Also try our birthday nail design to to standout in the party.
33. Interlocking Chain

Paint a line of butterflies that look like they are holding hands or interlocking their wings to form a chain running across all five nails. You can use butterfly nail stickers to ensure the sizing is perfect, but paint connecting lines between them so they look linked.
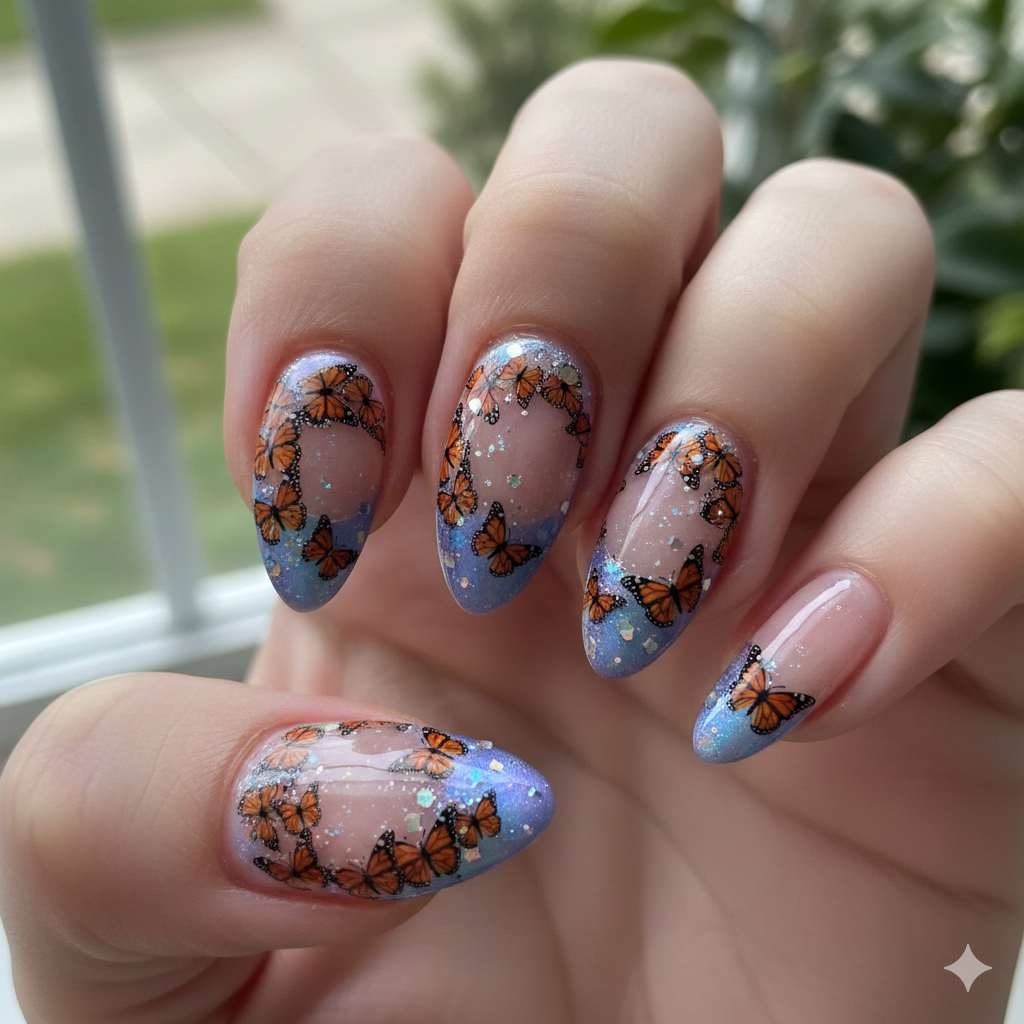
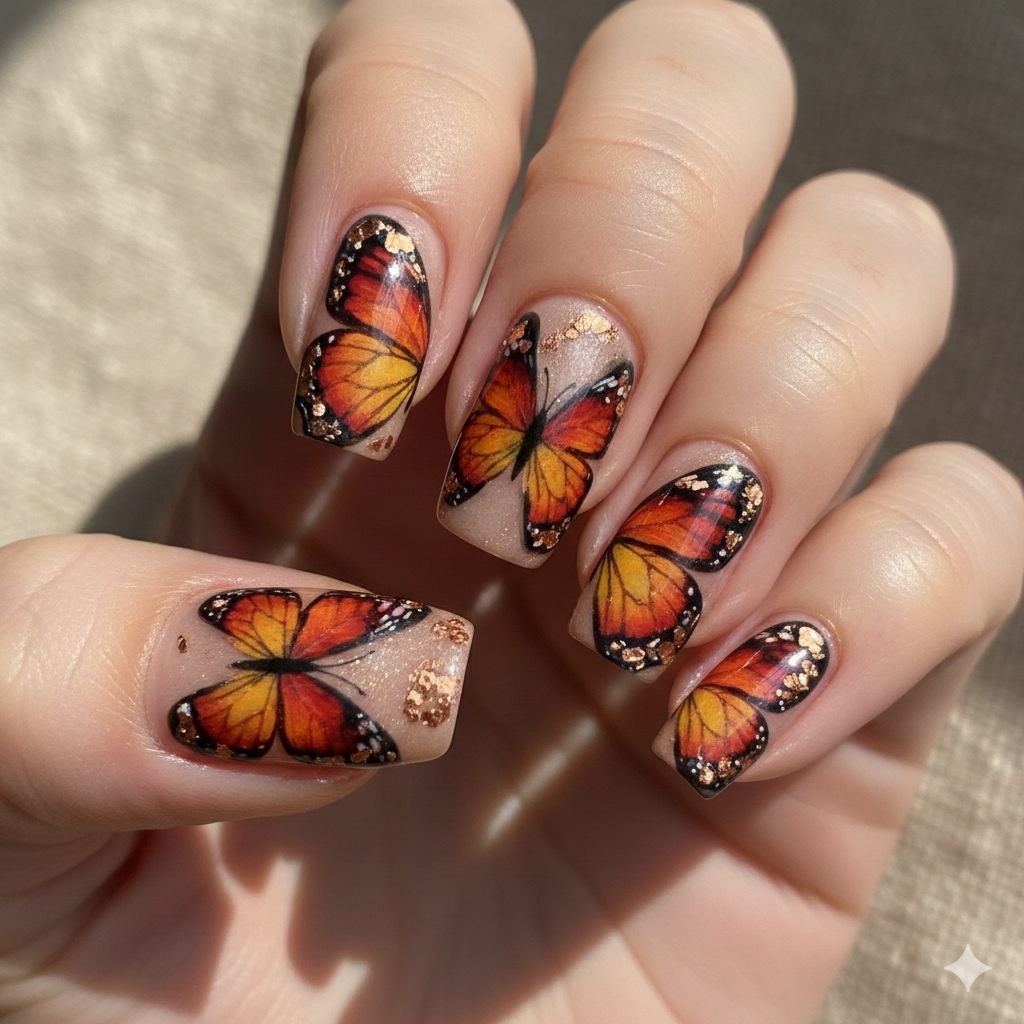
34. Realistic “Monarch” Migration
The Monarch is iconic, but let’s make it 3D. Paint a base of creamy nude. Build up the Monarch wings using thick layers of gel acrylic to give them physical height. Paint the veins in careful black and the spots in white. The 3D element makes these 3D butterfly nails feel alive.
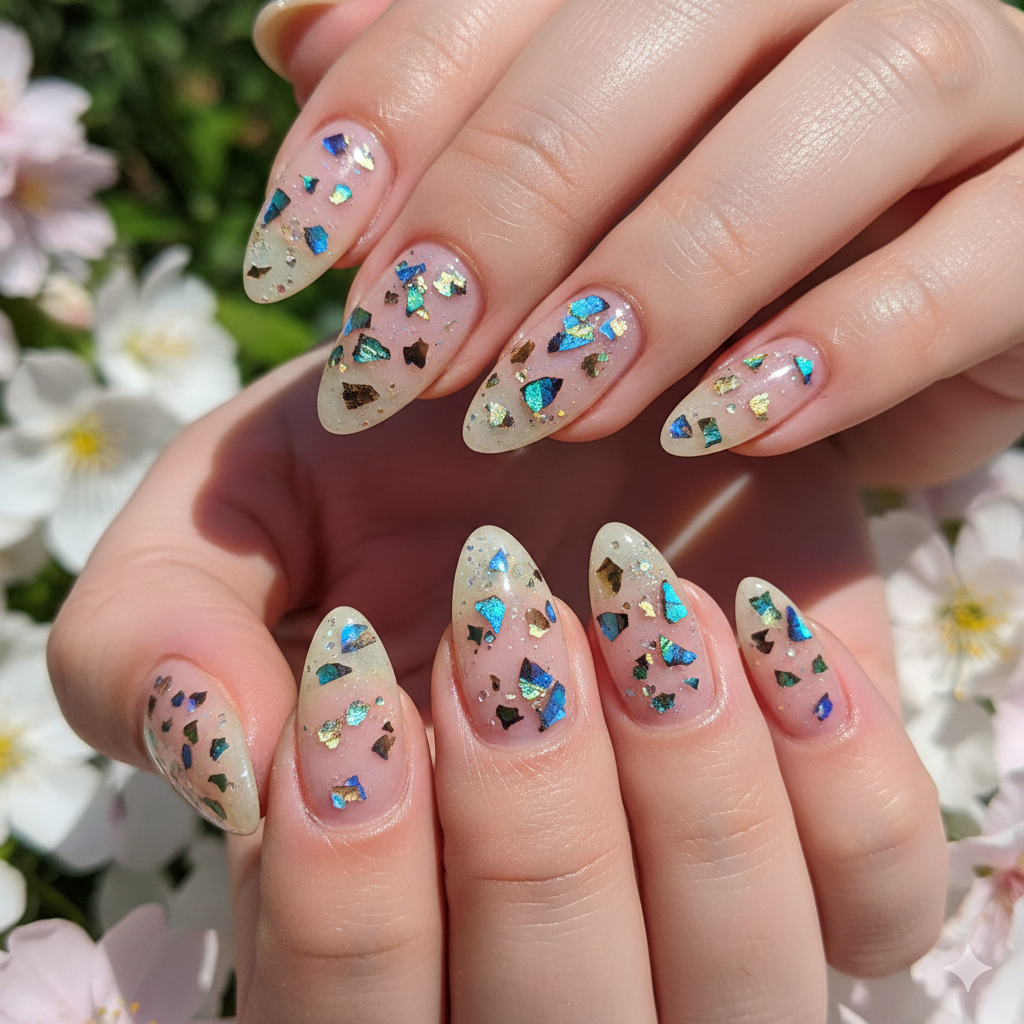
35. The “Hidden” Butterfly
This is a fun optical illusion. Paint a base of busy floral patterns or leopard print. Then, paint a butterfly shape in clear top coat only (no color). Sprinkle a fine iridescent glitter over the wet clear polish and shake off the excess. The butterfly is only visible when the light hits it, otherwise, it blends into the print. It’s the ultimate secret weapon in butterfly nail art.
Why Butterfly Nail Designs Work
Moving away from standard, flat butterfly nail designs allows you to express specific moods and aesthetics. Whether you choose the moody “Taxidermy” look or the bright “Stained Glass” vibe, you are telling a story on your fingertips. Using techniques like chrome butterfly nails, negative space, and mixed media (like velvet or gold leaf) elevates a simple drawing into high art.
Don’t be afraid to mix and match these ideas. Maybe you love the “Cloudy Day” watercolor but want to add the “Gold Kintsugi” detail. That’s the beauty of DIY butterfly nail art—there are no rules, only guidelines.
Conclusion
Feeling stuck in a style rut is the worst, but as you can see, the world of butterfly nail designs is vast, varied, and limited only by your imagination (or your nail tech’s skill level!). From the dark and moody “Taxidermy” style to the vibrant and joyous “Neon Drip,” there is a design here for every personality and every season.
These aren’t just nails; they’re tiny mood boosters that you carry with you everywhere. Whether you opt for a complex 3D butterfly nail art masterpiece or a subtle butterfly accent nail, the most important thing is that it makes you happy. So grab your polishes, pick a design, and let your creativity take flight. Your next mood-brightening manicure is waiting.
FAQs
1. Can I create 3D butterfly effects without using expensive acrylic powder?
Yes! You can achieve a raised 3D look by building up layers of gel polish (using a “thick viscosity” gel) or even using hard dried nail stickers that have a dome shape. Another great hack is using tiny drops of clear resin or builder gel, curing them, and then painting over the cured raised bumps to mimic the wing’s body.
2. How do I prevent butterfly nail stickers from peeling off at the edges?
The key is the “sandwich method.” Apply your base color and let it dry completely. Place the sticker. Then, use a fine nail file to gently buff down the edges of the sticker so it blends seamlessly into the natural nail. Finally, apply a generous layer of top coat, capping the free edge, and wrap the tip slightly to seal it in.
3. Are butterfly nail designs appropriate for short, bitten nails?
Absolutely. In fact, many butterfly nail designs for short nails look better because the design is compact and doesn’t overwhelm the hand. Focus on “micro” designs, single accent nails, or abstract line work. Tiny, detailed butterflies often look more elegant on shorter nails than giant cartoony ones.
4. What is the best top coat to use over glittery or chrome butterfly designs to keep them shiny?
For chrome butterfly nails and heavy glitter, you need a top coat specifically formulated not to shrink (which can cause wrinkling) and that doesn’t have a high solvent content (which can dull the chrome). Look for a “no-wipe” top coat designed for gel polish, or a high-gloss, quick-dry top coat like Seche Vite for regular polish, but apply it in thin, swift layers to avoid smudging the glitter.
5. How long do hand-painted butterfly nail designs typically last compared to stamping?
Hand-painted designs generally last as long as the base polish itself (about 7-10 days) because they are essentially the same material. Stamped designs can sometimes chip slightly faster if the stamping polish is thick and bulky. To extend the life of any butterfly nail art, always wear gloves when washing dishes or cleaning, and apply a thin layer of top coat every 2-3 days to refresh the shine and seal the edges.