

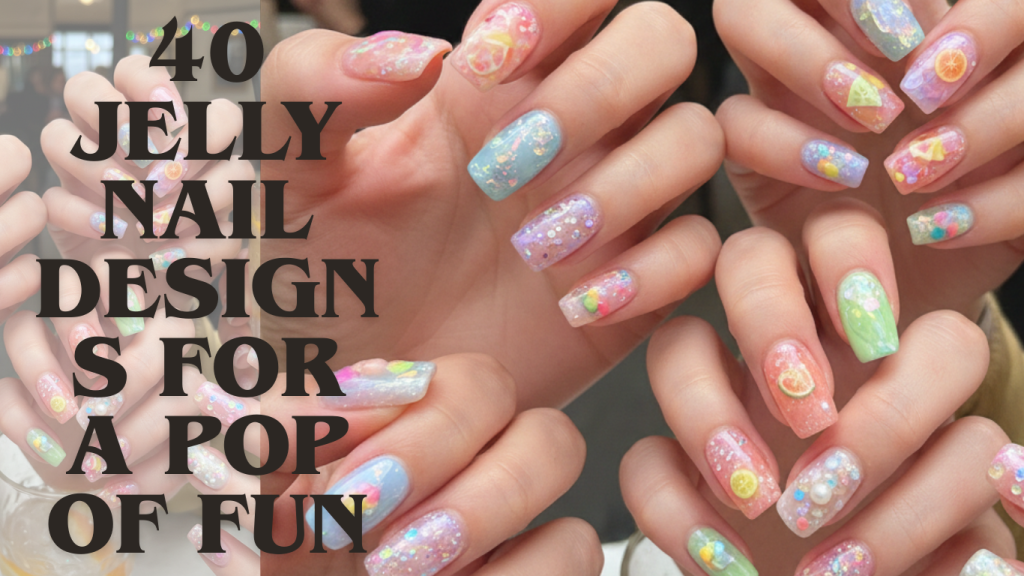
Do you ever sit down at the nail salon, stare at the wall of color swatches, and feel absolutely nothing? Like you’ve done the classic red, the safe nude, and the matte black, but you’re still craving that “wow” factor that feels fresh, youthful, and exciting? If you are bored with opaque, flat cremes that look heavy on your hands, you are not alone. We have all been there—stuck in a manicure rut, scrolling through social media wondering how everyone else seems to have such effortlessly cool nails.
The answer isn’t a complicated nail art technique that takes three hours to apply. The answer lies in the playful, squishy, and utterly delightful world of jelly nail designs.
Jelly nails are having a massive moment, and for good reason. They mimic the translucent, glossy finish of your favorite gummy candy. They are lightweight, dimensional, and offer a “your nails but better” vibe that opaque polishes just can’t achieve. Whether you are into Y2K nail trends, soft Korean jelly nails, or bright neon jelly nails, this list has something to break you out of your style slump.
We have curated 40 unique, head-turning jelly nail designs that you probably haven’t seen all over the internet yet. Get ready to screenshot your next manicure!
Sweet & Edible Vibes Jelly Nail Designs
Let’s start with the most obvious inspiration: candy. These jelly nail designs look delicious enough to eat, focusing on milky tints and sprinkles that mimic your favorite confectionaries.
1. The “Toasted Marshmallow” Gradient

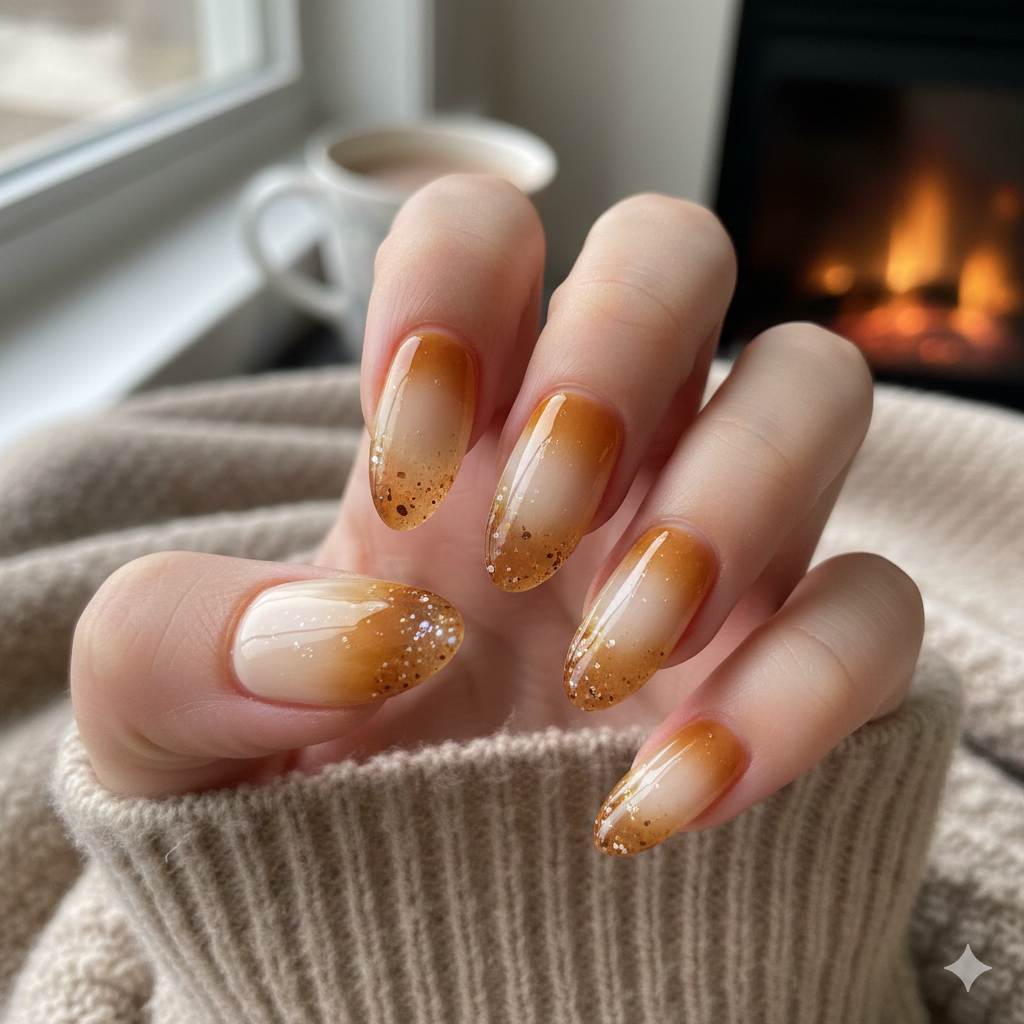
Forget the basic French tip. This design takes a clear base and layers a sheer, burnt orange jelly nail polish at the tips, fading into a milky white at the cuticle. The key here is the “toasted” effect—you use a thin brush to dab a slightly darker orange jelly right at the very edge of the free edge to look like a marshmallow caught on fire. It’s cozy, warm, and perfect for autumn but still fun for summer.
2. “Bobba Tea” Pearls in Milky Tea
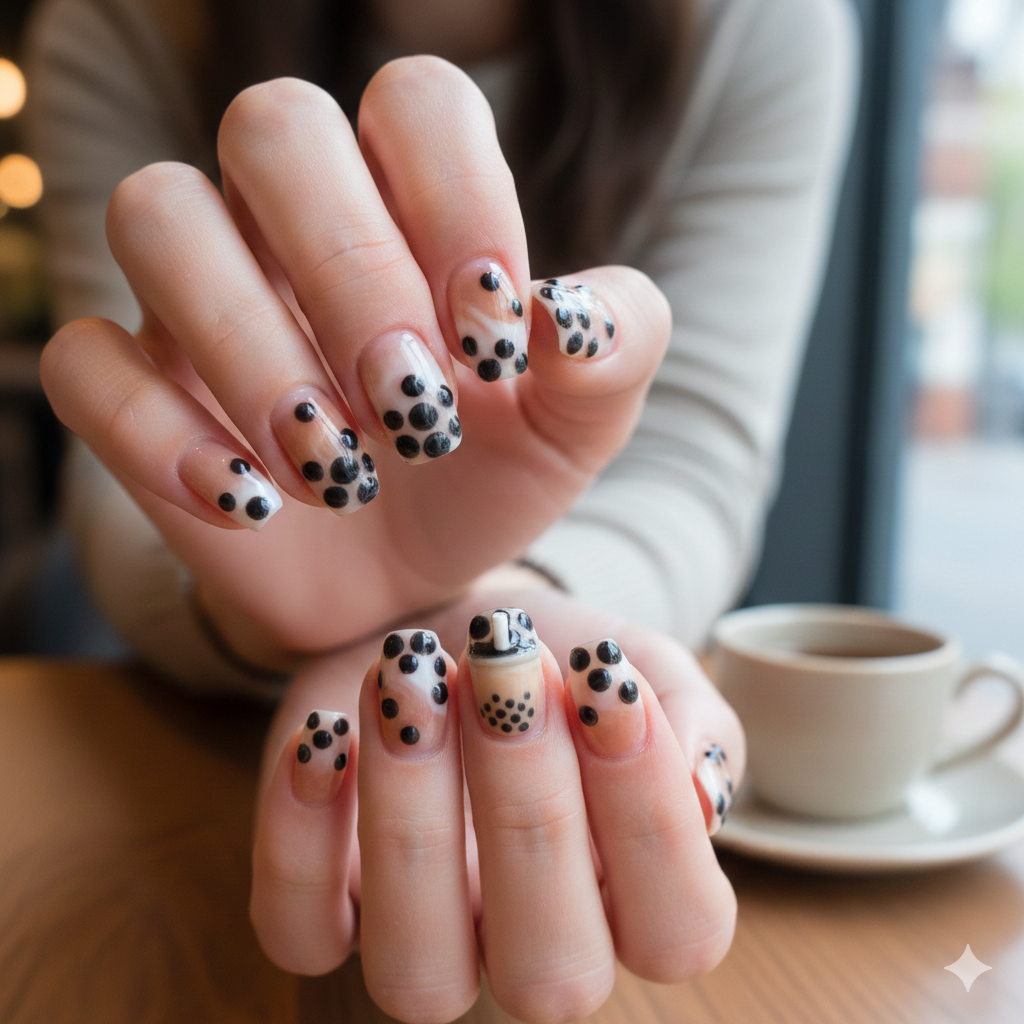
This is a huge trend in the sheer nail designs world. Paint your nails in a sheer, beige-taupe jelly to mimic the color of milk tea. Then, instead of applying black caviar beads (which can look heavy), use large, irregular white pearls or flat-backed beads arranged asymmetrically on two accent nails. It looks like a cup of boba with the tapioca pearls floating at the bottom. It’s texture-heavy but dainty.
3. The “Gummy Bear” Glass Shatter
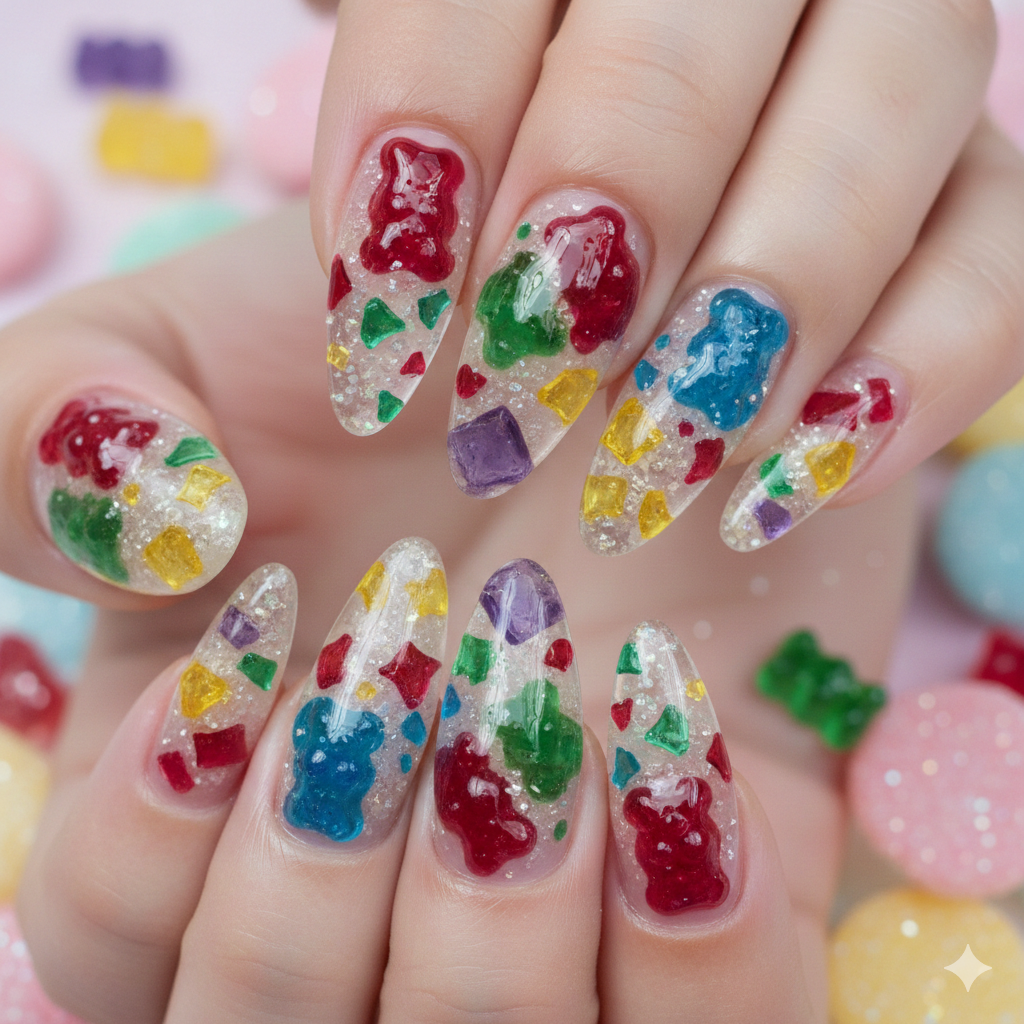
Start with a neon green or bright pink sheer gel polish base. While it is still wet, press a shard of iridescent cellophane or “mylar” paper onto the nail. Seal it with a thick clear gel. The result looks like a hard candy gummy bear that has been cracked open. The light refracts off the mylar, creating a prismatic effect that is stunning in the sun.
4. “Fruit Slice” Jelly Sandwich
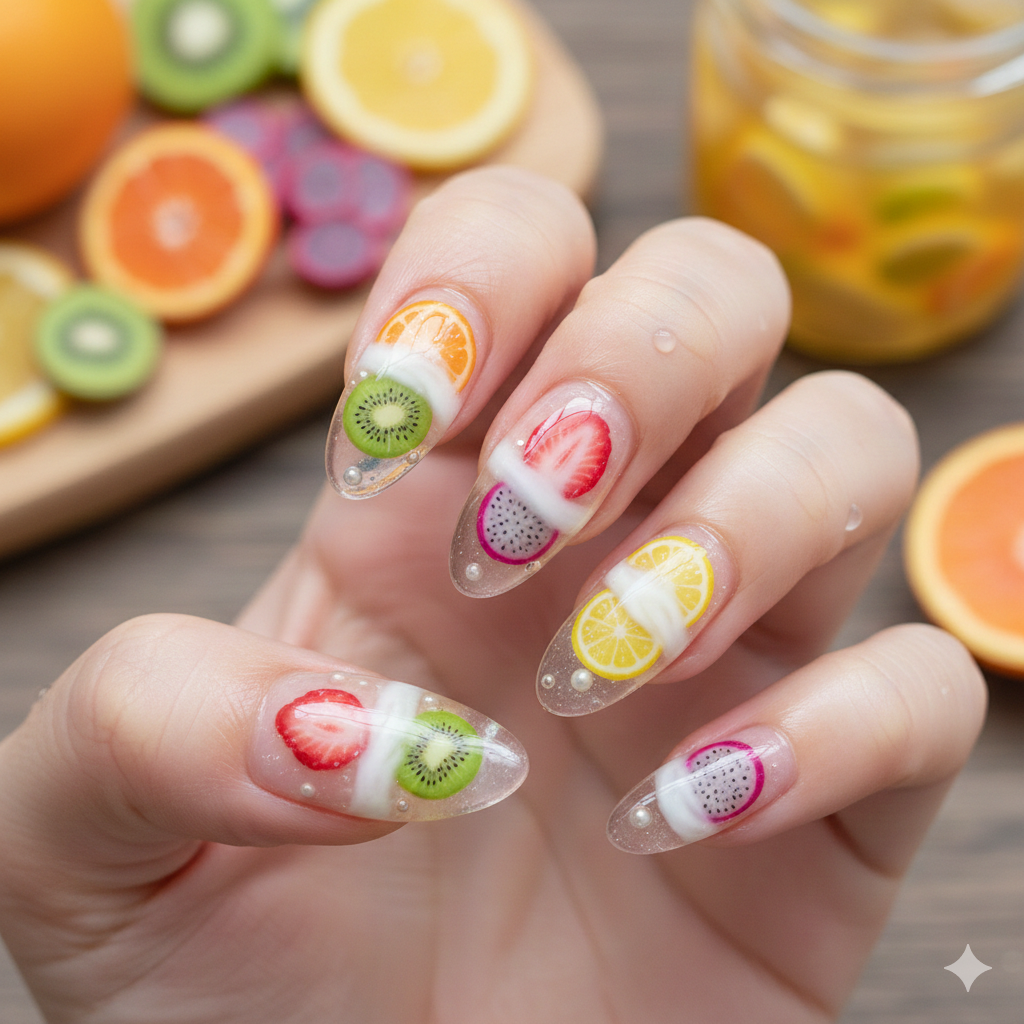
Think of those orange slice gummy candies coated in sugar. To achieve this, use a clear base and place tiny, circular confetti glitter in orange and yellow shades in the center of the nail. Paint two or three layers of translucent nail art jelly over the top. The jelly layers magnify the glitter, making it look like sliced fruit suspended in a block of gelatin.
5. “Speckled Egg” Easter Treat
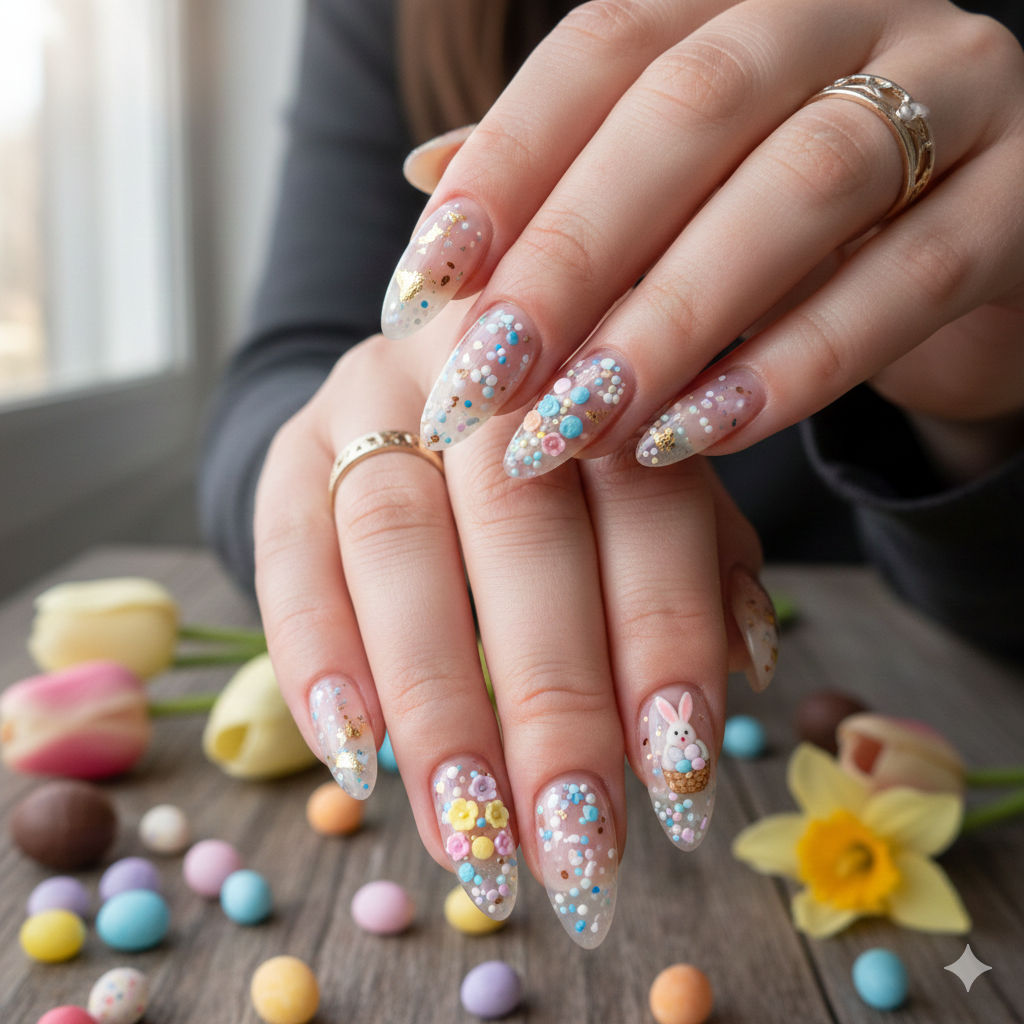
This is a subversive take on pastels. Use a baby blue or pale pink pastel jelly nail base. Once cured, use a fine dotting tool and white acrylic paint to create tiny, imperfect speckles all over the nail. It mimics a robin’s egg or a Jordan almond. It’s minimalist, textured, and incredibly chic.
6. The “Strawberry Milk” Swirl
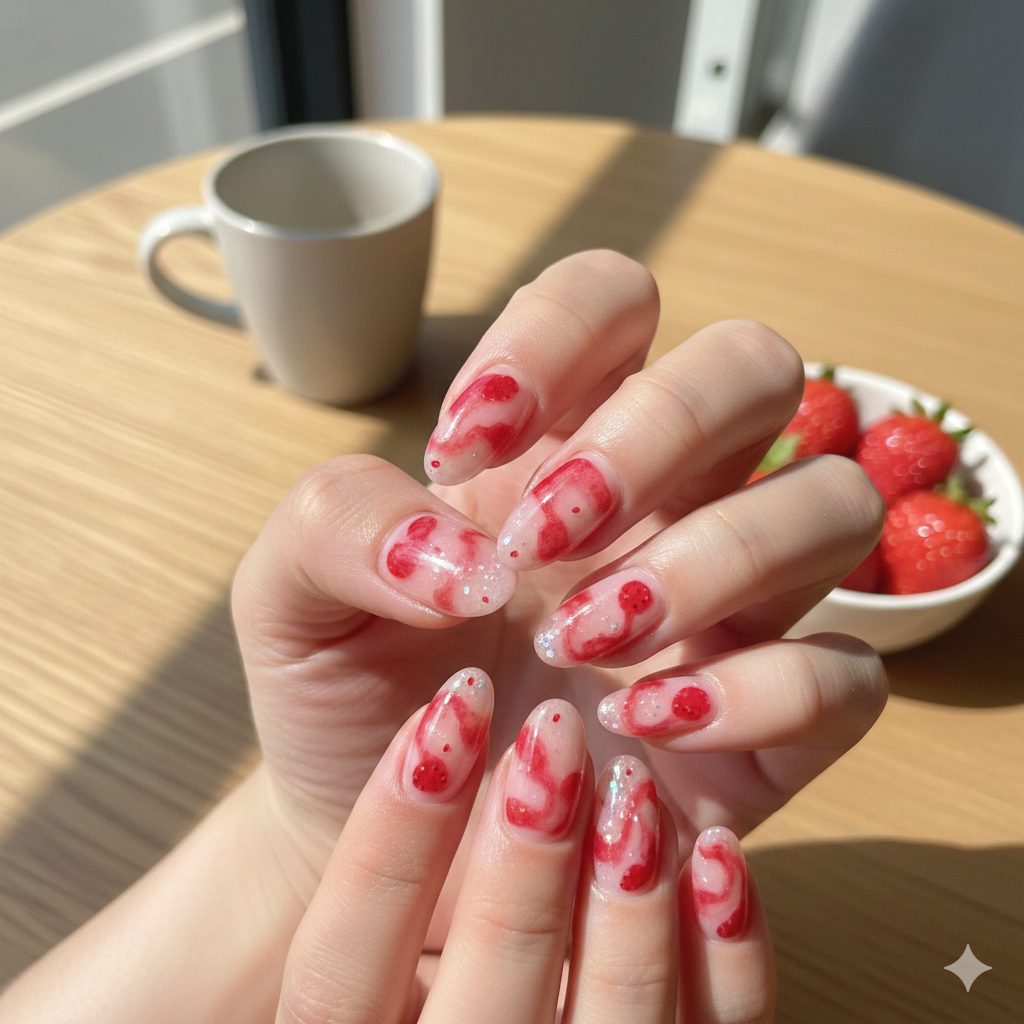
Mix a little bit of red jelly polish into a white cream polish before you paint it. Don’t mix it fully—you want a swirl effect. Paint this onto the nail for a marbled, milky strawberry look. Top it off with a single gold flake or a tiny 3D gold bow on the ring finger. This is the epitome of cute and simple jelly nail designs.
7. “Watermelon Jolly Rancher” Geode
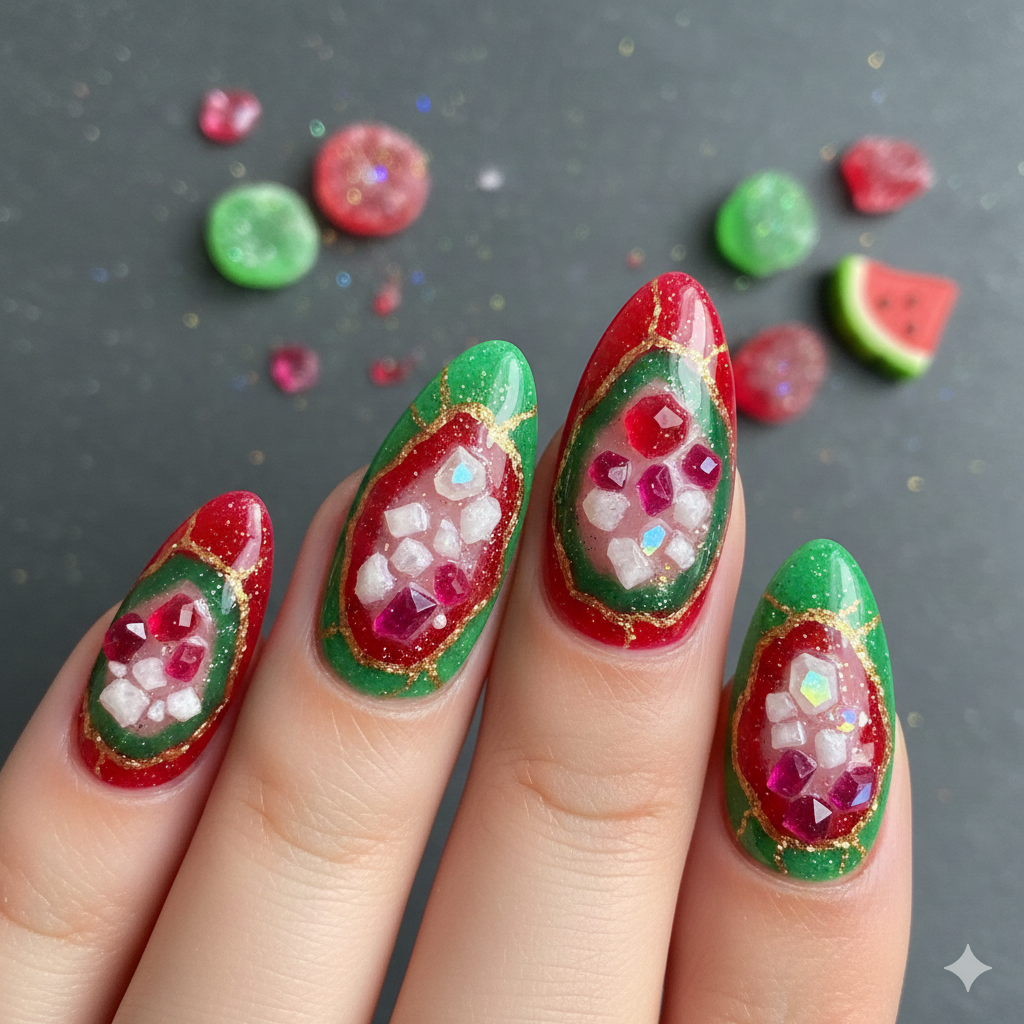
Use a bright green jelly on the bottom half and a deep red watermelon jelly on the top half. In the middle, where they meet, apply a line of irregular loose glitter and crushed glass. Finish with a high-shine top coat. It looks like a geode rock formed from hard candy.
8. The “Bubblegum Blowing” Abstract
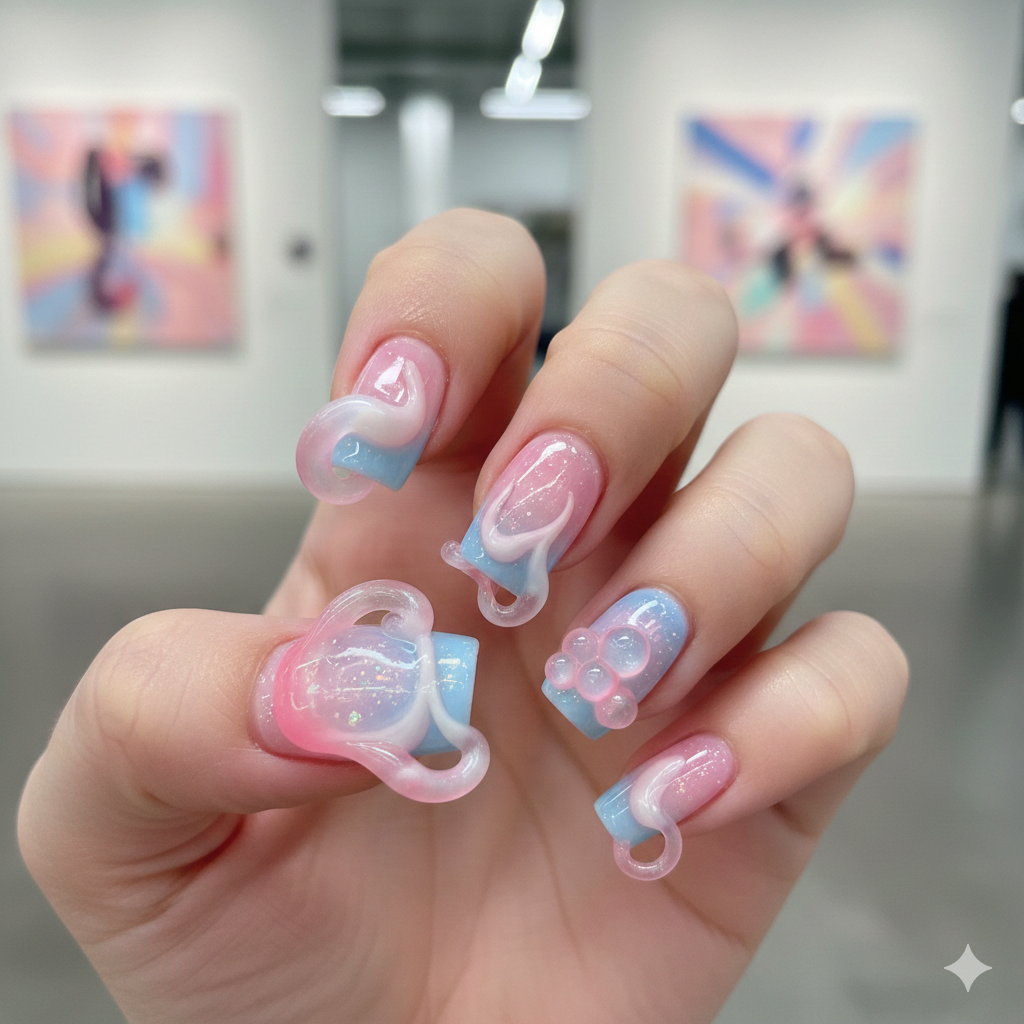
This is a fun, artistic take. Use a sheer pink base. On the accent nail, use a thicker brush to create a large, irregular pink circle that doesn’t touch the edges. Add a tiny white highlight to make it look like a shiny bubblegum bubble. It’s a cartoonish, pop-art style that fits the jelly nail designs aesthetic perfectly.
9. “Blue Raspberry” Chrome Dust
Blue raspberry is that specific, deep, artificial blue flavor. Paint your nails in a deep blue jelly. Do not fully opacity it—keep it see-through. Rub a holographic chrome powder over the wet top coat, then seal it. The chrome peeks through the blue jelly, creating an oily, slick surface that looks like liquid candy.
10. The “Retro Soda” Bubbles
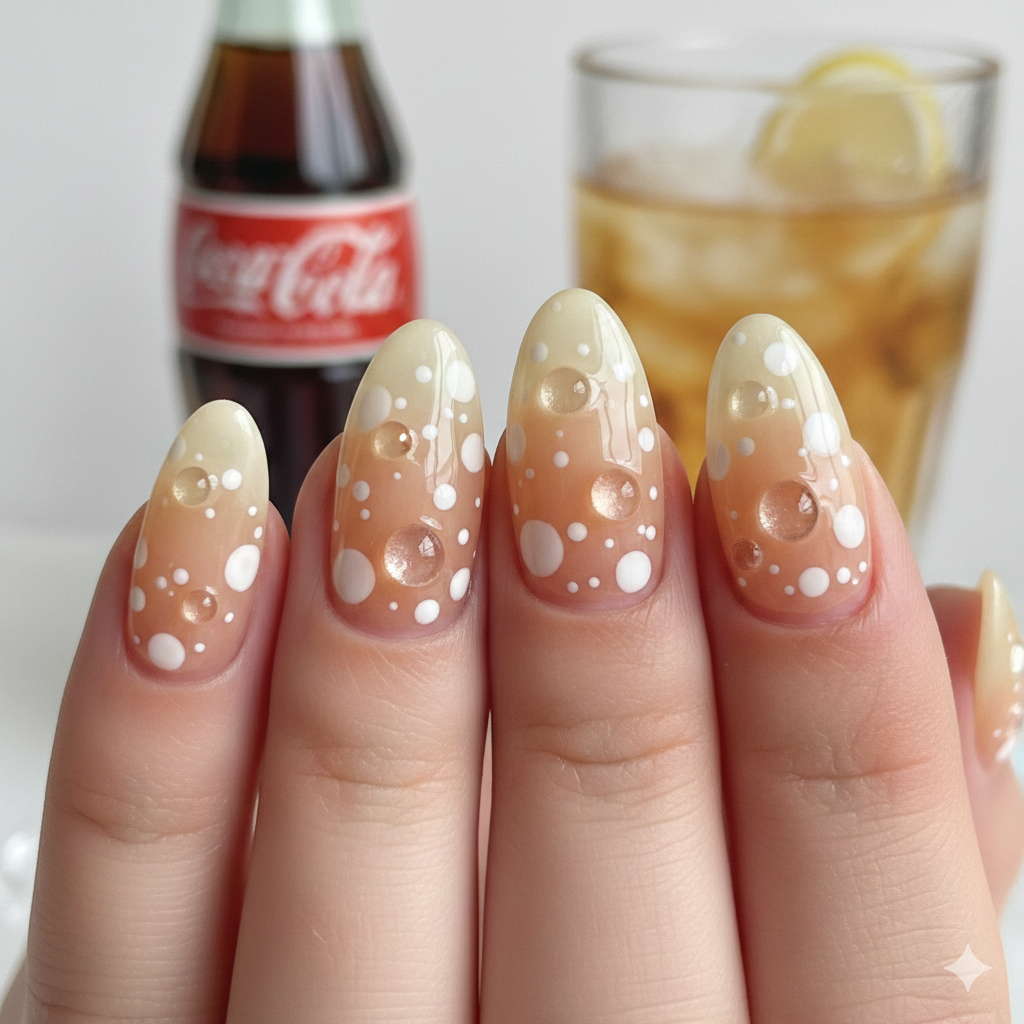
Use a cream-soda colored jelly (a murky orange/yellow). Place different sized circles of white gel paint randomly on the nail. Over the white circles, place a tiny dot of clear gel or a glass bead. This creates a 3D bubble effect rising out of the “soda.” It’s a quirky texture play that is super satisfying to look at.
If you’re a fun lover and want colorful nail art designs, don’t forget to Pin It Today. We have so many nail ideas for different looks and vibes.
Nature & Ethereal Jelly Nails For “Fairy Core” Vibe
If you prefer something more earthy or mystical, these jelly nail designs use the transparency of the polish to create depth, resembling water, glass, or stained windows.
11. The “Koi Pond” Floating Fish
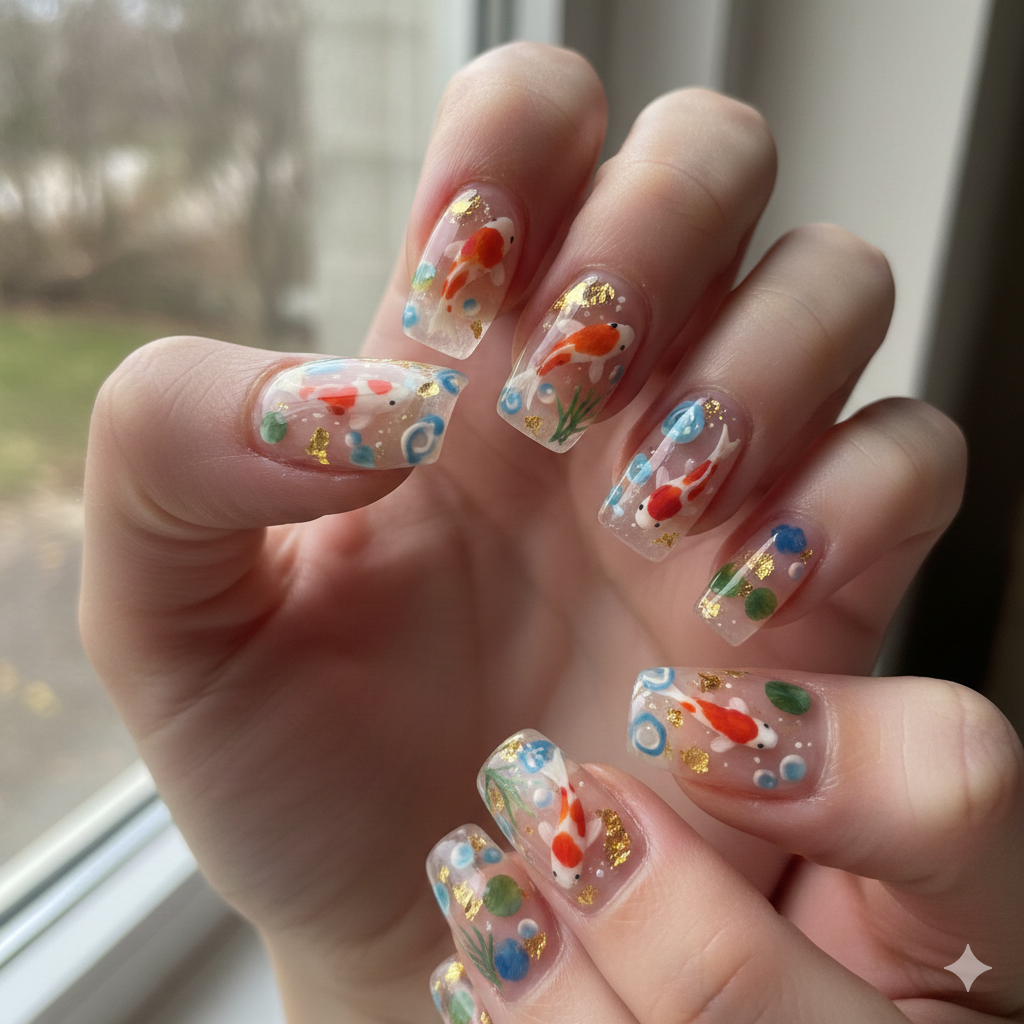
This sounds intricate, but it’s stunning. Use a murky, moss-green sheer gel polish as your water. Using a fine detail brush, paint tiny, abstract orange and white shapes (resembling koi fish) underneath the jelly layers. You can paint the fish on the nail, then layer the green jelly over them so they look like they are swimming deep in the water.
12. “Stained Glass” Leading
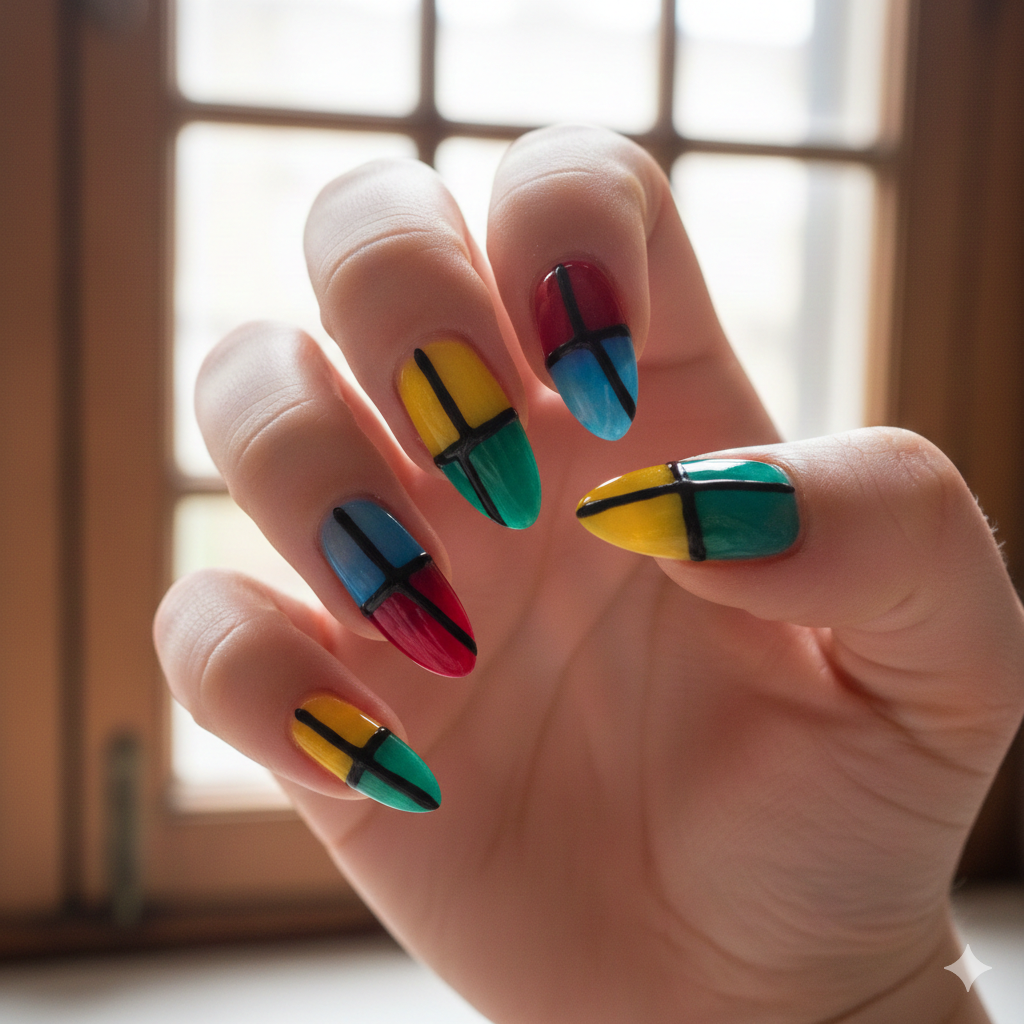
Paint your nails in different sections of colored jellies—yellow, blue, red, and green. Once cured, use black acrylic paint or a very thin black gel liner to trace the borders between the colors. It mimics the lead framing of a church stained glass window. The light shines through the translucent nail art, making it glow.
13. “Frosty Pine” Winter Effect
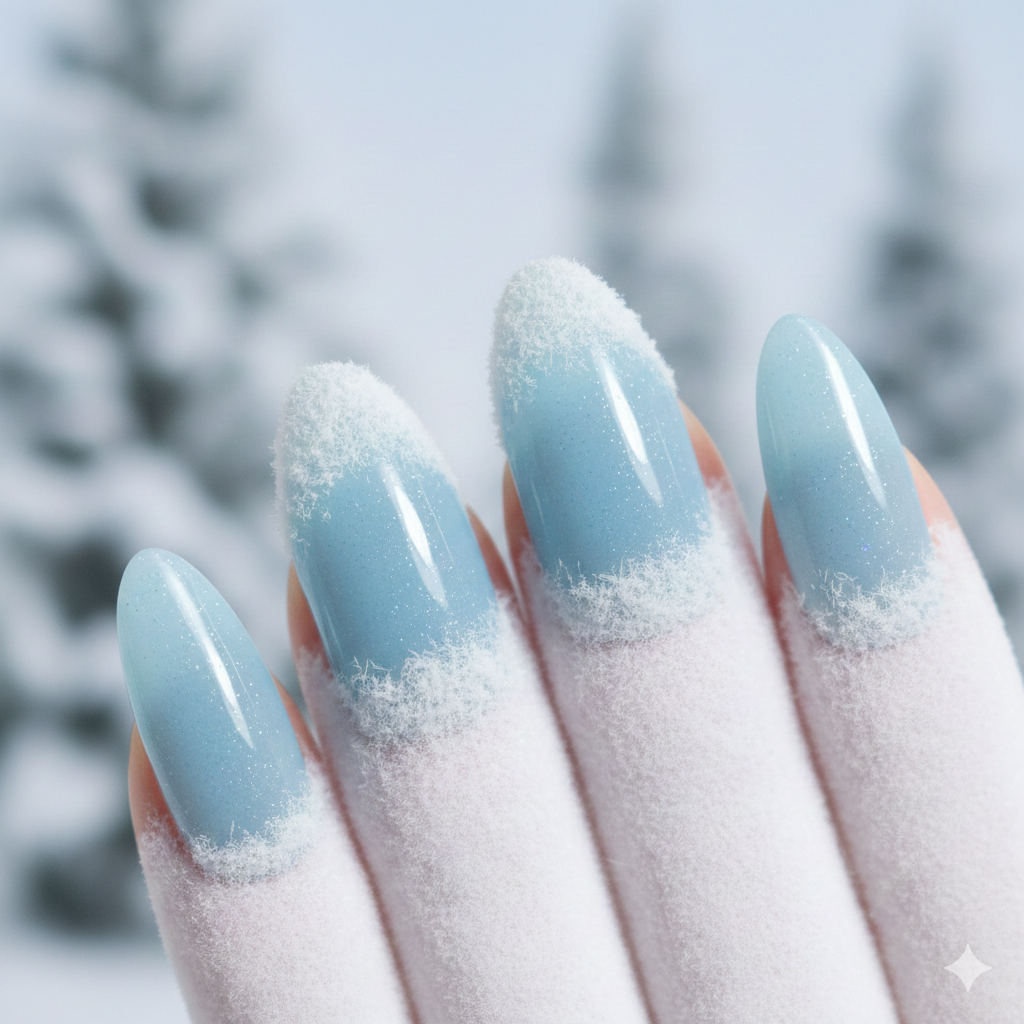
Use a sheer, icy blue jelly. Before your final top coat, flock the tips of the nails with white velvet flocking powder or fine white glitter. Leave the base of the nail clear blue and the tips frosted. It looks like a pine tree covered in snow. This is a unique idea for winter that isn’t just a snowflake.
14. The “Iris” Flower Eye
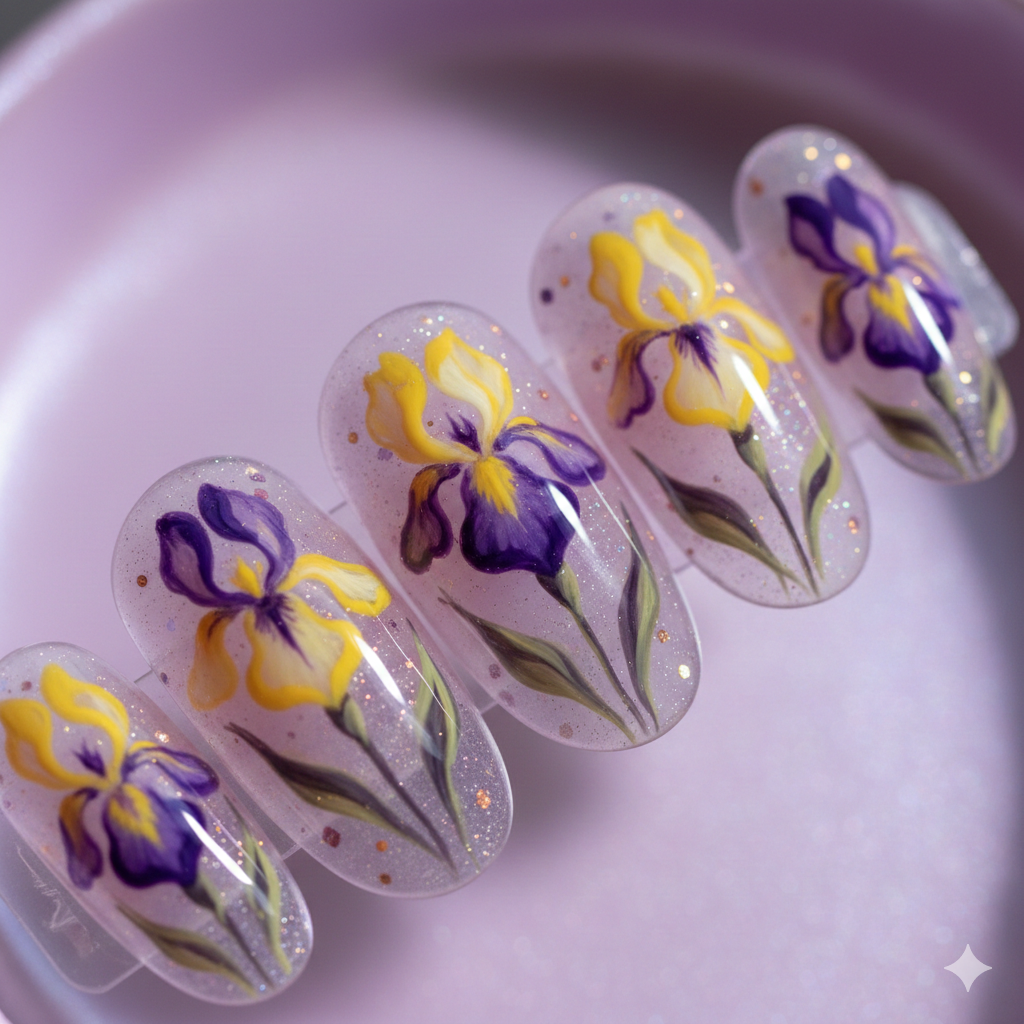
On a sheer purple base, paint intricate iris flowers using yellow and purple gel paint. The magic happens when you paint over the flowers with another layer of the same sheer purple jelly. It softens the harsh lines of the paint, making the flowers look like they are submerged in water or preserved in amber.
15. “Butterfly Wing” Iridescence
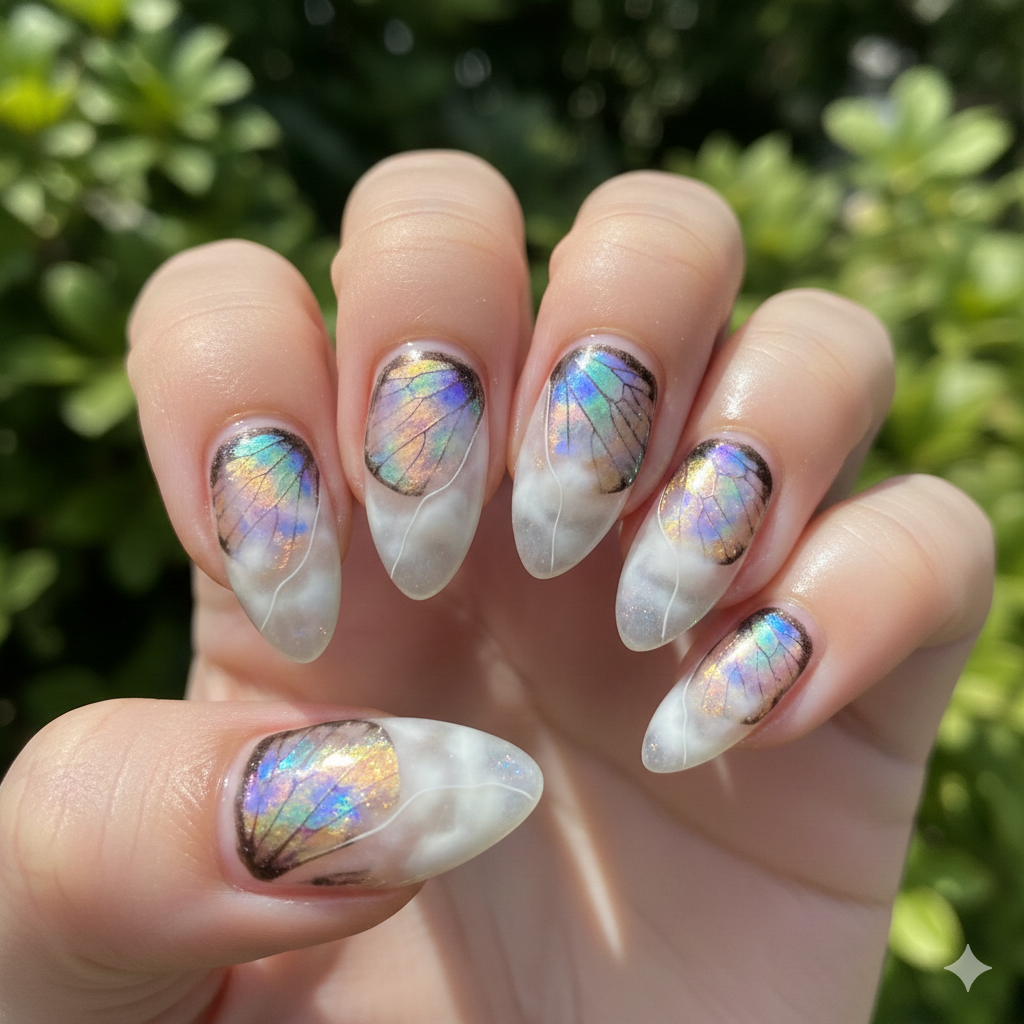
Apply a clear base. Place a piece of sheer iridescent fabric or butterfly wing foil on the nail. Paint a layer of milky white jelly over it. The jelly dims the foil just enough to make it look organic, like a real insect wing rather than shiny metal.
16. “Leaf Litter” Pressed Flowers
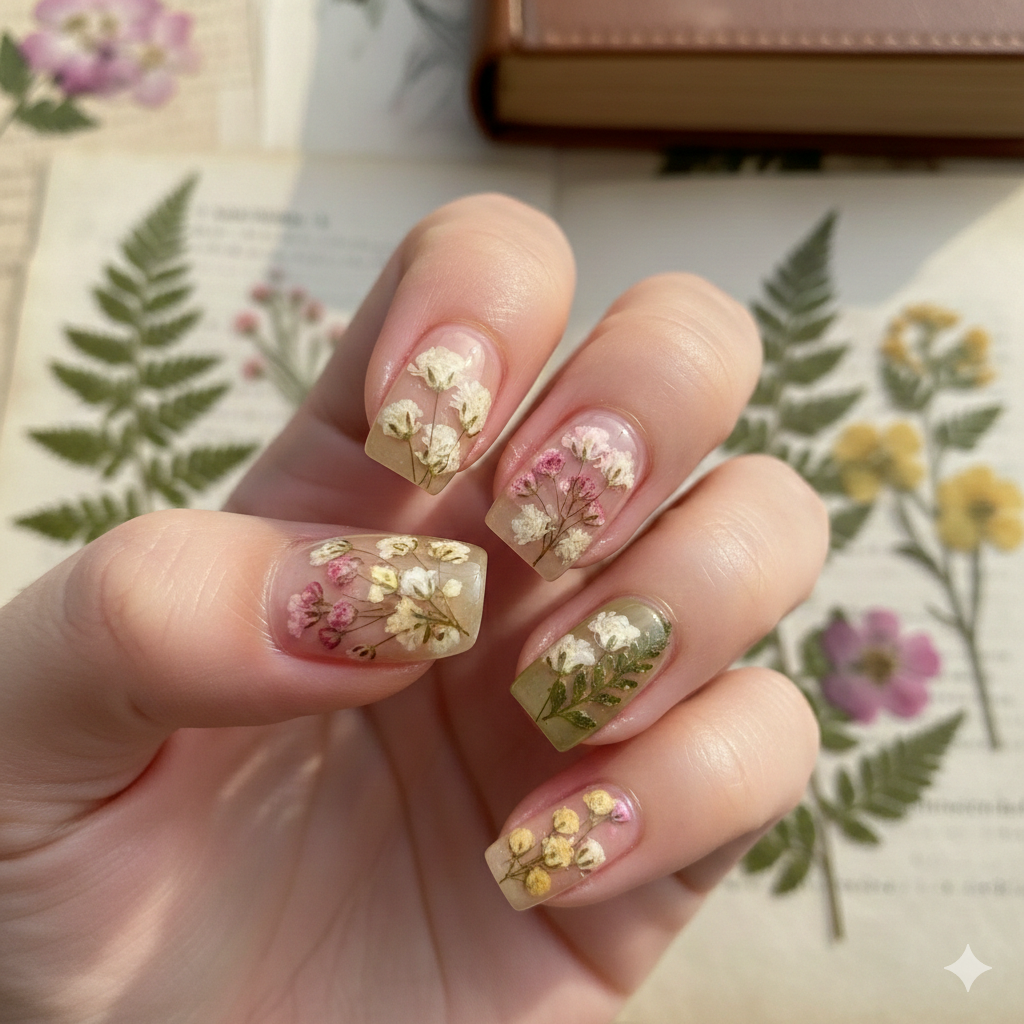
This is a staple of Korean jelly nails. Use a clear base gel and press actual dried, baby’s breath flowers or tiny fern leaves into the gel. Cure. Paint a layer of sheer beige or olive jelly over the top. It preserves the flowers and gives a vintage, pressed-flower book vibe.
17. The “Raindrop” Mountain
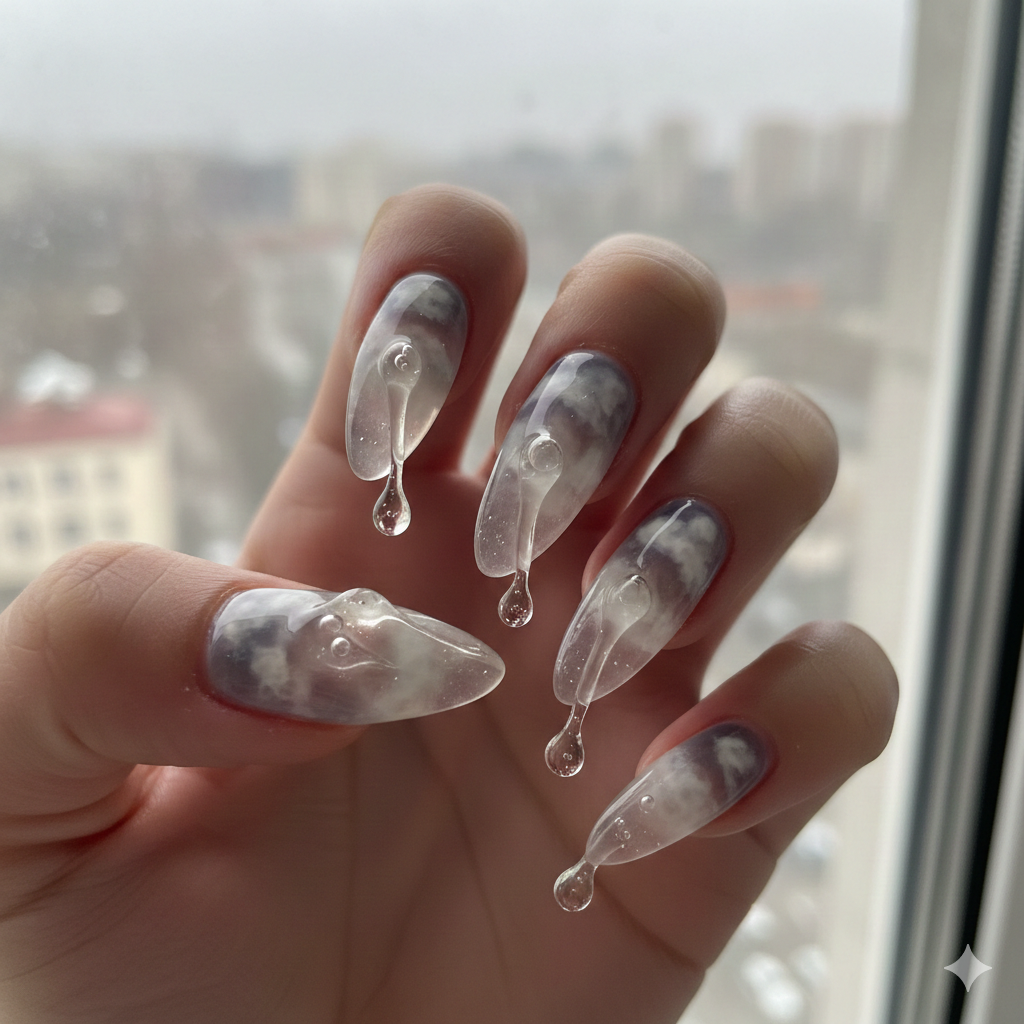
Paint a gradient of grey and white jellies to look like a cloudy sky. At the cuticle area, build up a small amount of thick clear gel and shape it into a perfect mountain peak. Let it drip slightly down the nail. It looks like a raindrop frozen in time on a window pane.
18. “Northern Lights” Oil Slick
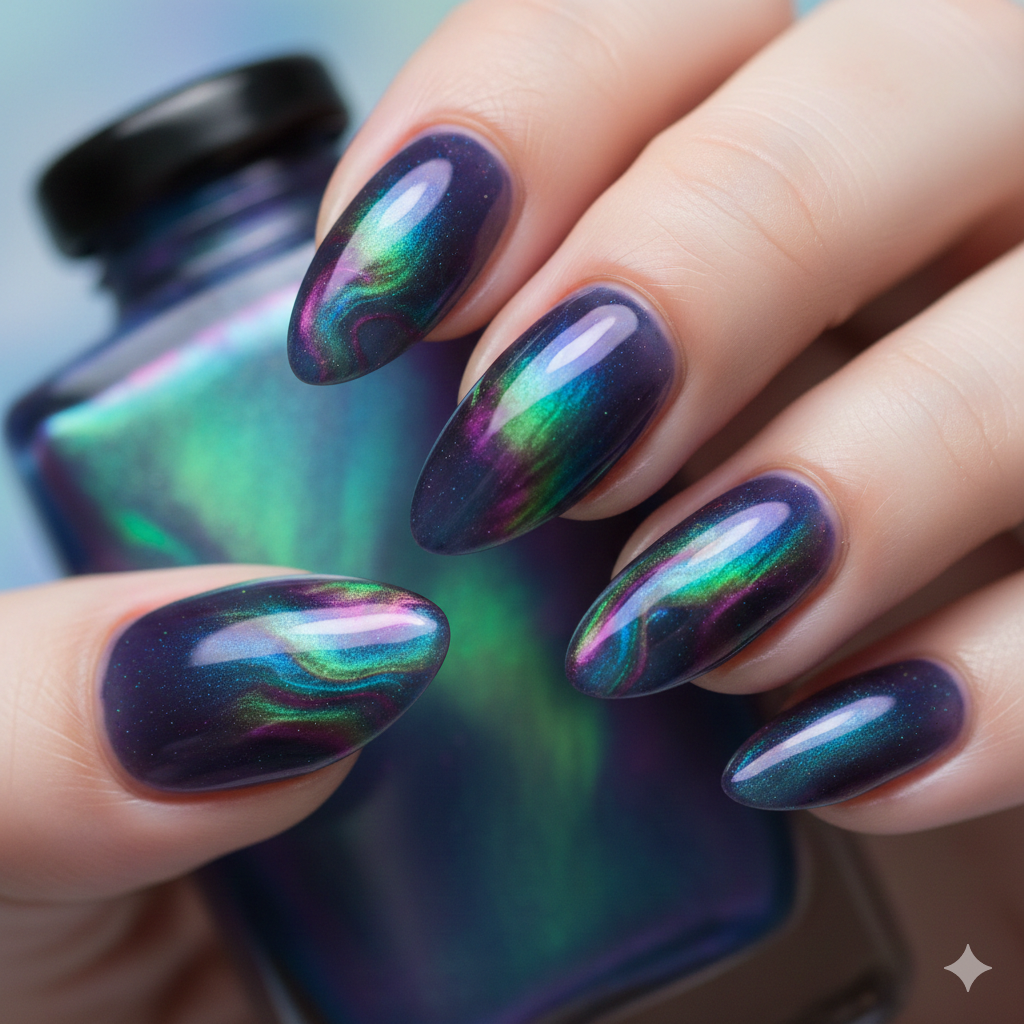
This is one of the most popular jelly sandwich nails variations. Use a dark blue or black jelly as a base. Apply “thermal” color shifting powder or aurora pigment, and cover it with a clear top coat. The depth of the jelly makes the colors shift from green to purple like the aurora borealis.
19. The “Agate Stone” Slice
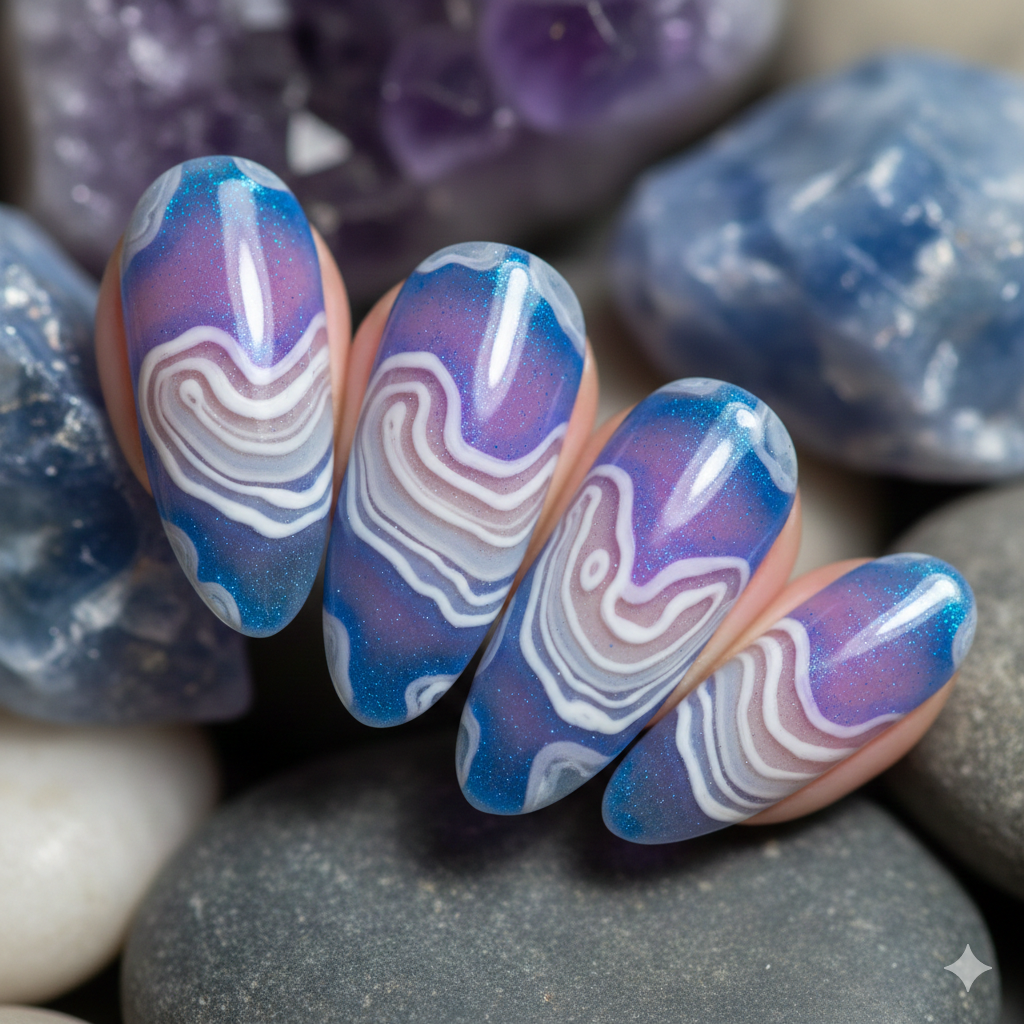
Agate stones have concentric rings of color. To mimic this, use a sheet of mylar or laser paper that has a ring pattern. Paint over it with a layer of sheer purple or blue jelly. The transparency allows the pattern to show through while softening the edges, making it look like a slice of semi-precious stone.
20. “Sunset Boulevard” Negative Space
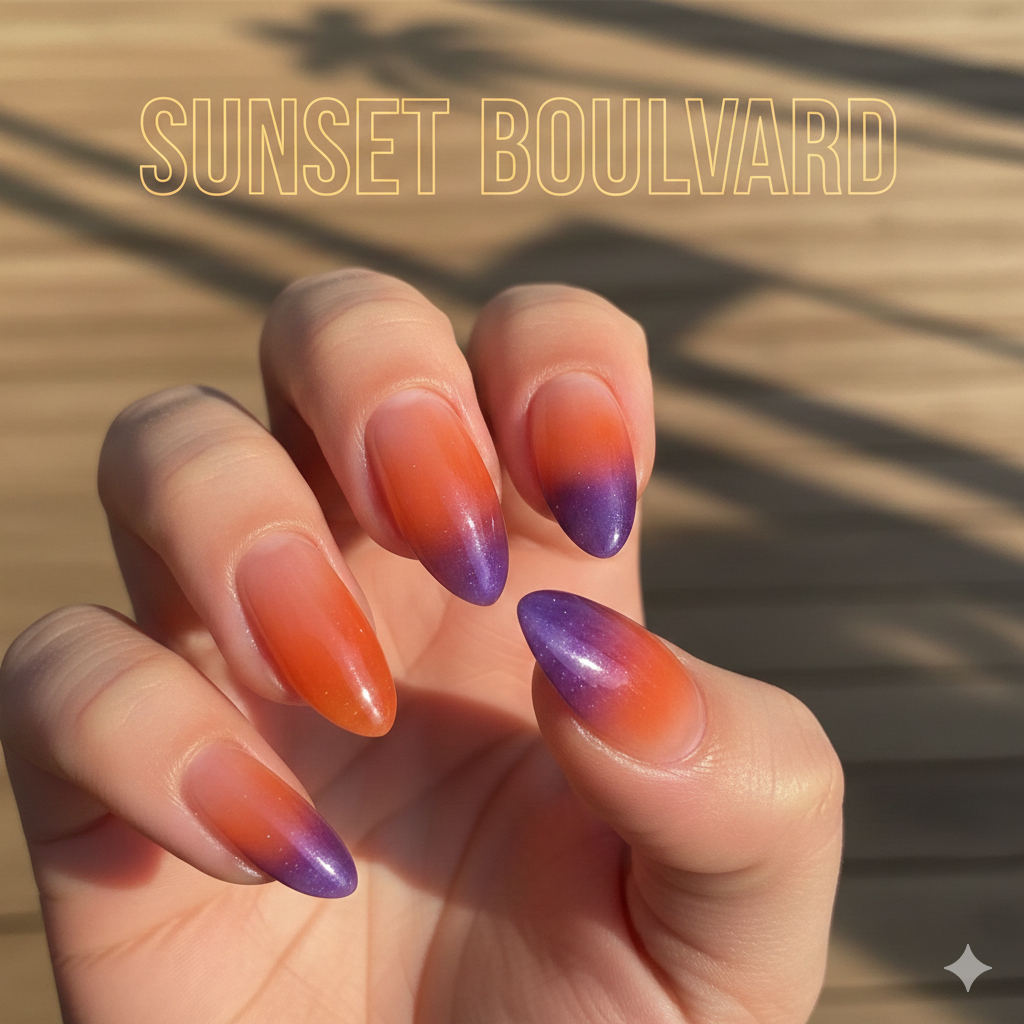
Leave the moon of your cuticle bare (natural nail). Paint a vibrant orange jelly fading into a deep purple jelly at the tip. Use the transparency to your advantage by letting the pink of your natural nail bed show through the orange, creating a realistic, glowing skin-tone effect at the base.
Y2K & Retro Blasts Jelly Nail Designs
The Y2K nail trends are back in full force, and jelly nails are the perfect vessel for 2000s nostalgia. Think flip phones, rhinestones, and chrome.
21. “Cyber-Glitch” Electric Blue
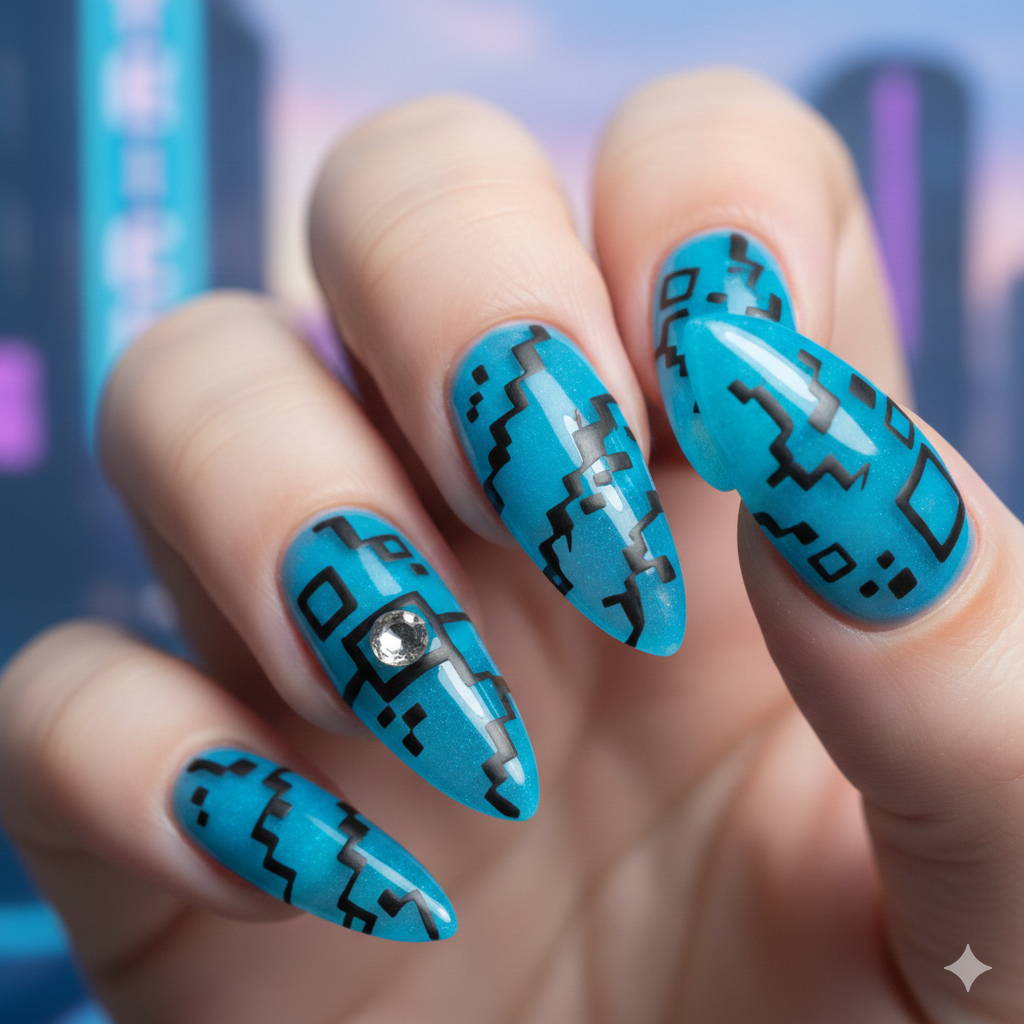
Use a neon blue sheer gel polish. Use black gel paint to paint jagged “glitch” lines or squares that look like a computer error. Add a single silver rhinestone inside one of the black squares. It’s edgy, futuristic, and plays on the gummy nails texture by mixing tech with softness.
22. The “Flip Phone” Antenna
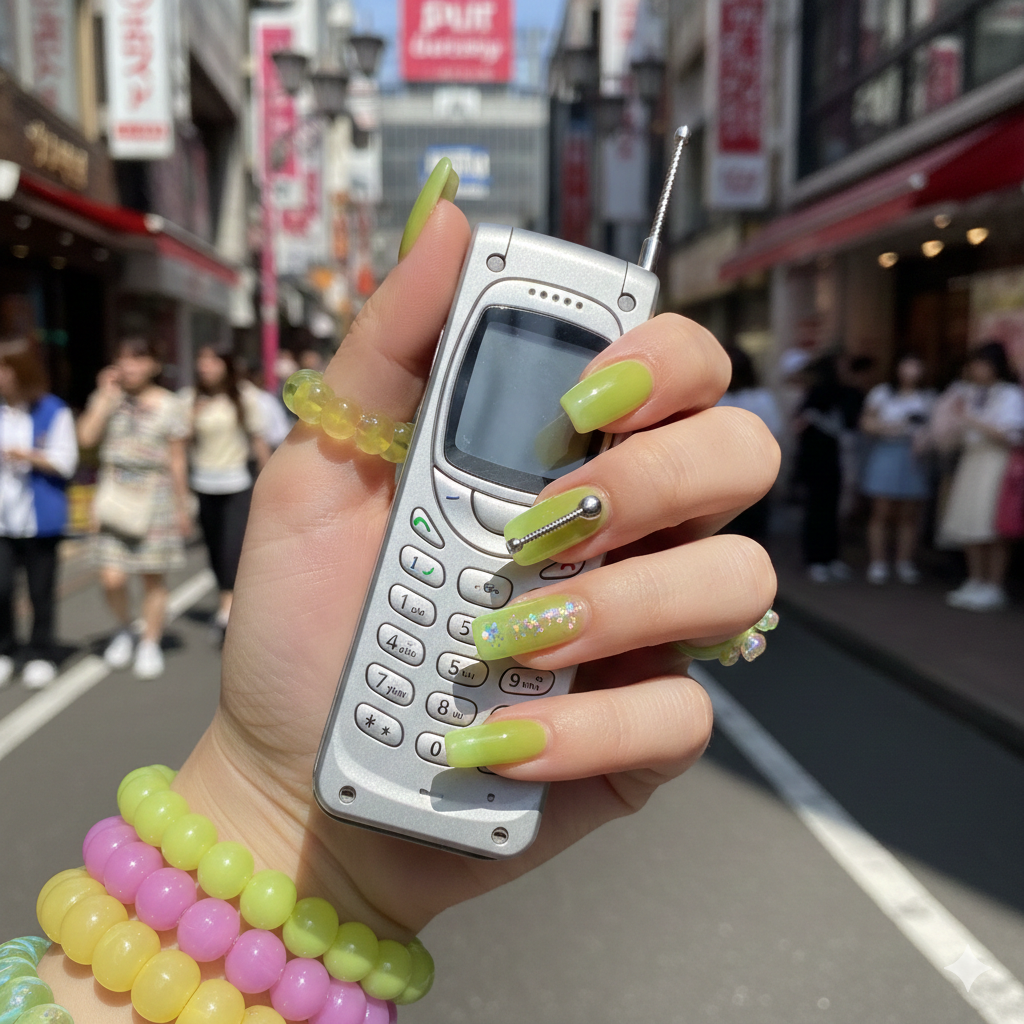
Paint all nails a sheer, lime green jelly. On the ring finger, attach a long, thin charm or a piece of metal wire that curves upwards like an old-school phone antenna. It’s a kitschy, literal interpretation of the 2000s aesthetic that is very popular in Tokyo street fashion.
23. “Bubblegum Machine” Confetti
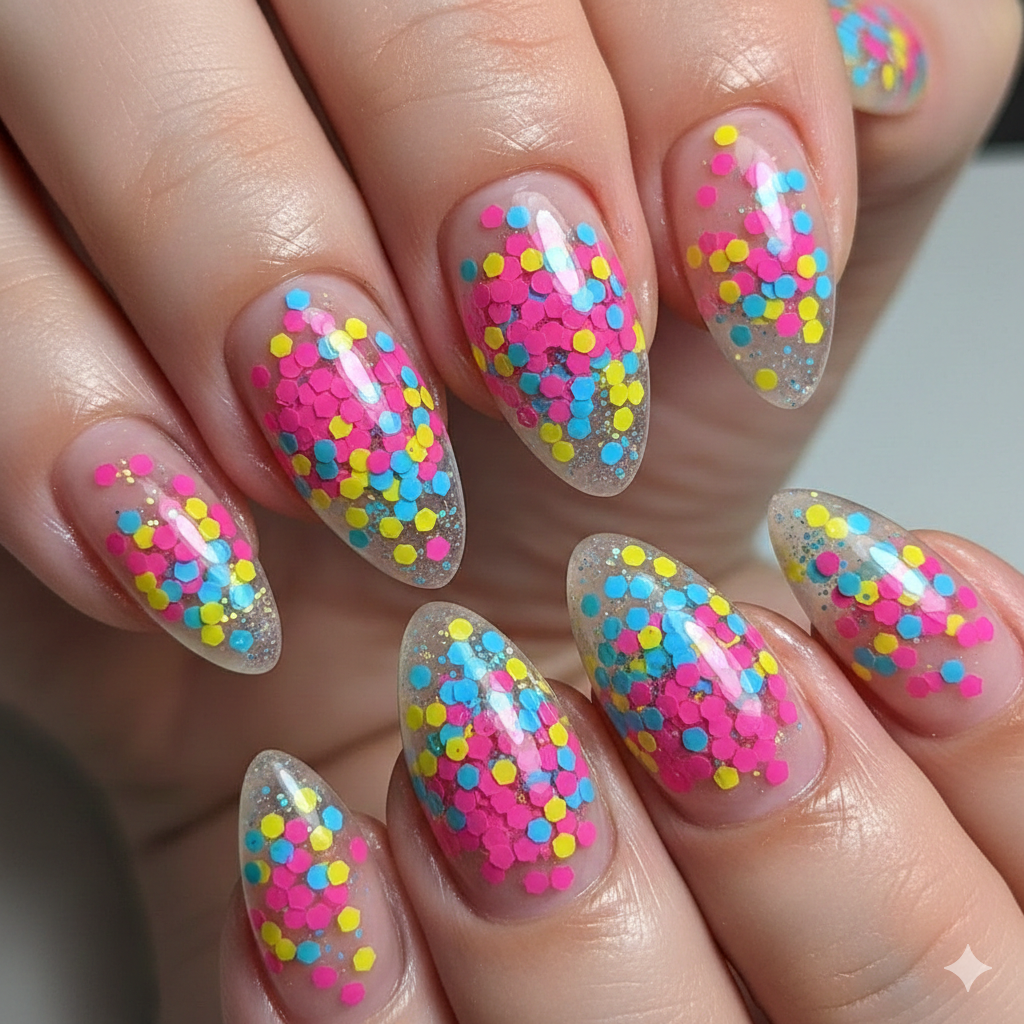
Use a clear jelly base. Pour a mix of tiny hexagon glitters in bright pink, yellow, and blue all over the nail. The density of the glitter should be uneven—heavier at the base, lighter at the tip. It looks like the inside of a gumball machine.
24. “Velvet Rope” Red Carpet
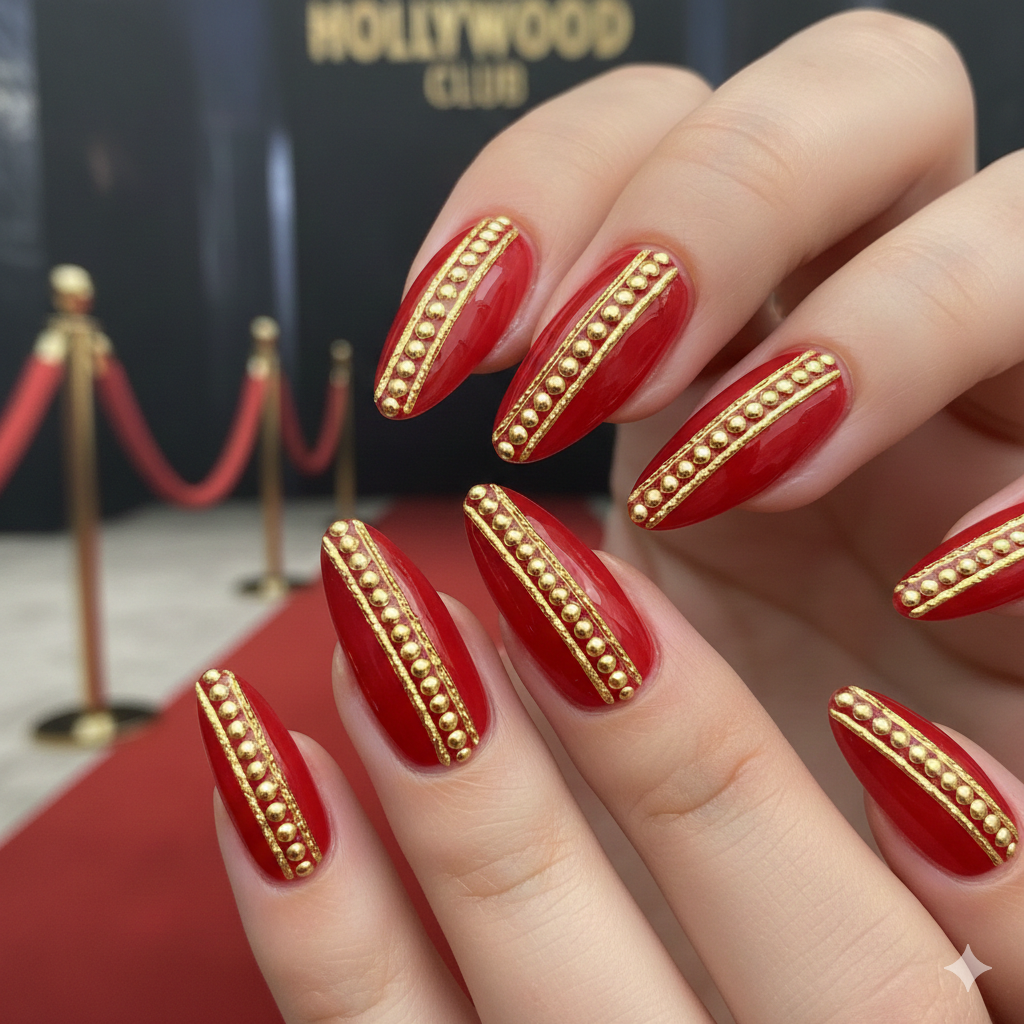
Use a sheer red jelly. Place two thin lines of gold caviar beads vertically down the nail. It resembles the velvet ropes outside a Hollywood club. This is a great way to add texture without doing a full set of bling.
25. The “Cherries” Suspended Animation
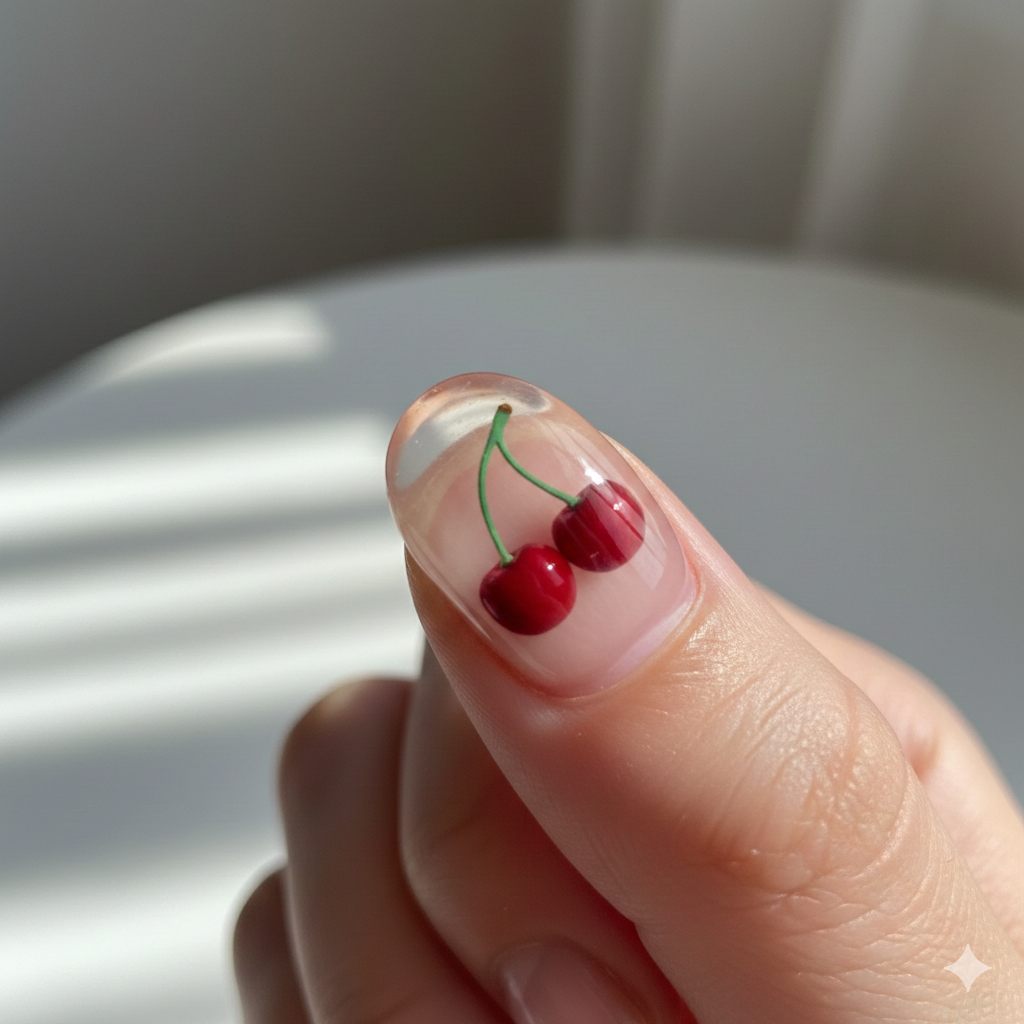
This is a classic motif updated. Draw two red cherries and a green stem on a plastic bag or stamper. Let it dry completely, peel it off, and place it inside a layer of thick clear jelly on your nail. The cherries look like they are floating in the middle of the nail, rather than painted on the surface.
26. “Tie-Dye” Swirl 90s Style
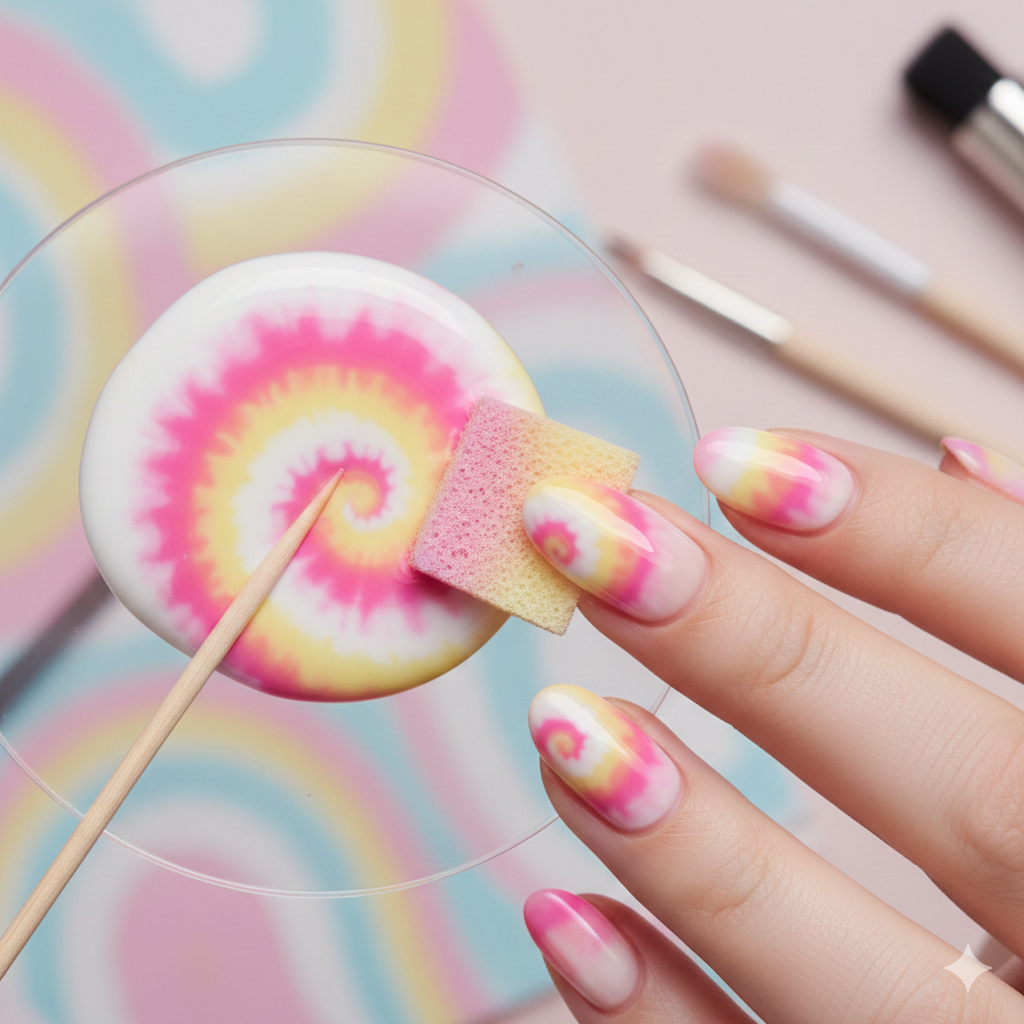
Use a toothpick to swirl together white, yellow, and pink jelly nail polish on a palette (do not mix them). Pick up the swirl with a sponge and dab it onto the nail. Paint a clear layer over the top. It mimics the fabric patterns of 90s t-shirts but with a glossy, wet finish.
27. “Denim” Texture Overlay
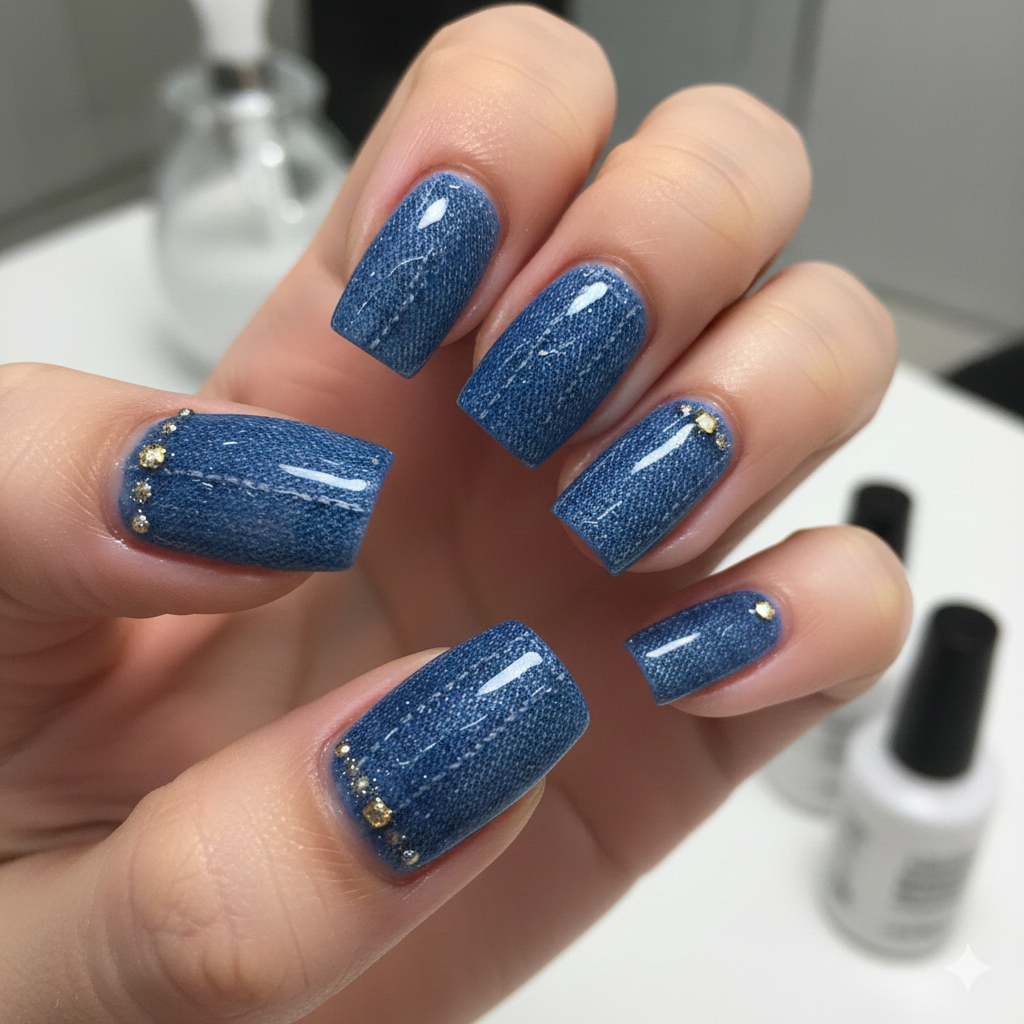
Paint a layer of medium blue jelly nail designs. While wet, press a piece of denim fabric (or a texture stamper that looks like fabric) lightly onto the nail. Remove it. The jelly retains the weave texture of the denim. It looks like you are wearing tiny, shiny jeans on your fingers.
28. The “Atomic” Starburst
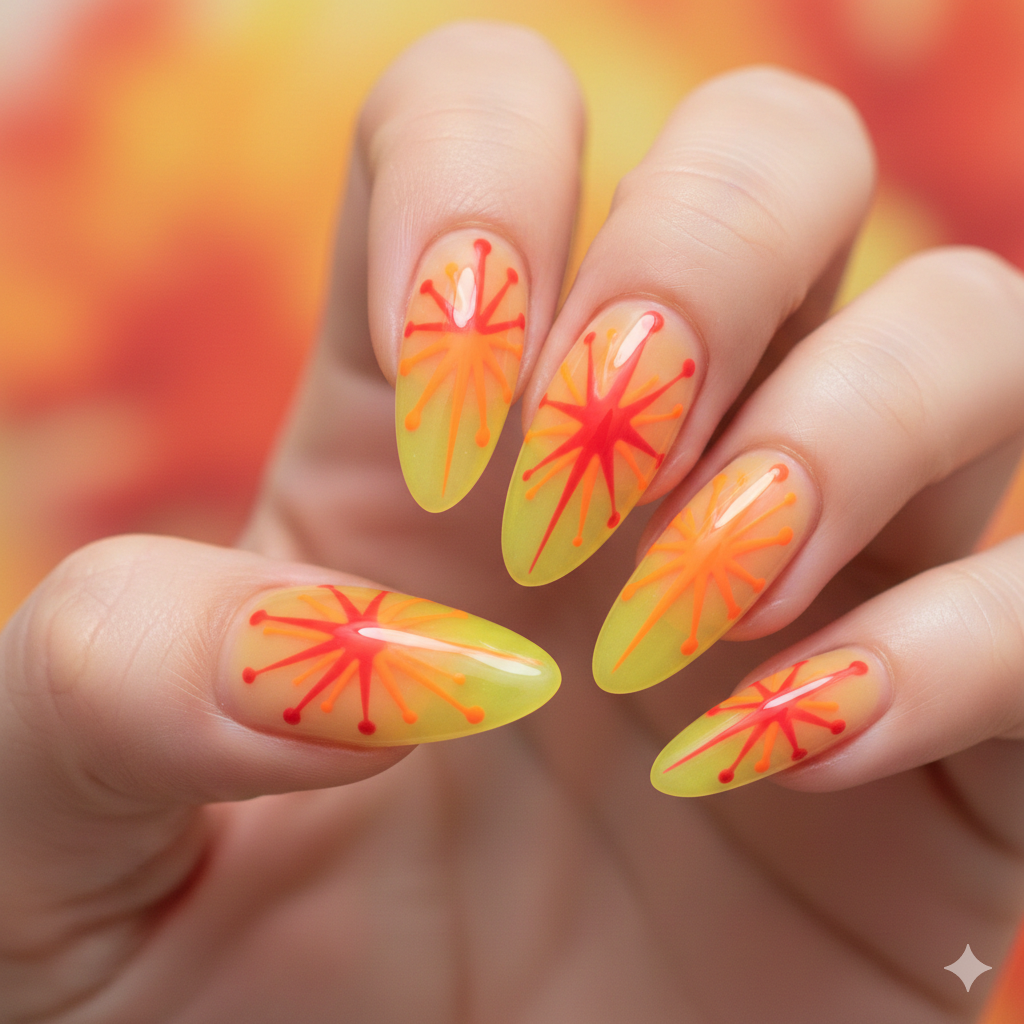
Use a sheer yellow base. Paint orange and red starbursts or sputnik shapes exploding from the cuticle. This is a very bold, mod 60s/70s look that feels retro but fresh due to the neon jelly nails finish.
29. “Checkerboard” Sheer Overload
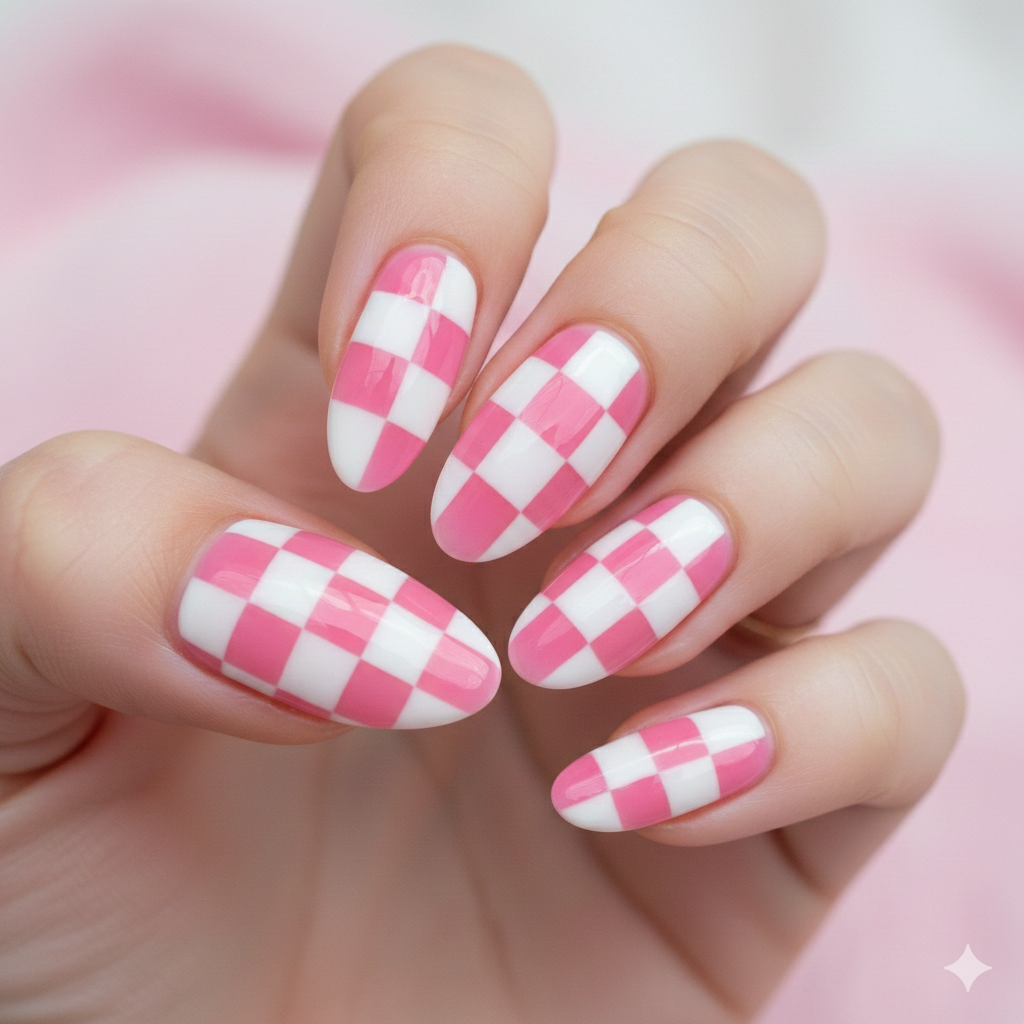
Instead of a black and white checkerboard, use a white and pastel pink checkerboard. Paint the pink squares with a jelly polish so they are semi-transparent, while the white squares are opaque. This adds depth to a graphic pattern that is usually flat.
30. “VHS Tape” Distortion
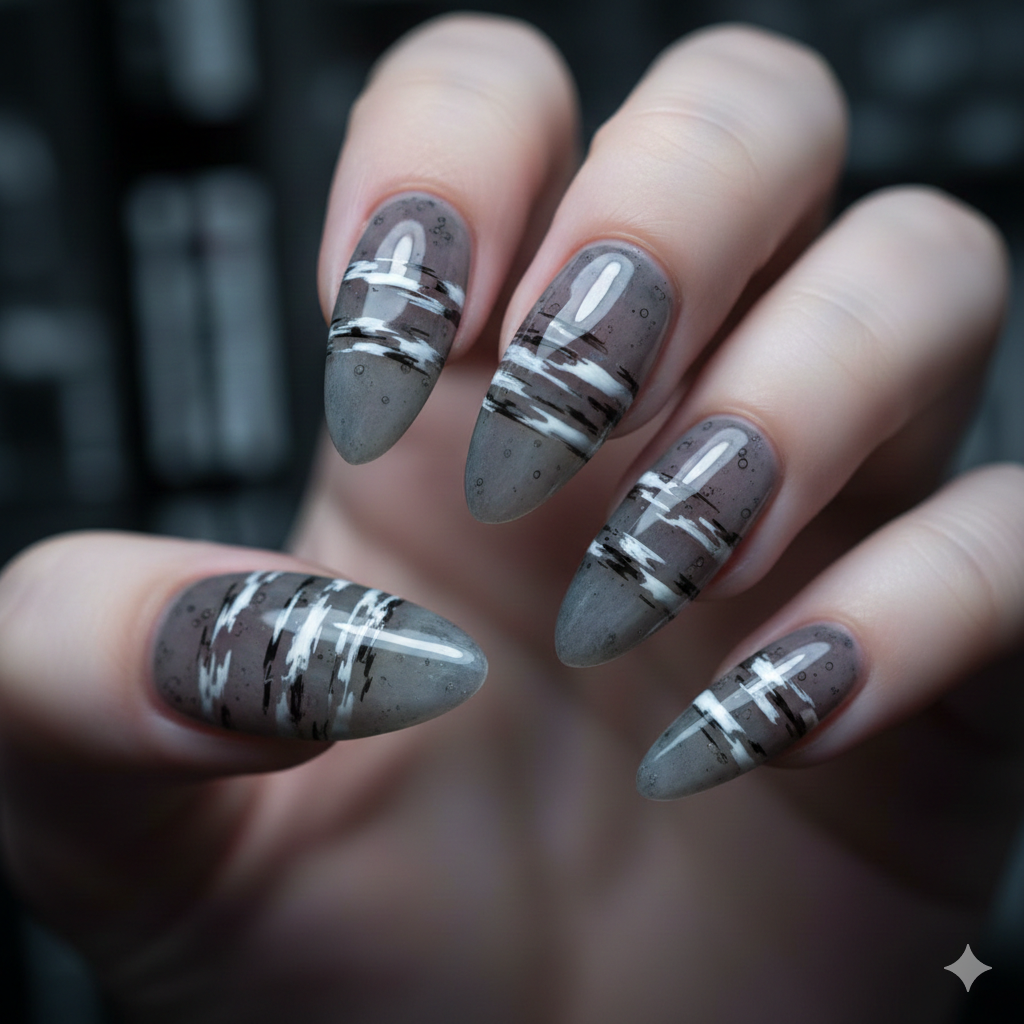
Use a murky grey jelly base. Paint horizontal lines of static or “tracking” noise in white and black across the nail. It’s a moody, grunge take on the translucent nail art trend that appeals to the e-girl aesthetic.
Abstract & Artsy Jelly Nails For the Creative Sou
These designs are for those who view their nails as a tiny canvas. They focus on color theory, brush strokes, and unique materials.
31. The “Monolith” Black Jelly
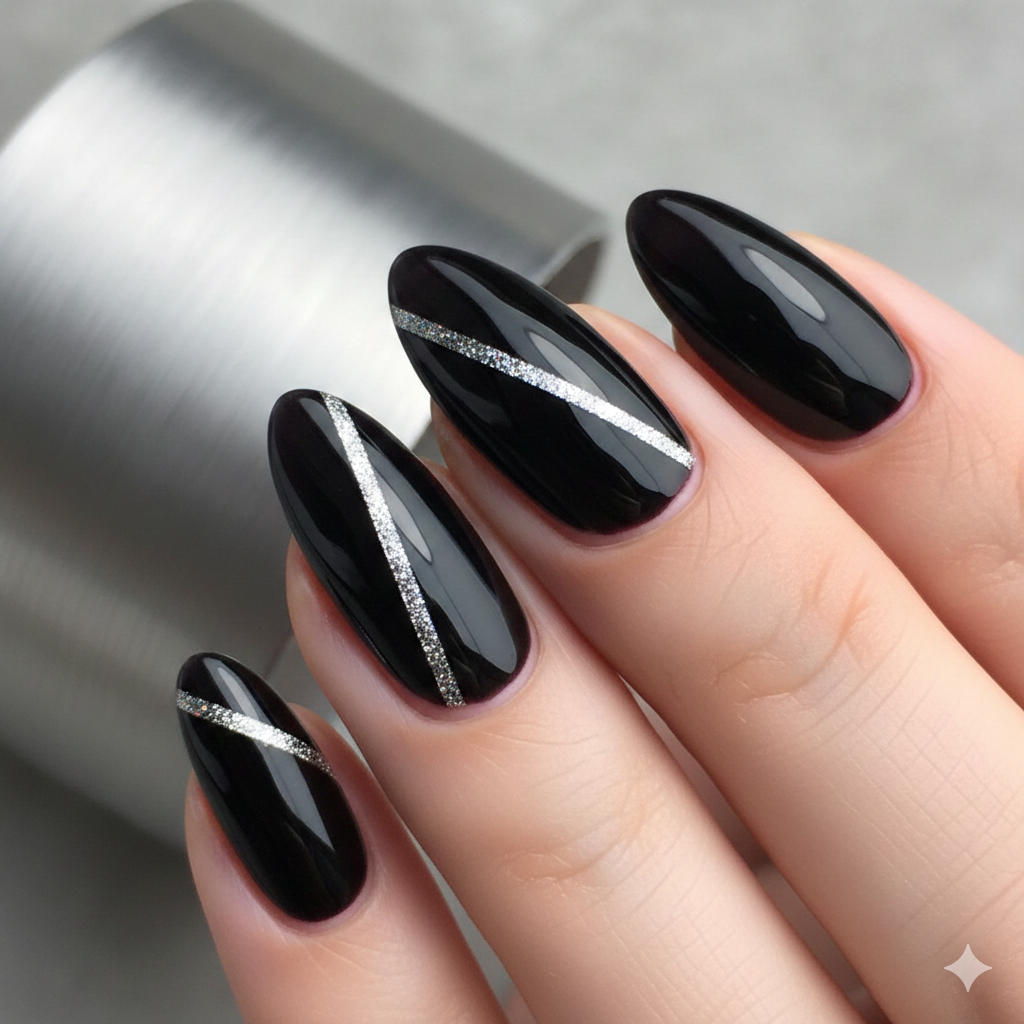
Black jelly is an underrated shade. It doesn’t look like a harsh void; it looks like dark obsidian glass. Paint your nails in black jelly. Add a single, perfectly placed diagonal line of silver foil. It’s architectural, minimalist, and sophisticated.
32. “Ink Drop” Marbling
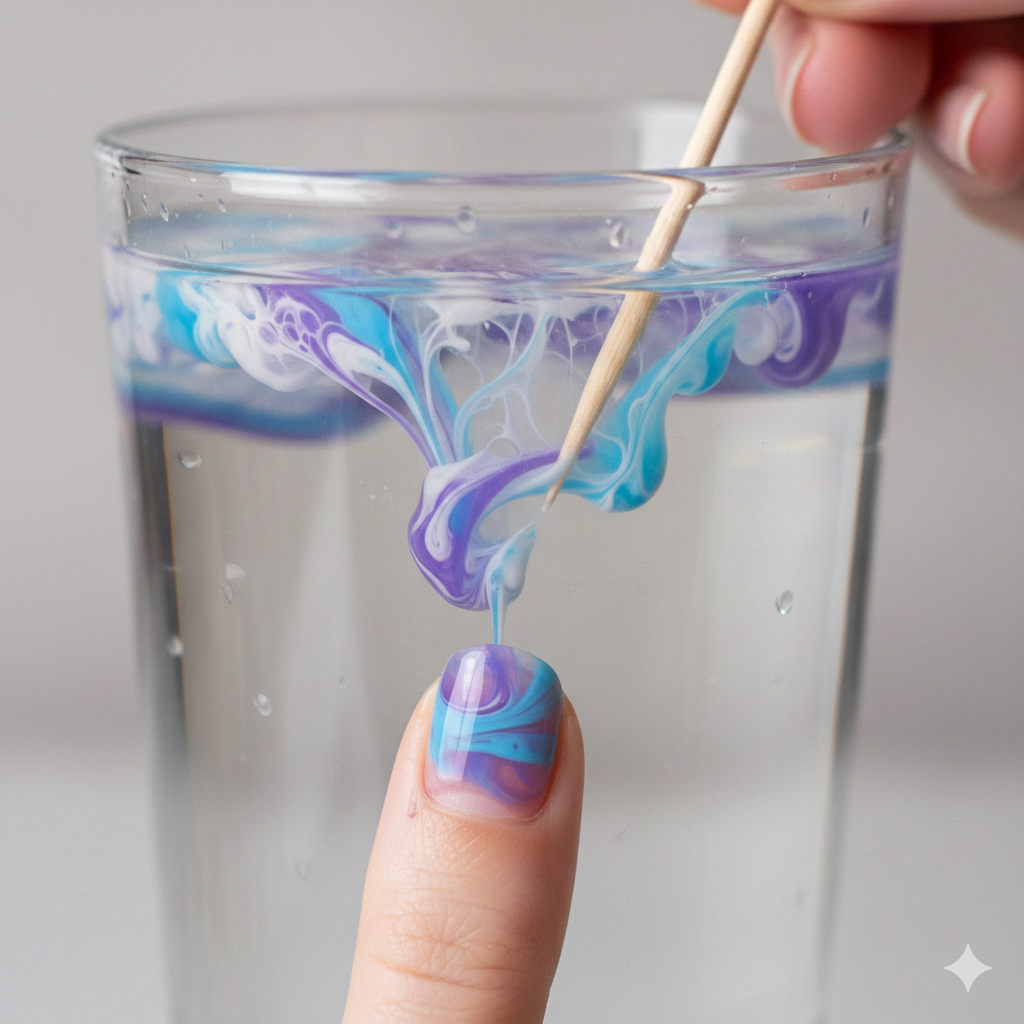
Fill a cup with room temperature water. Drop drops of white, blue, and purple jelly nail polish onto the surface. Use a toothpick to swirl them. Dip your nail in. The jelly polishes spread differently on water than regular polish, creating a web-like, marbleized pattern that looks like ink in water.
33. The “Terrazzo” Chip
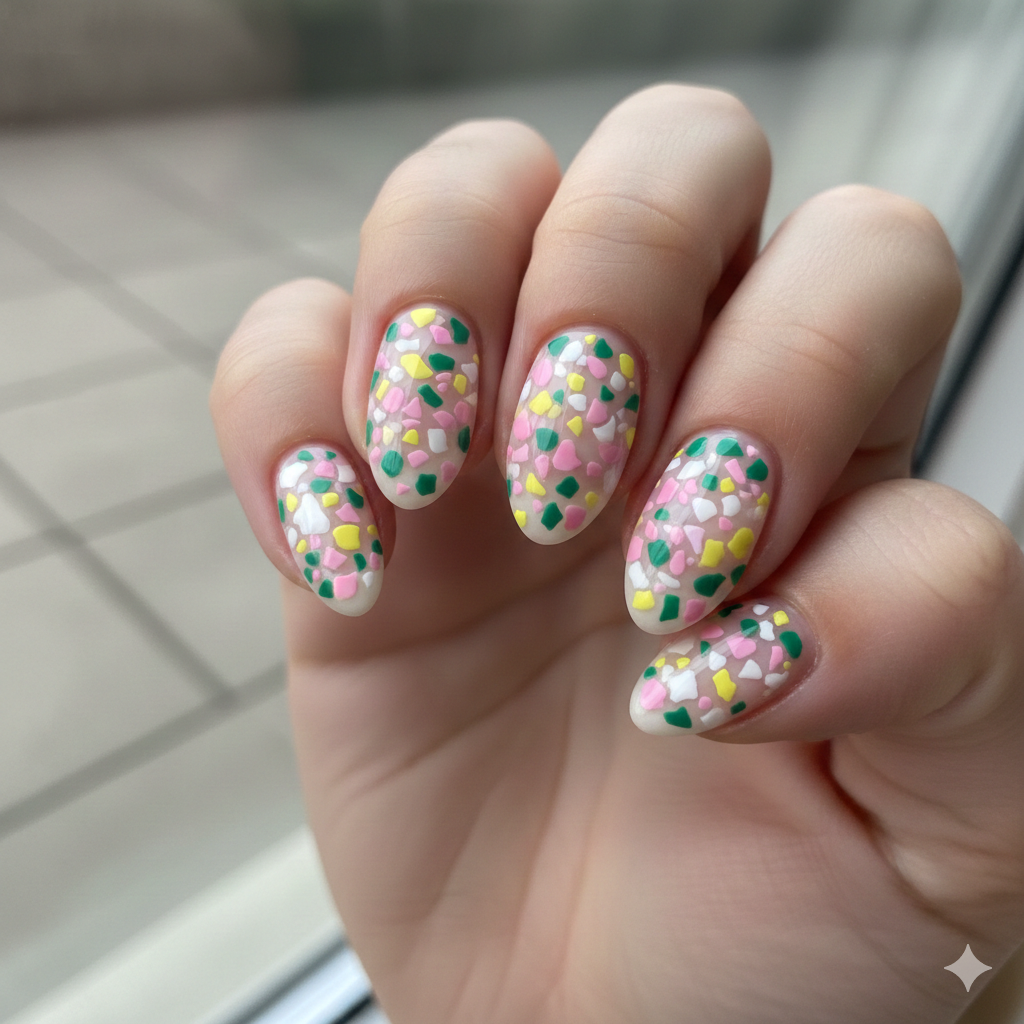
Terrazzo is the composite material used in floors with chips of marble. To get this look, use a clear base and sprinkle tiny, irregular chips of pink, green, and yellow acrylic (or crushed shell) over the nail. Cover with a milky white jelly. It looks like a piece of trendy flooring or countertop.
34. “Cloudy Day” Ombré
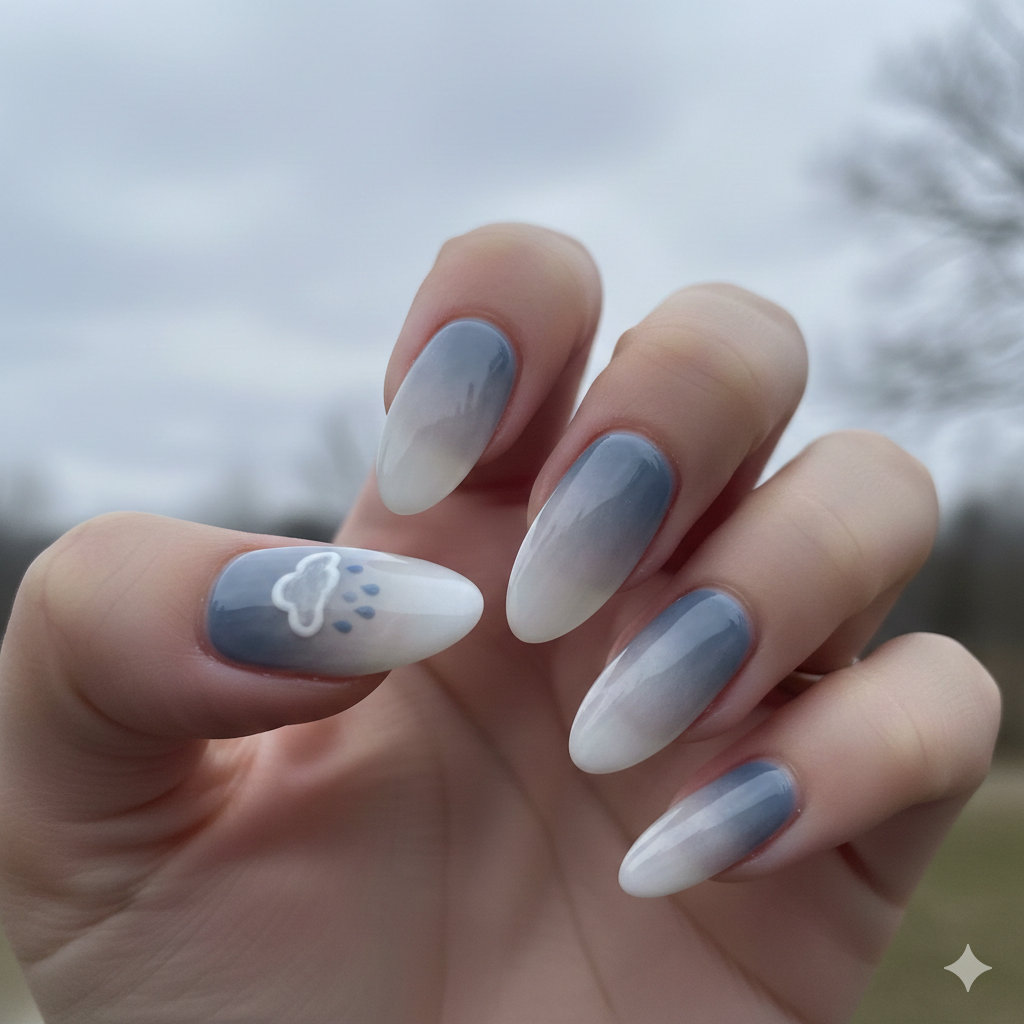
Use a grey-blue jelly at the cuticle and a white jelly at the tip. Blend them in the middle. Add one tiny, hand-painted white rain cloud near the cuticle. It’s melancholy but cute—perfect for “cloud core” aesthetics.
35. The “Shattered Glass” Mosaic
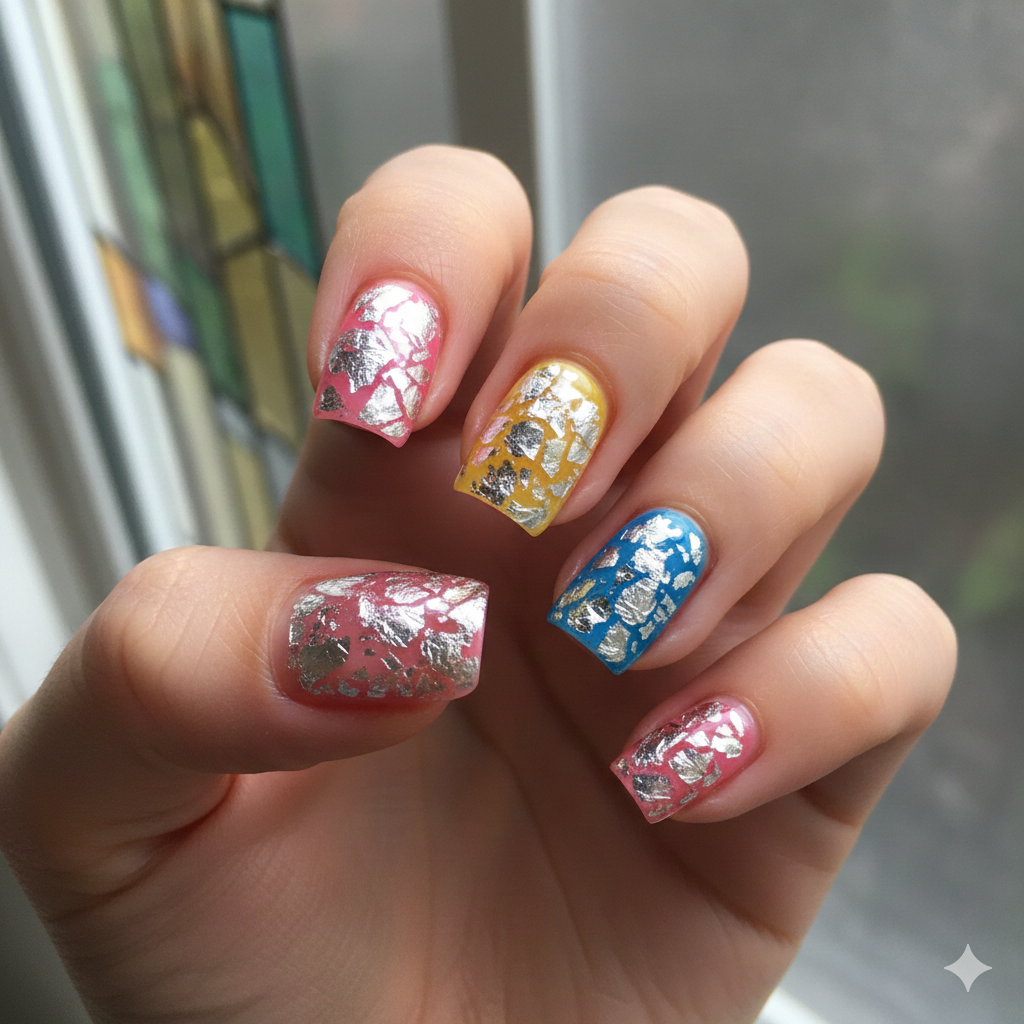
Use different colored jelly sandwich nails on each finger (one pink, one blue, one yellow). On top of these, apply pieces of silver mylar “shattered glass” foil. The different jelly bases tint the silver foil, making the mosaic look multi-colored.
36. “Plaid” Layering
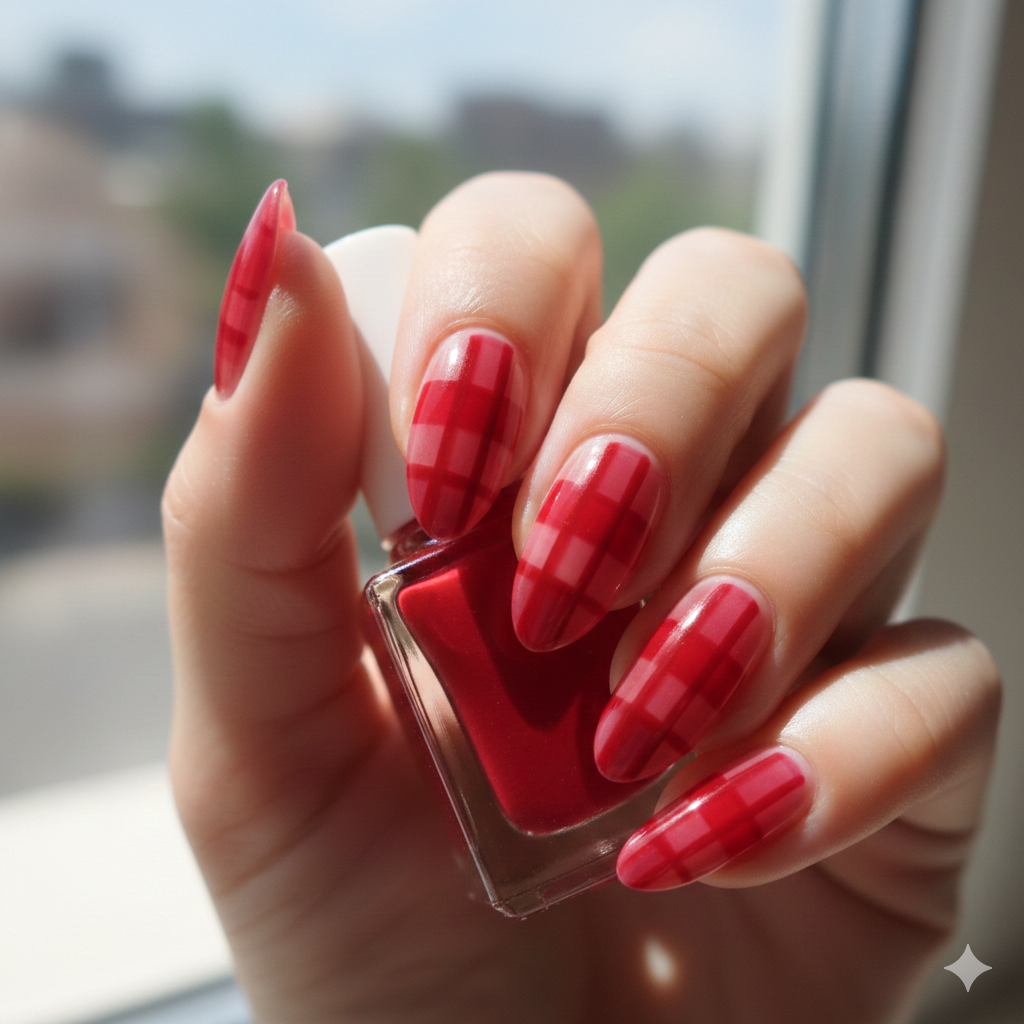
Paint vertical stripes of a sheer red jelly. Let dry. Paint horizontal stripes of the same red jelly. Where they overlap, the color will be deeper. Where they don’t, it will be lighter. It creates a sheer, gingham plaid effect without harsh lines.
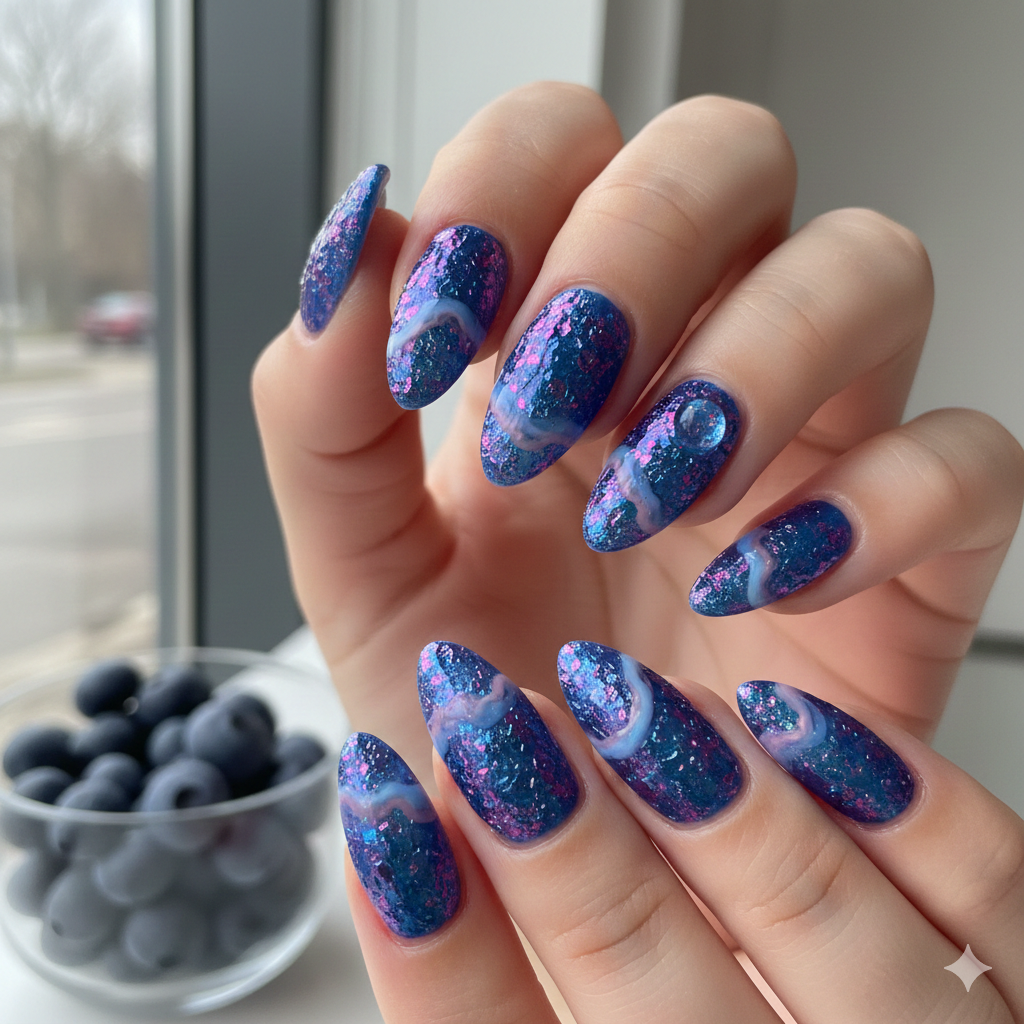
37. The “Galaxy” Swirl
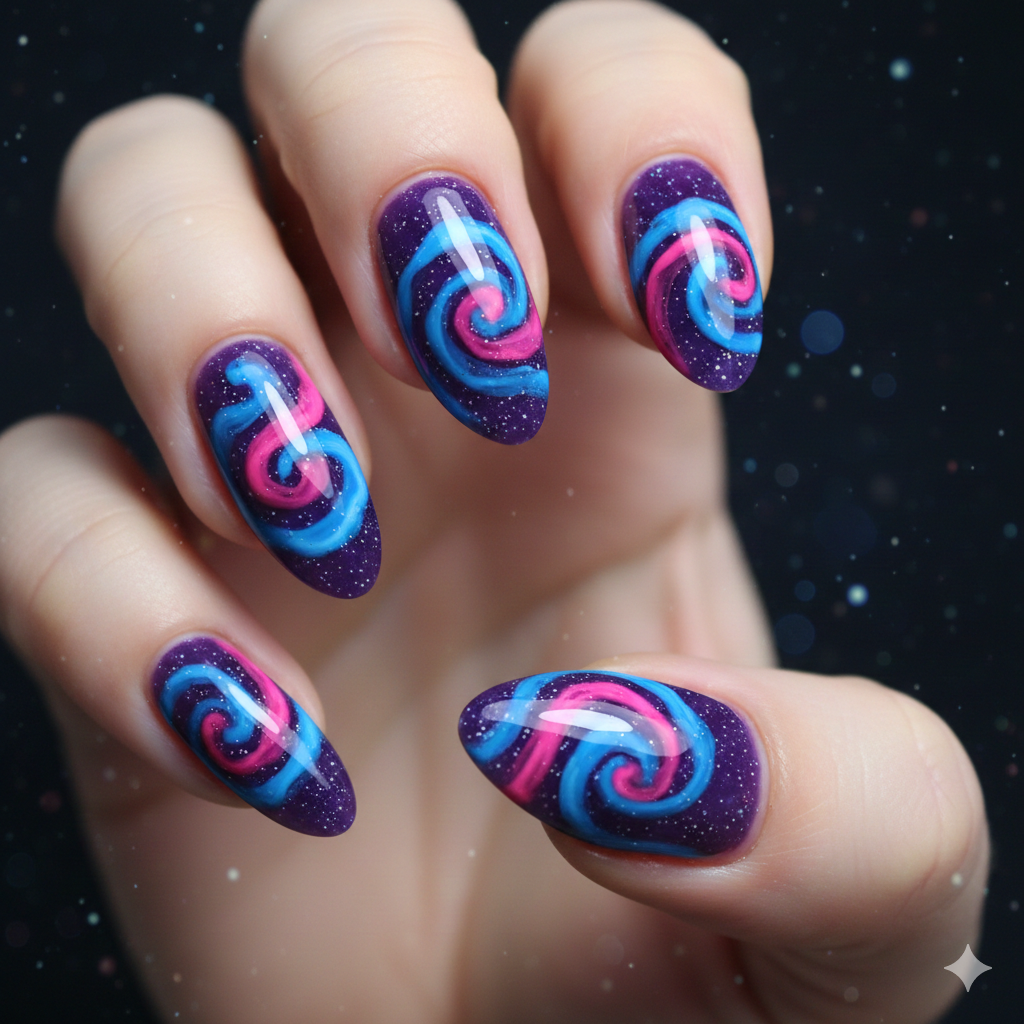
Use a dark purple jelly as a base. Sponge on some bright blue and pink jelly in a spiral pattern. Add tiny white dots for stars. Because the base is jelly, the stars look like they are deep in the universe rather than stuck on top.
38. “Lava Lamp” Blobs
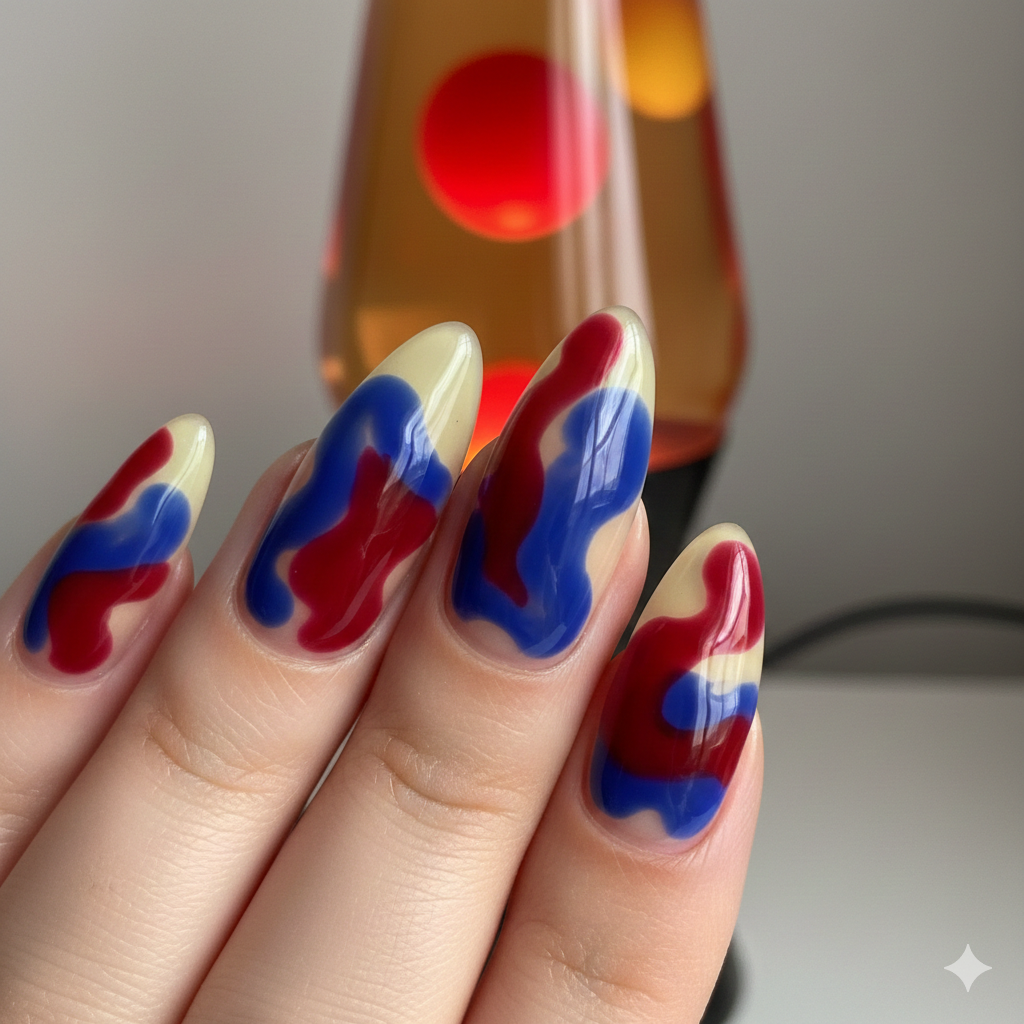
Use a clear or yellow base. Use a larger brush to drop blobs of red and blue jelly into a clear top coat and let them spread naturally before curing. Don’t try to shape them. Let the blobs be organic and round. It looks exactly like a lava lamp in motion.
39. The “Geode” Crystal Edge
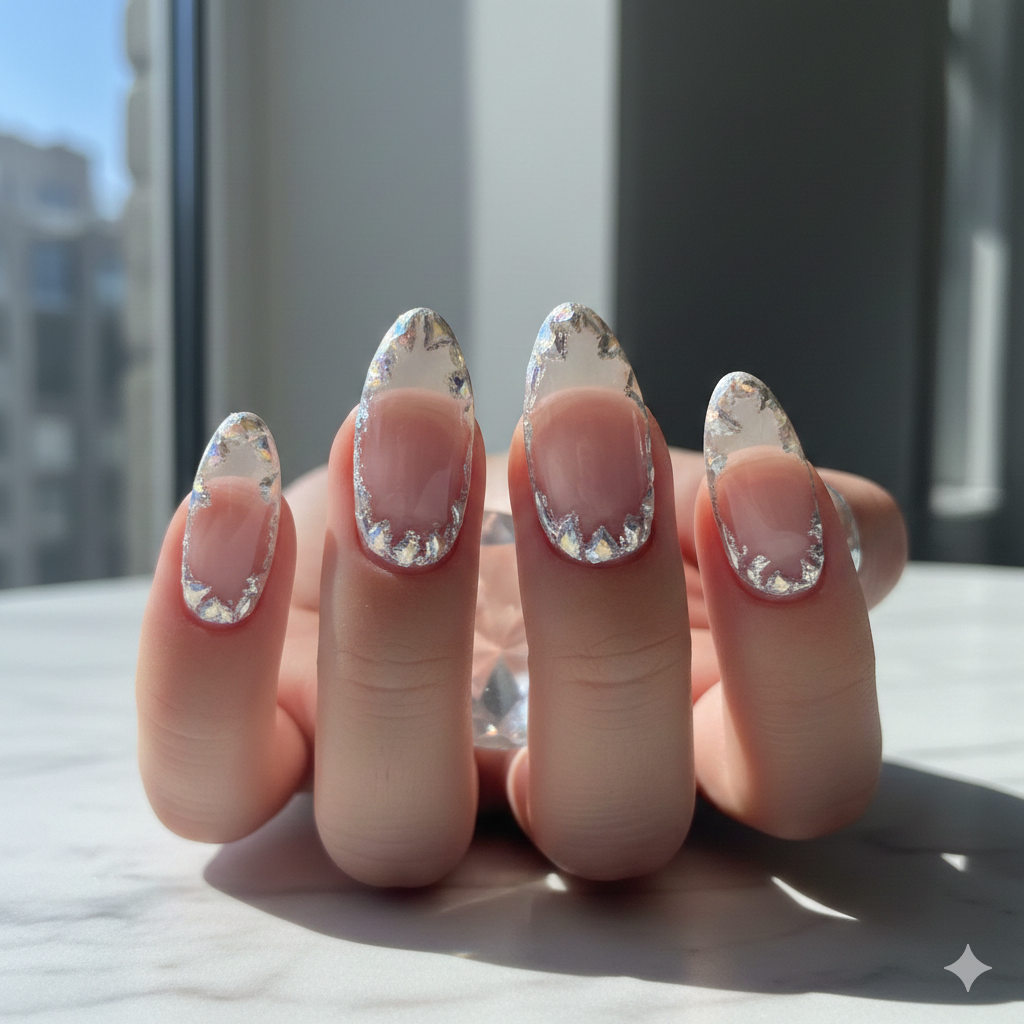
Paint the entire nail in a clear jelly. Use a fine brush to paint a jagged “crystal” edge around the cuticle and sidewalls using white and silver iridescent paint. The center of the nail remains a clear window, looking like a hollow geode rock.
40. “Gradient Skittles” Mani
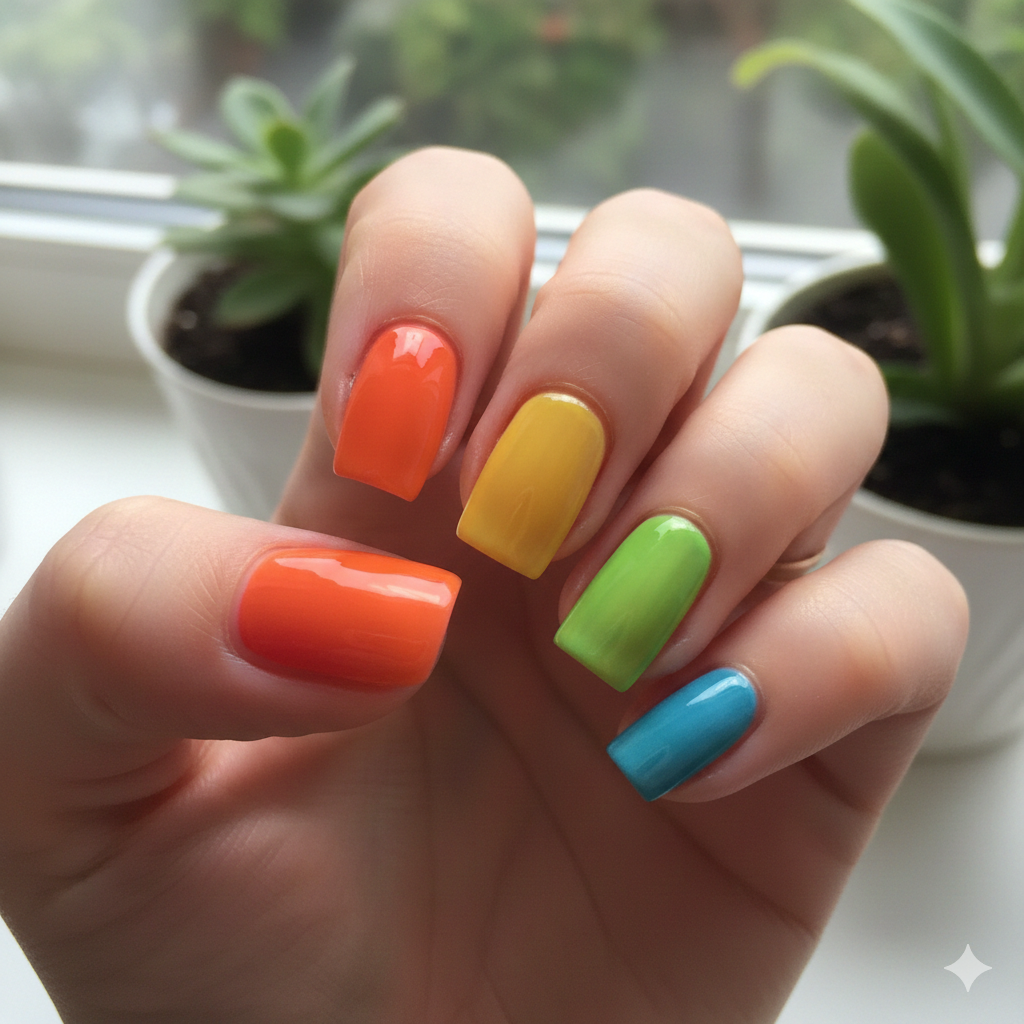
Who says all nails have to match? Paint each nail a different color of the rainbow, but use jelly versions of those colors. Thumb is red jelly, index is orange, etc. Because they are all sheer, they harmonize better than opaque colors would. It’s a cohesive yet colorful mess.
Do you like keeping your look simple but want some class? Try our classy nail designs to stand out with elegance.
Why Jelly Nail Designs Are Here to Stay
You might be wondering, why go through the trouble of jelly nail designs? Why not just slap on a solid color? The answer is versatility and wearability. Opaque colors can sometimes look harsh or highlight every imperfection in your nail shape. Sheer nail designs, however, are forgiving. They blur the lines and add a soft focus to your hands.
Moreover, the glass nails and jelly sandwich techniques allow for incredible depth. You are building a 3D structure on a flat surface. Whether you are using sheer gel polish professionally at a salon or experimenting with DIY jelly nails at home, the result is always glossy, juicy, and full of fun.
Bottom Line
Breaking out of a manicure rut is as easy as changing the opacity of your polish. Jelly nail designs offer a limitless playground for creativity, from the sweetest candy nails to the grungiest VHS tape distortions. The sheer, translucent nature of the polish allows you to play with color in a way that feels weightless and fresh.
So, the next time you are staring at that wall of polish colors, feeling uninspired, ask for a bottle of sheer jelly. Whether you want to channel Y2K nail trends or just want a manicure that looks like a refreshing drink of water, there is a jelly design out there with your name on it. Go ahead and add that pop of fun to your look—you deserve it!
FAQs
1. Can I achieve jelly nail designs with regular regular nail polish, or do I need gel?
While you can use regular polish, it is much harder to get that authentic “squishy” look. Regular polishes tend to streak when applied sheerly. For the best sheer gel polish look that mimics real gummy candy, gel is superior because it self-levels and cures into a thick, glossy glass-like layer that standard polish can’t replicate.
2. What is the difference between “glass nails” and “jelly nails”?
People often confuse the two, but they are distinct. Glass nails (or iridescent nails) focus heavily on the shiny, reflective chrome or foil aspect to resemble a shattered mirror. Jelly nail designs focus on the translucency and the color depth, looking more like stained glass or fruit gummies. You can actually combine them (like in the “Blue Raspberry Chrome” idea) for the best of both worlds.
3. How many layers of jelly polish do I need for the perfect opacity?
It depends on the brand, but typically 3 to 4 layers of jelly nail polish are the sweet spot. You want to build up the color slowly. If you apply it too thick in one go, it might pool at the cuticles. Thin, even coats are the secret to a professional DIY jelly nail look.
4. Are jelly nails damaging to the natural nail?
Actually, jelly nail designs can be less damaging than heavy acrylics! Because the aesthetic relies on the natural nail showing through (negative space), you don’t need to build up a thick, heavy extension on the nail plate. If you use soak off gel polish, the removal process is standard and gentle, making them a healthy option for frequent changers.
5. How do I prevent my jelly nail art from looking “streaky”?
Streaking is the enemy of translucent nail art. To avoid this, use a high-quality builder gel as your base. Builder gels have a thicker viscosity that helps smooth out the sheer color layers on top. Also, be sure to cap the free edge with every layer to seal in the moisture and prevent chipping at the tip.