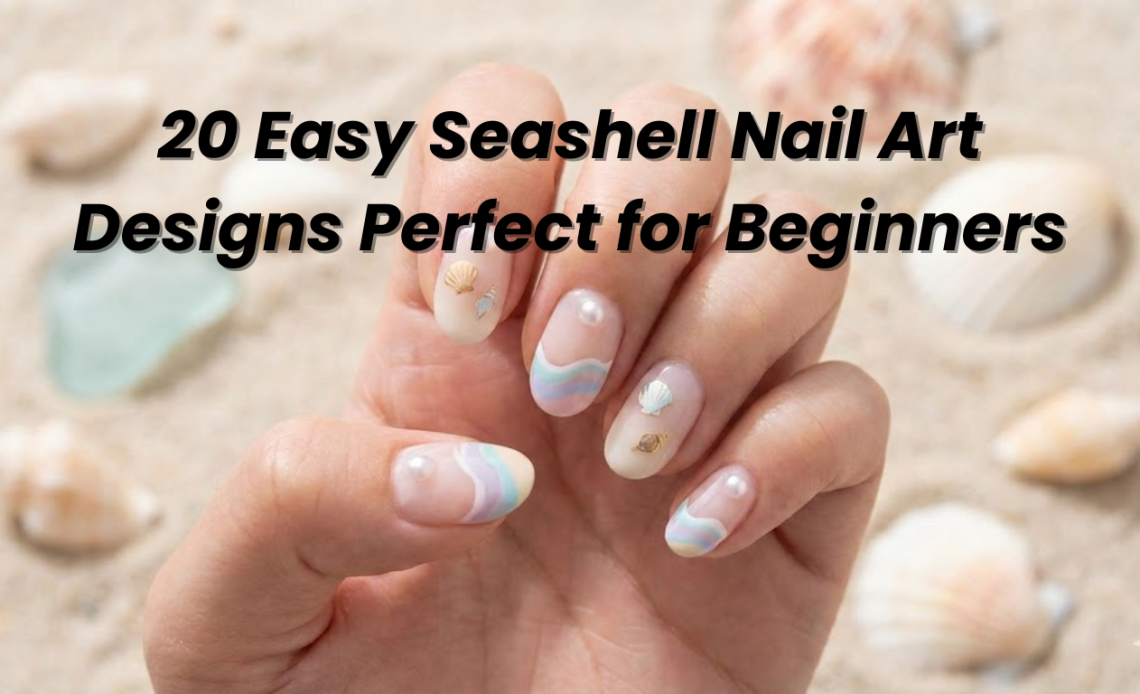
Are your summer nails looking a little flat? Do you find yourself scrolling through Instagram, envying those intricate ocean manicures, only to tell yourself, “I could never do that”? You spend hours at the beach collecting inspiration, but when you get home, you’re stuck with the same old French tip or a single, boring color. You want the vibe of a luxury beach vacation without the $80 salon price tag, but every tutorial you find assumes you have the steady hands of a surgeon and a professional kit.
It’s frustrating. You love the aesthetic of the coast, but you’re intimidated by 3D art and complex brushwork. What if I told you that achieving salon-quality seashell nail art doesn’t require a degree in fine art? In fact, you can create stunning, beach-ready looks using tools you probably already have at home.
This guide is designed to take you from “nail art novice” to “DIY queen” with 20 Easy Seashell Nail Art Designs Perfect for Beginners. We aren’t doing generic, copy-paste designs you see everywhere. These are unique, fresh concepts that blend textures, colors, and simple seashell nail designs to create something truly special. Whether you are prepping for a beach vacation or just want to carry a piece of the ocean with you, we’ve got you covered.
Getting Started: The Beginner’s Toolkit for Seashell Manis
Before we dive into the designs, let’s talk about what you need. You don’t need a massive cart full of products. For seashell nail art, less is often more, especially when you are just starting out.
Essential Tools for DIY Seashell Nails
- Base and Top Coat: Essential for protecting your natural nail and sealing in your design.
- Thin Striper Brush: This is non-negotiable. You need something with a long, fine bristle to create the delicate ridges of a shell.
- Dotting Tool: Perfect for creating uniform pearls or barnacles.
- Sponge: For gradient effects (ombré).
- Toothpick: For placing tiny 3D seashell nail charms or adjusting rhinestones.
- Matte Top Coat: This is the secret weapon for making designs look high-end and modern.
The Right Color Palette for Seashell Nail Art
While blue is the obvious choice, don’t limit yourself. Pink seashell nails are incredibly trendy right now, mimicking the inside of a conch. Nude seashell nails offer an elegant, “clean girl” aesthetic. Don’t be afraid to experiment with pastels like lavender, mint, or even a sandy beige.
Minimalist & Abstract Designs (The “I Woke Up Like This” Vibes)
These designs are perfect if you want easy seashell nails for beginners. They focus on negative space and simple lines rather than complex 3D structures.
1. The “Sandbar” Negative Space Half-Moon
Forget the traditional French tip. This modern look uses the lunula (the white half-moon at the base of your nail) as the focal point.
- The Vibe: Subtle, earthy, and sophisticated.
- How to Do It: Apply a sheer, milky beige polish as your base. Once dry, use a hole reinforcement sticker (or a circle sticker) placed at the base of your nail. Paint the exposed half-moon with a textured, sandy gold polish. Remove the sticker.
- Pro Tip: Use a matte top coat over the gold to make it look like actual sand rather than shiny foil.
2. The “Single Scallop” Line Art
Less is definitely more here. Instead of filling the nail with shells, we suggest using geometric shapes.
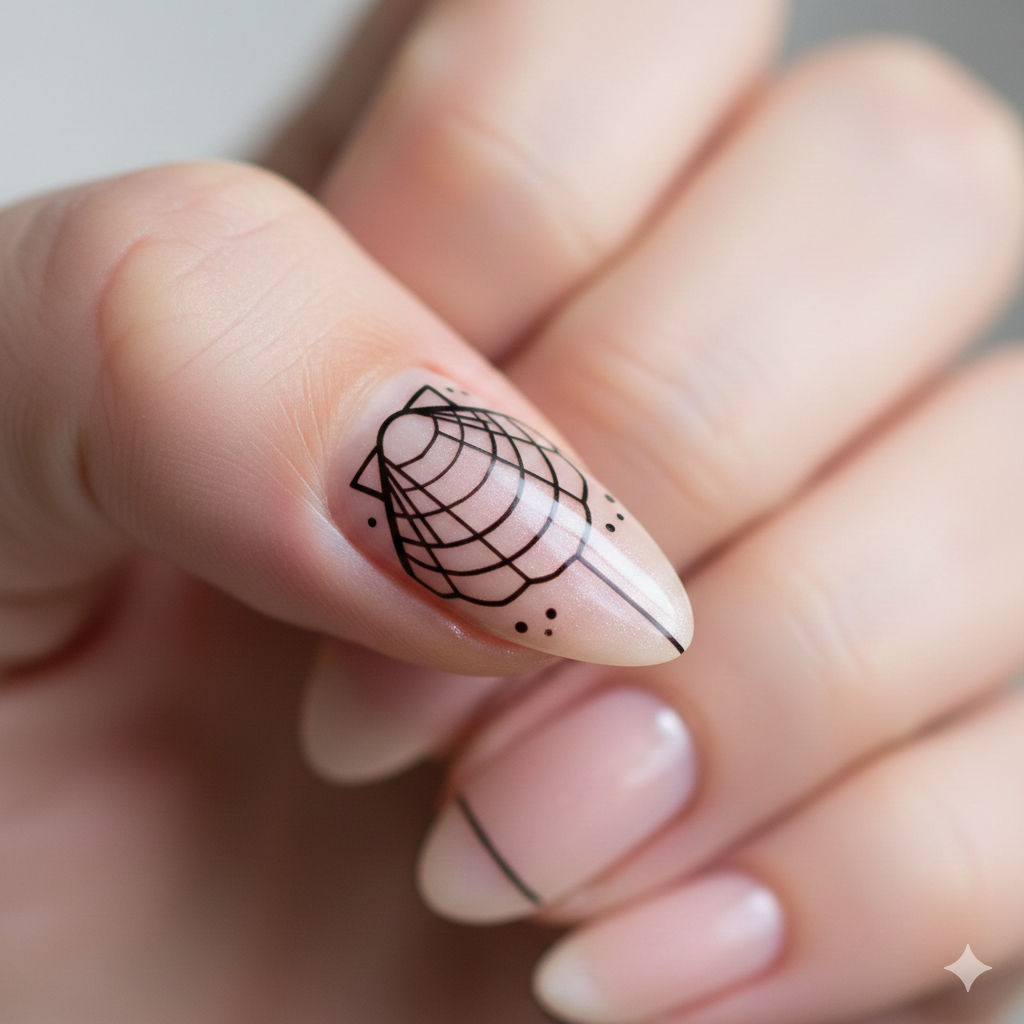
- The Vibe: Architectural and chic.
- How to Do It: Start with a clean white seashell nails base or a soft grey. Using your striper brush and a pastel coral or blue polish, paint a simple fan shape (like a scallop shell) at the base of the nail. Fill it in. Do this on just one or two accent nails.
- Why It Works: It’s an interpretation rather than a literal drawing, making it very forgiving if your hand shakes.
3. The “Driftwood” Stripe
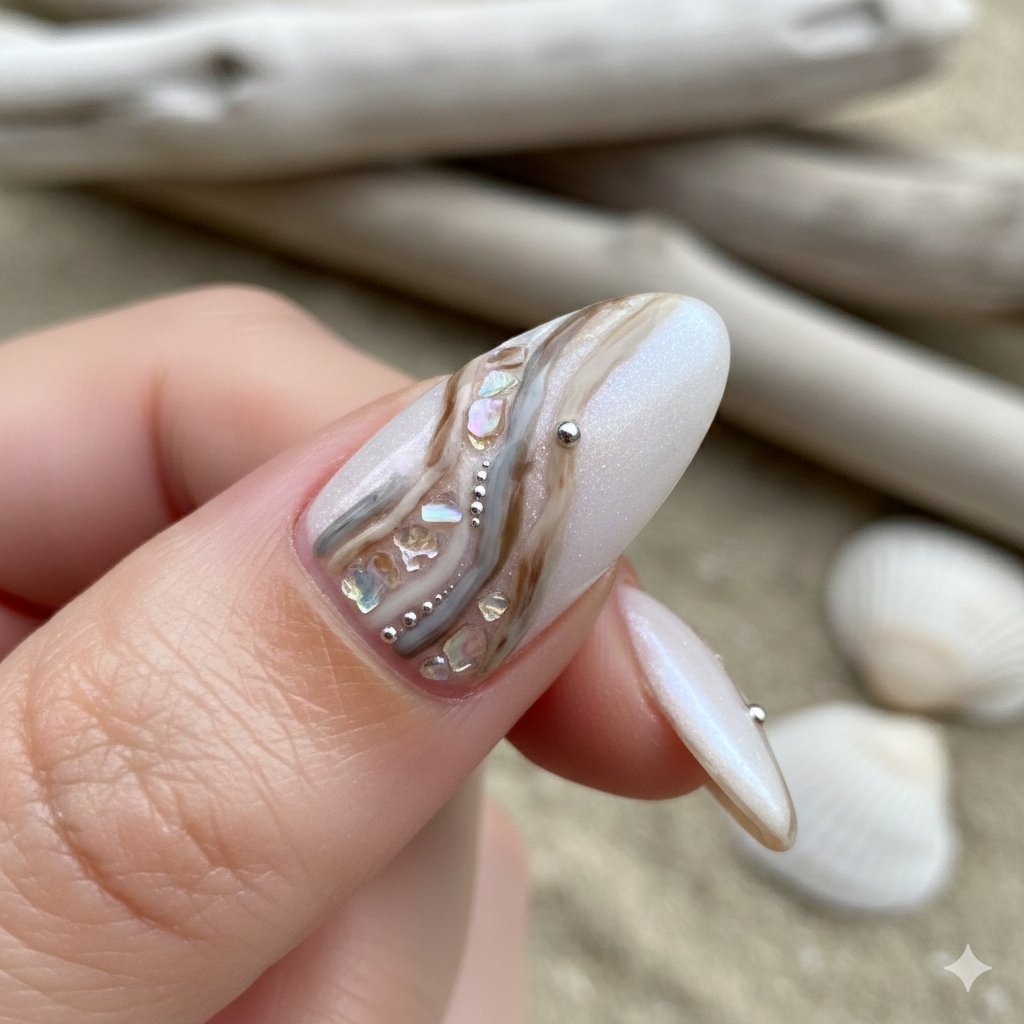
Who says shells have to be the star? Sometimes, the weathered wood found on the beach is just as beautiful.
- The Vibe: Rustic and cozy coastal.
- How to Do It: Paint your nails a soft, creamy color. Using a thin brush and a dark brown polish, paint very thin, irregular horizontal lines. They shouldn’t be perfect. They should look like twigs or driftwood washed up on the shore.
- Variation: Add one tiny dotting of gold between the “wood” lines to mimic a hidden treasure.
4. The “Bioluminescent Glow”
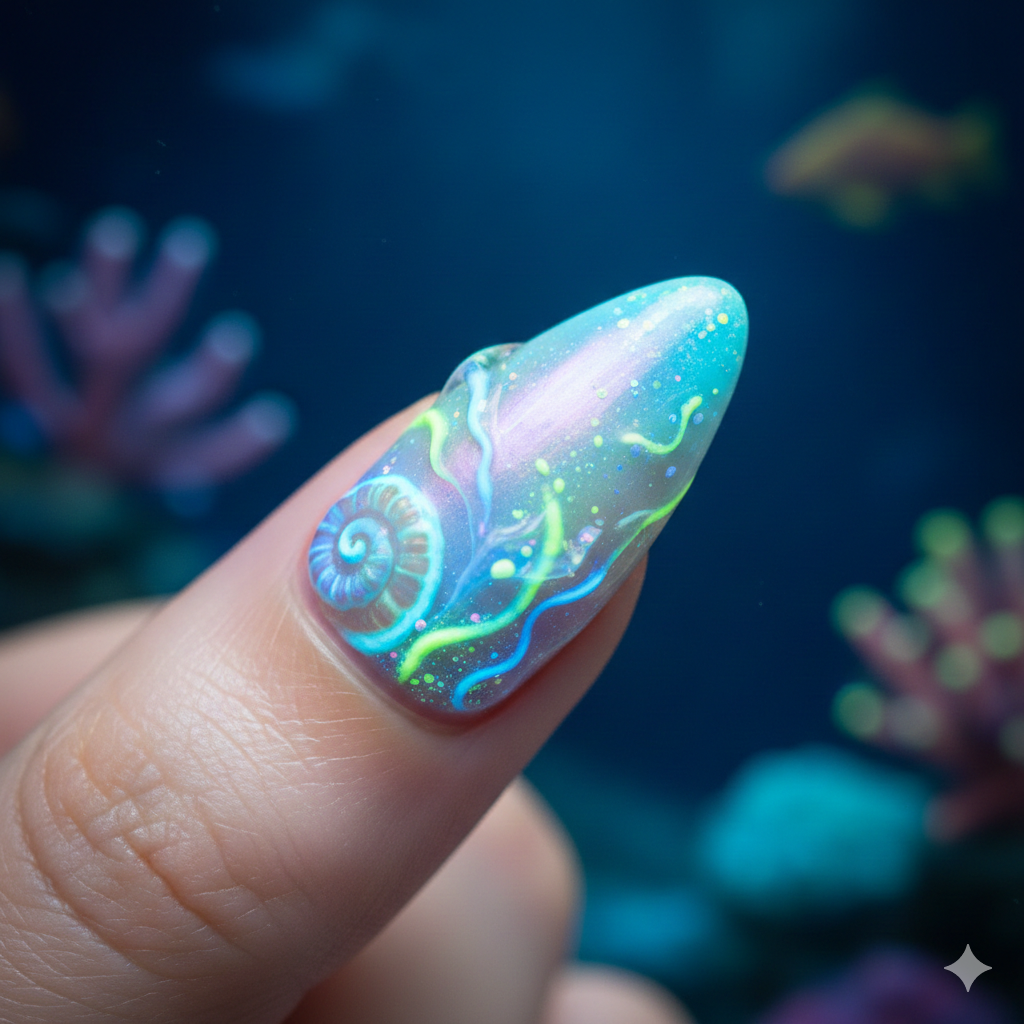
Inspired by the ocean at night, this ocean-themed nails idea uses glow-in-the-dark polish or bright neons against a dark background.
- The Vibe: Edgy and mystical.
- How to Do It: Apply a deep navy or black base. Using a toothpick, dot small circles of neon blue or glow-in-the-dark polish. These represent tiny sea creatures or plankton. Add a tiny white outline to one dot to make it look like a glowing shell.
- Difficulty Level: Super easy. The darker the base, the less precision you need.
5. The “Sea Glass” Confetti
Instead of drawing shells, we use irregular foil shapes to mimic sea glass.
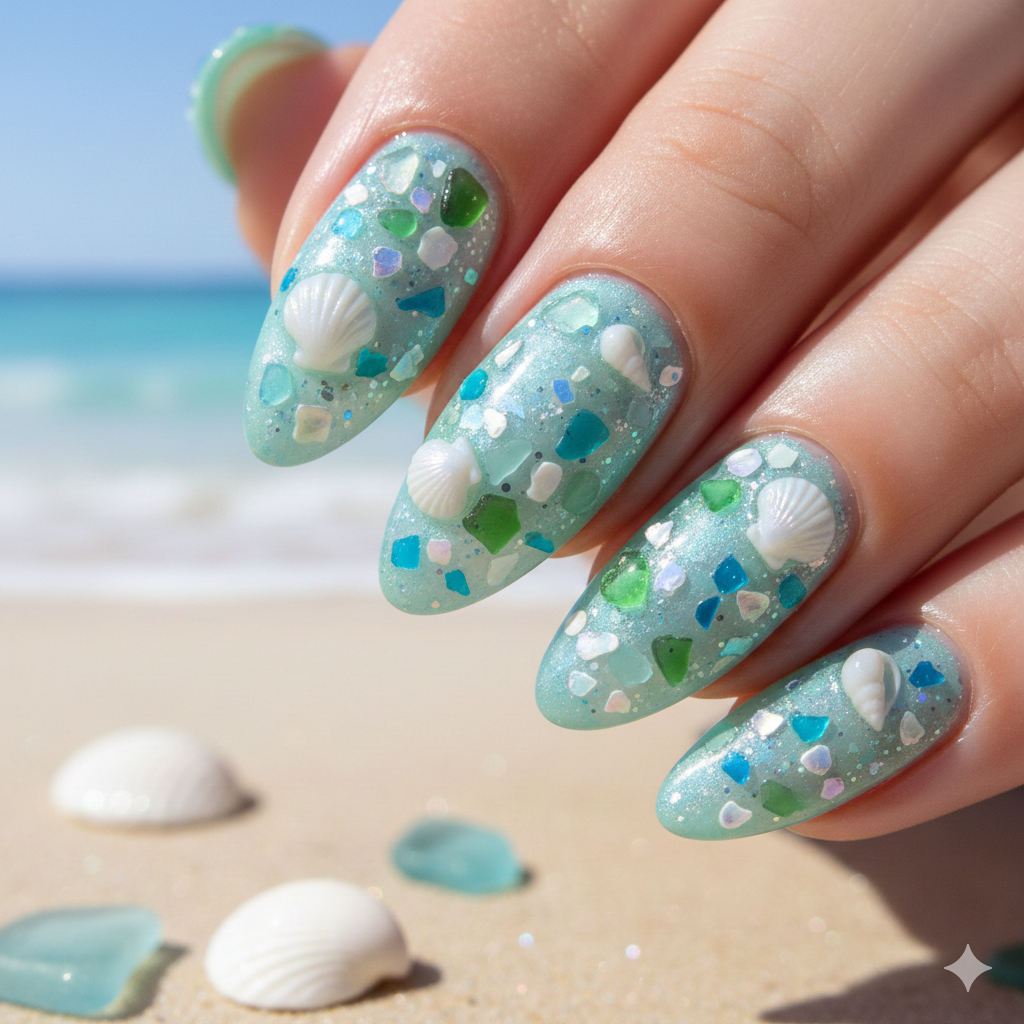
- The Vibe: Fresh and sparkly.
- How to Do It: Use a sheer, pale blue or green base polish. Tear tiny pieces of metallic foil (irregular shapes, not squares). Place them randomly on the nail. Seal with a top coat.
- Pro Tip: This is a great way to use up leftover foil from other manicures.
Touchable Seashell Nail Designs with Texture
Now we move into designs that feel as good as they look. These are great for almond seashell nails because their shape lets the texture really shine.
6. The “Pearlescent Drizzle”
This looks like liquid pearl poured over your nails.
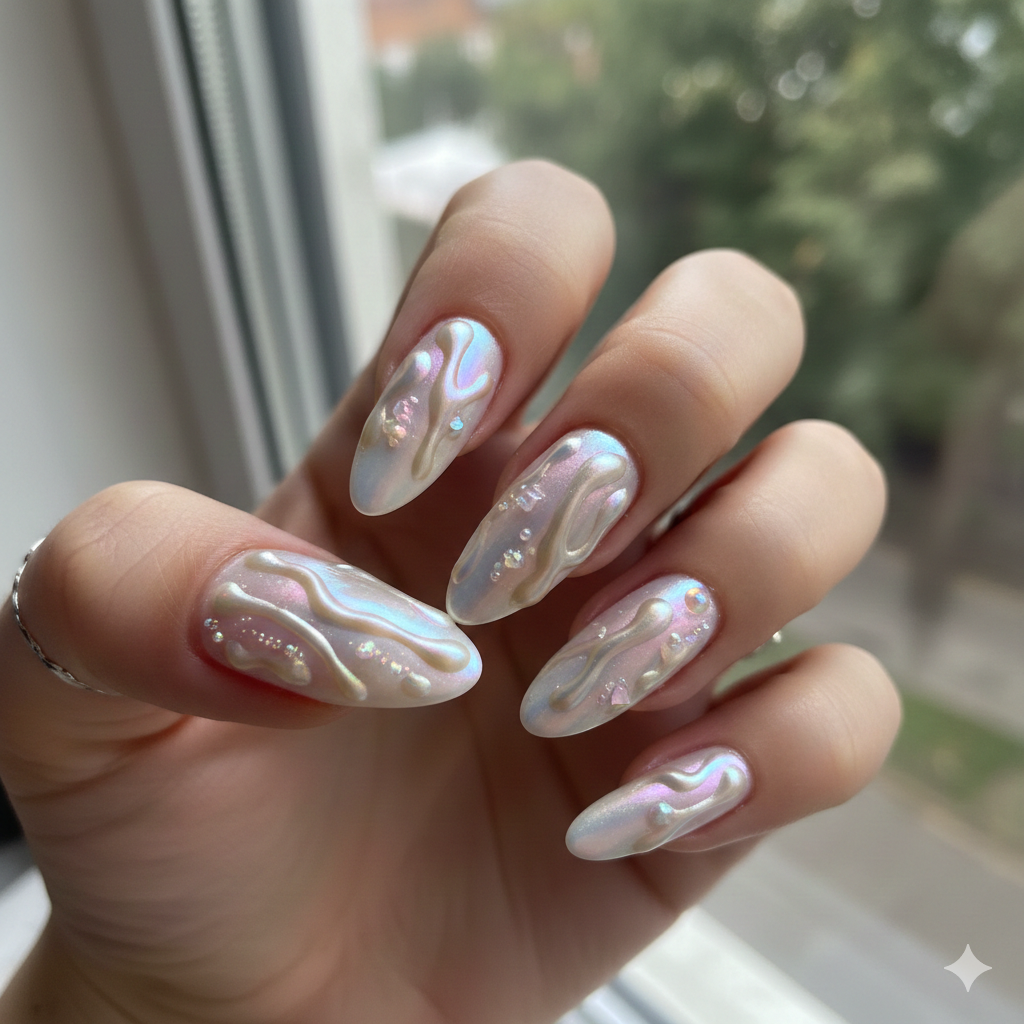
- The Vibe: Luxury and elegance.
- How to Do It: Choose a base color that matches your skin tone (nude or blush pink). Use a specialized “iridescent top coat” or a sheer, pearlized polish. Starting at the cuticle, let a thick drip of polish run down the nail. Don’t smooth it out; let the drip dry naturally. It creates a 3D wave of pearls.
- Why It Works: It’s abstract enough to be beginner-friendly but looks incredibly complex.
7. The “Velvet Sea Urchin”
This uses flocking powder to create a soft, fuzzy texture resembling a sea urchin.
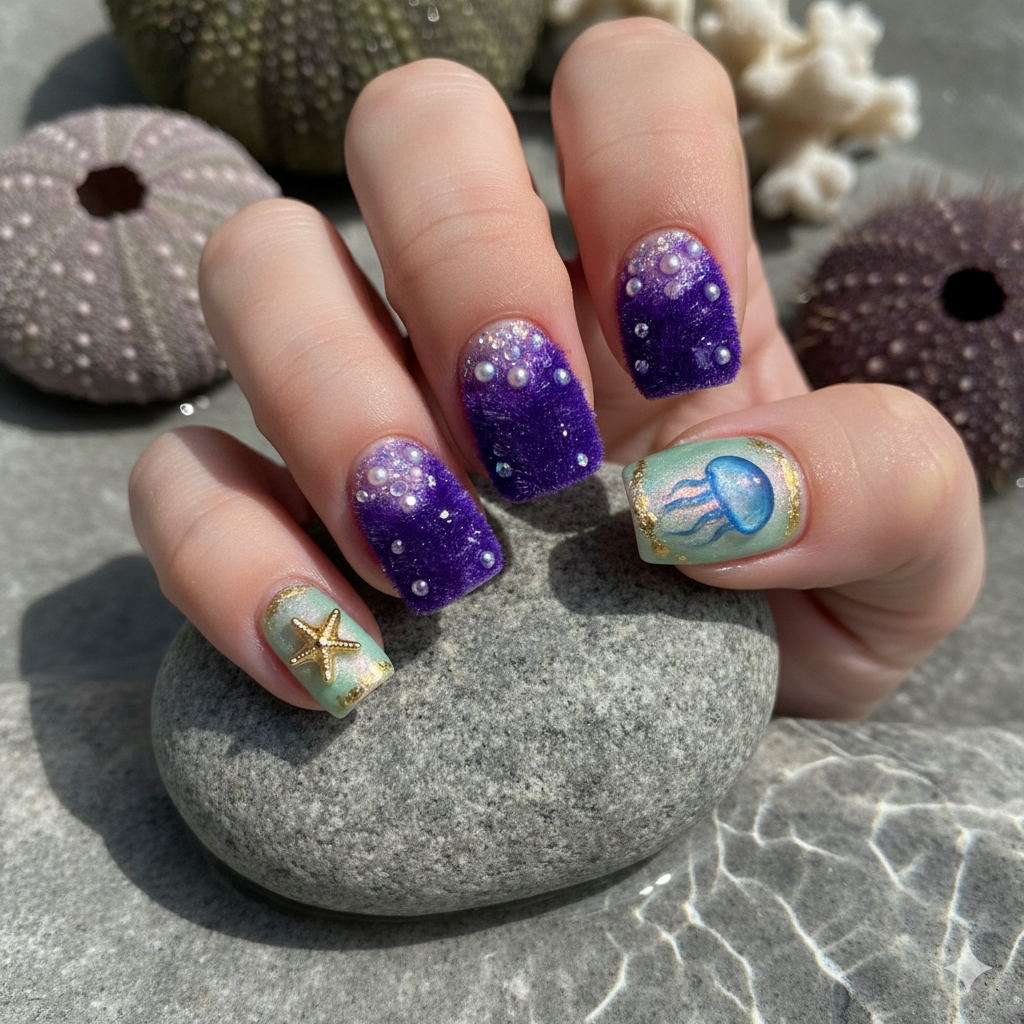
- The Vibe: Tactile and unique.
- How to Do It: Paint your nail with a colored base coat (purple or black works best). While it is still wet, pour velvet flocking powder over the nail. Press it down gently and shake off the excess. Use a dotting tool to create tiny black dots on top of the velvet once it dries.
- Warning: This is a textured design, so be careful when putting on gloves or sweaters!
8. The “Salt Crystals” Gradient
Mimic the crusty, salty line left on the beach when the tide goes out.
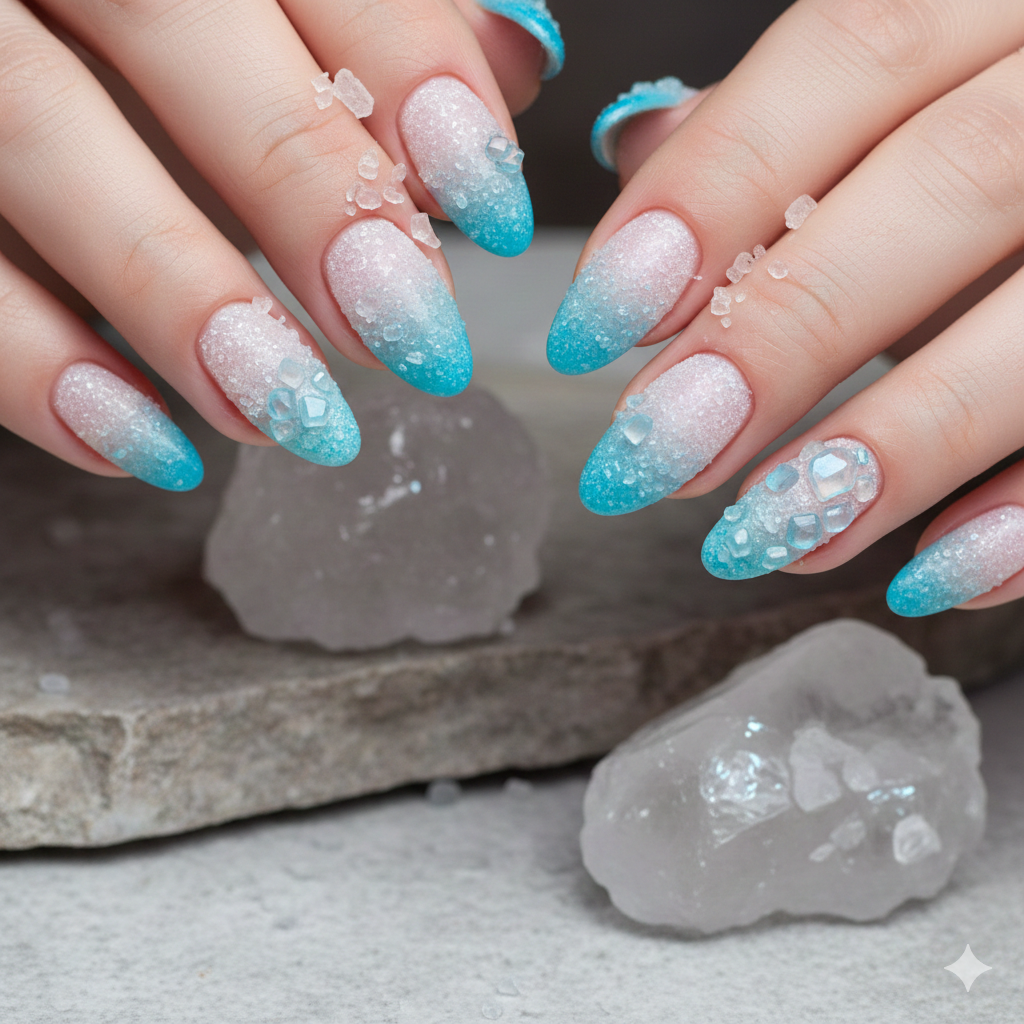
- The Vibe: Raw and realistic.
- How to Do It: Create an ombre from blue to white using a sponge. While the white part is still wet, sprinkle chunky white iridescent glitter or crushed glass sugar heavily on the top third of the nail.
- Twist: This looks best on short seashell nails because it keeps the design contained and cute.
9. The “Tie-Dye Conch”
Instead of painting the outside of the shell, we are painting the inside—the beautiful spiraled pink and orange patterns.
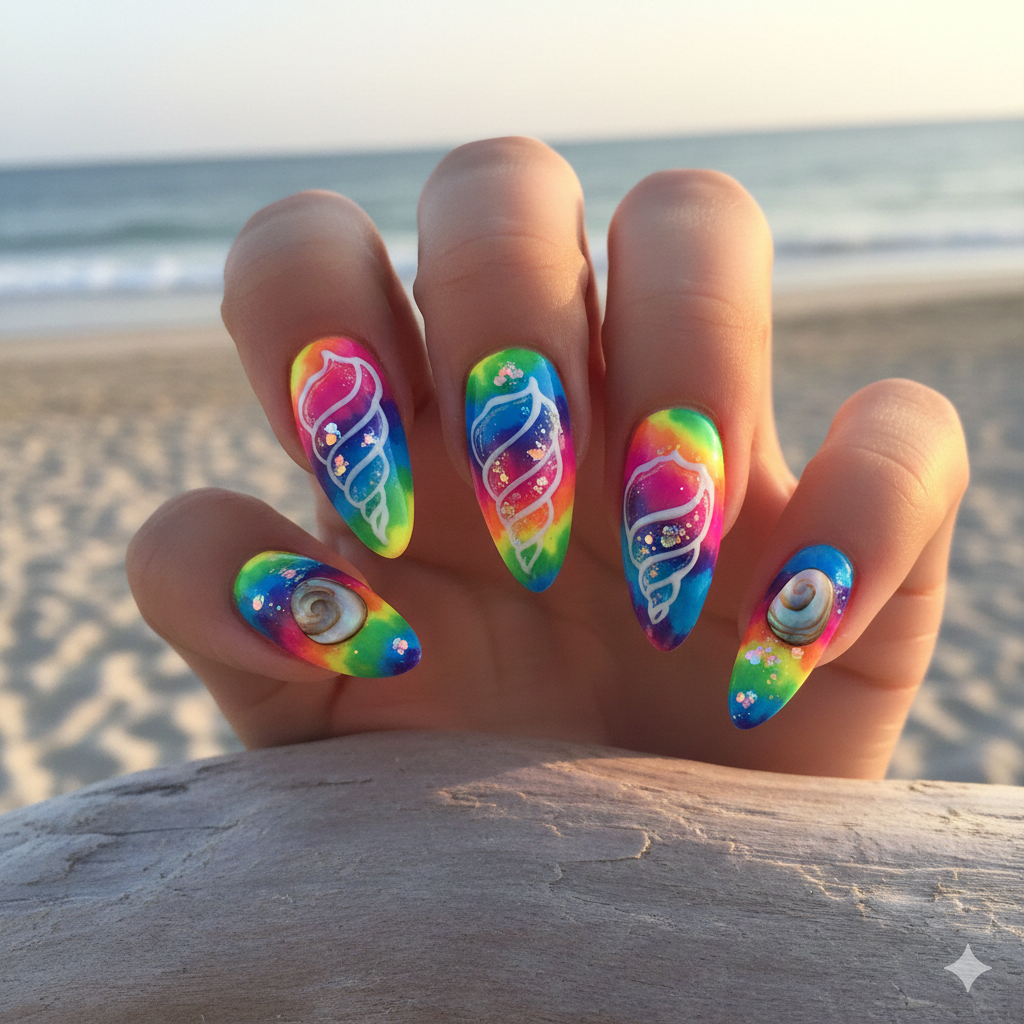
- The Vibe: Psychedelic and retro.
- How to Do It: This is a water marble technique. Fill a cup with room-temperature water. Drop drops of pink, orange, and white polish into the water, letting them spread. Use a toothpick to swirl them into a spiral pattern. Dip your nail in.
- Optimization: Use nude seashell nails as a base to balance out the intensity of this look.
10. The “Cracked Earth” Shell
This uses crackle polish (yes, it’s coming back!) to mimic the texture of an old, dried starfish or a broken shell.
- The Vibe: Grunge beach.
- How to Do It: Apply a metallic gold or bronze base. Apply a layer of black crackle polish over the top. As it dries, it will shrink, creating jagged lines. Fill some of the cracks with a few tiny blue caviar beads.
The Trending “Mermaidcore” Aesthetic Seashell Nail Art
Mermaidcore nails are huge right now. These designs lean into the ocean’s fantasy.
11. The “Siren Scales” Foil
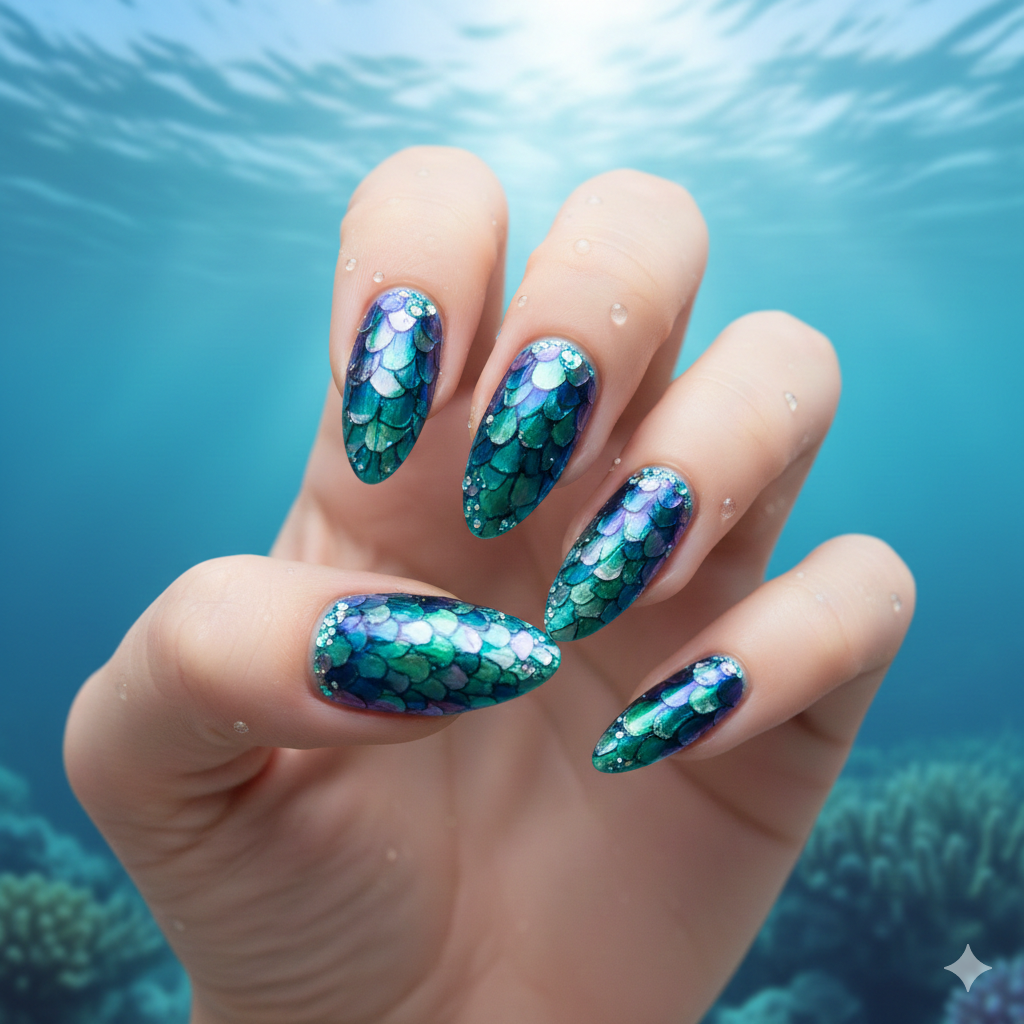
Fish scales and seashells go hand in hand. This design creates a scale effect that transitions into a shell.
- The Vibe: Magical and shimmery.
- How to Do It: Use a sheer, periwinkle blue base. Apply fish scale decals or stamped images. Over the scales near the cuticle, layer a piece of loose glitter “sequin” shaped like a scallop shell.
- Unique Factor: The transition from organic scales to the rigid geometry of the shell shape creates a cool contrast.
12. The “Floating Bubble Shells”
A dreamy look where shells appear to be suspended in water.
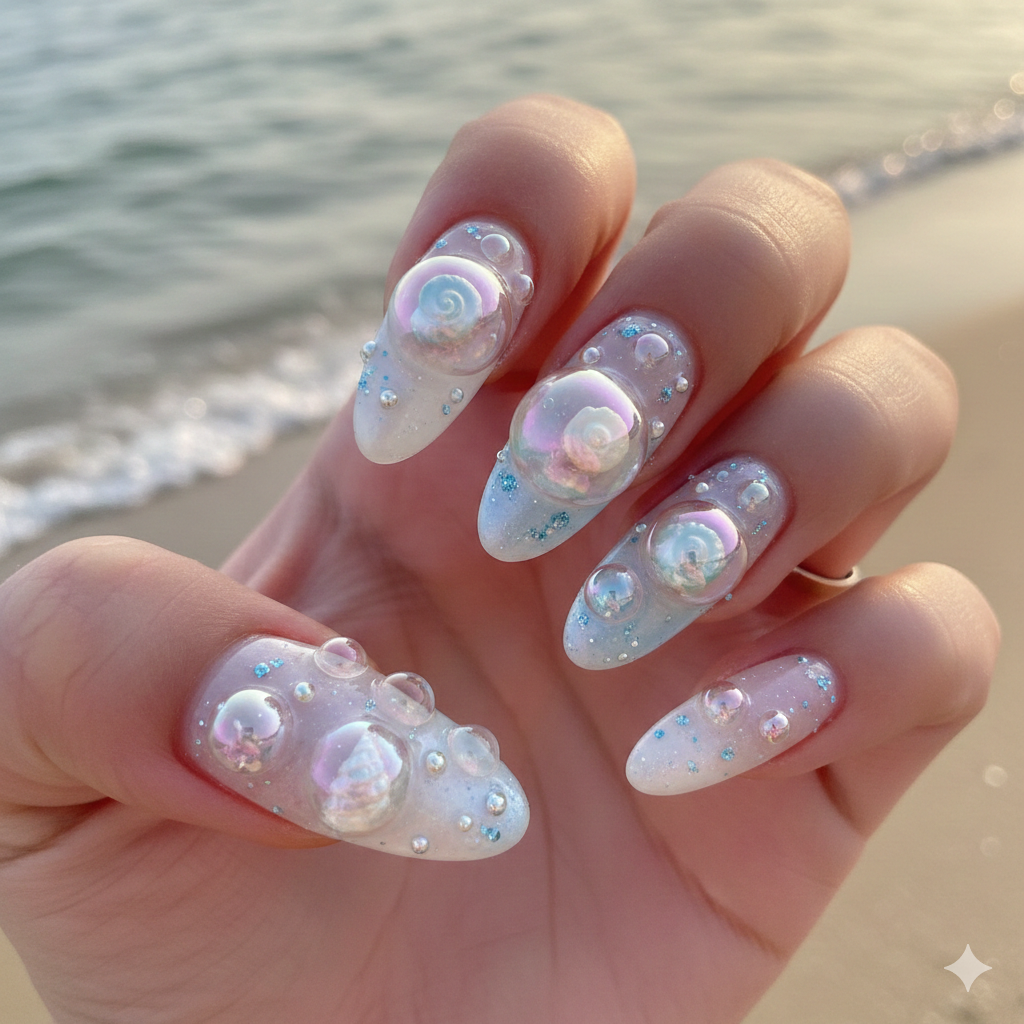
- The Vibe: Ethereal and soft.
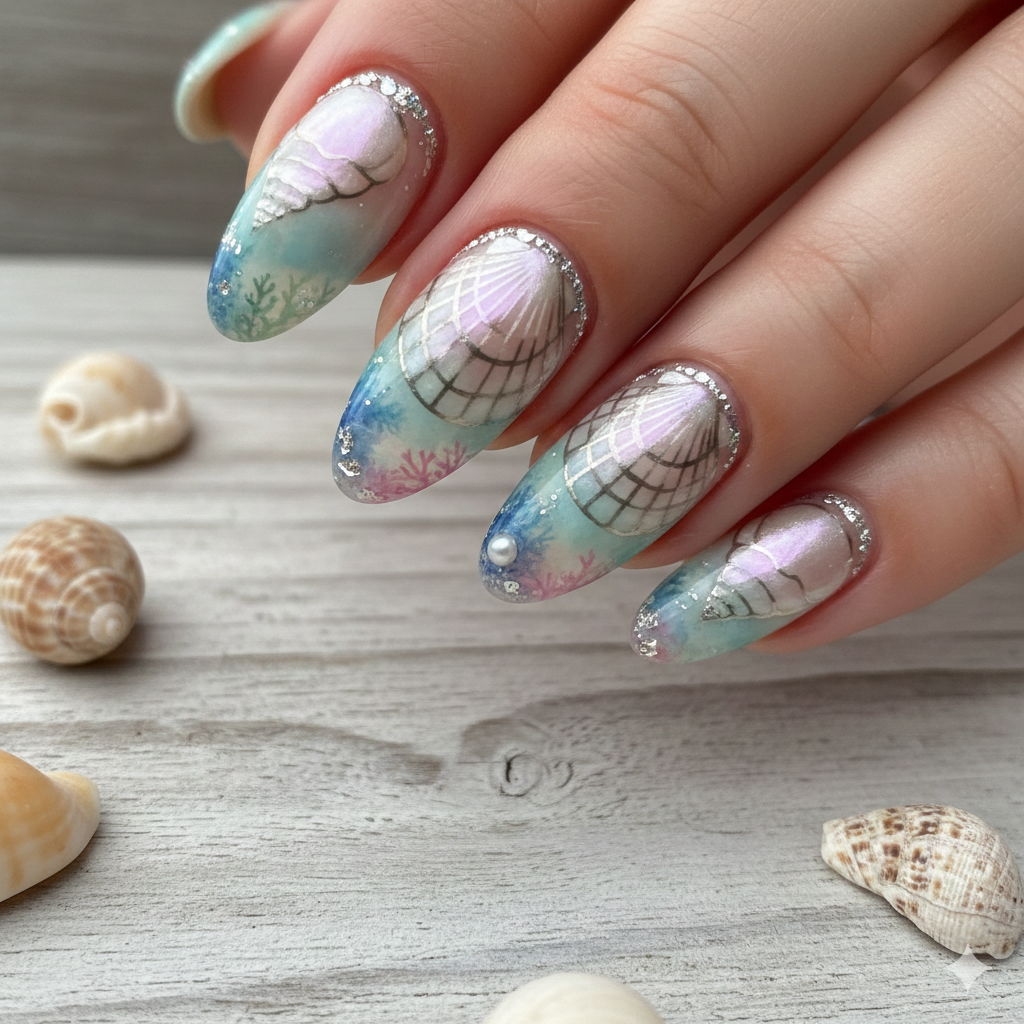
- How to Do It: Apply a clear or jelly pink polish. While wet, place tiny 3D seashell nail charms and iridescent micro-beads onto the nail. Apply a second layer of clear jelly polish over the top, partially covering the shells, so they look submerged.
- SEO Note: This is a top-tier idea for summer seashell nail ideas because it looks incredible in photos.
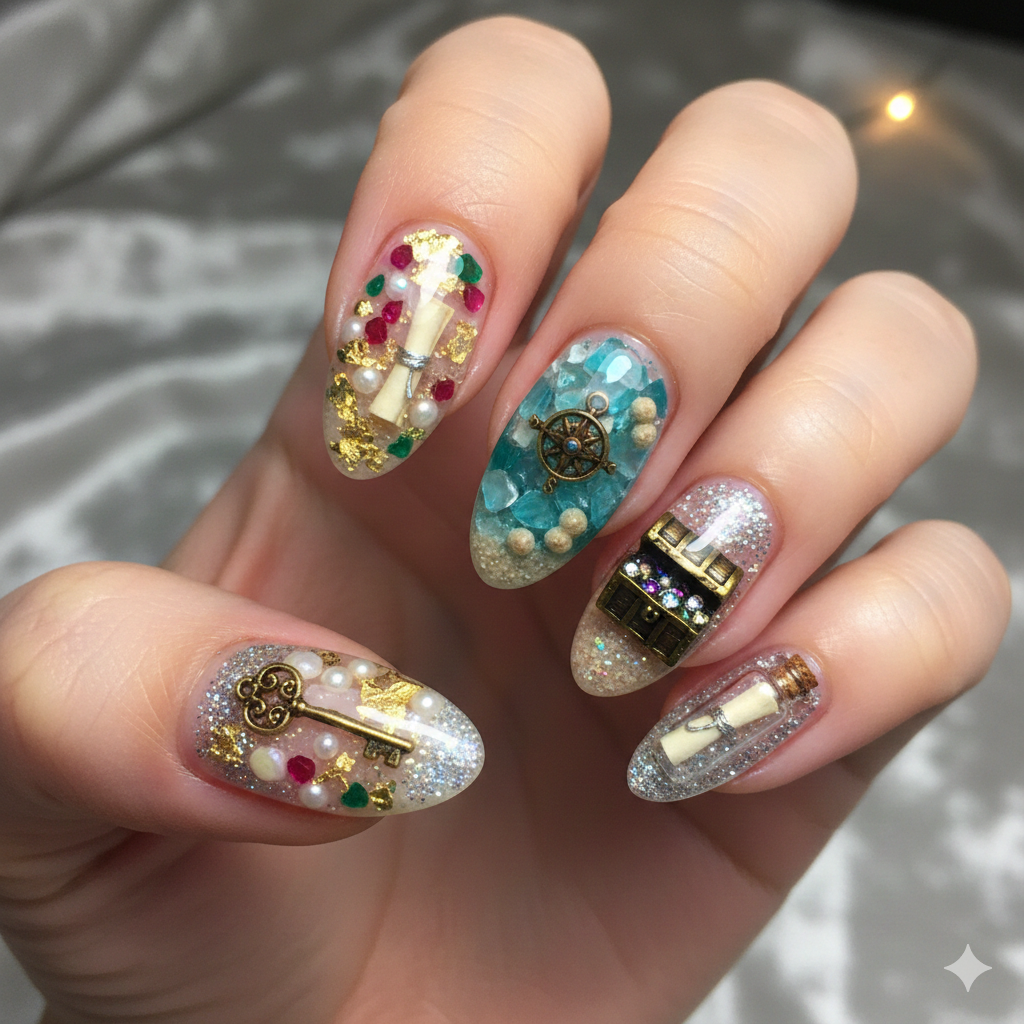
13. The “Ariel’s Treasure” Mix
Inspired by the “Thingamabob” collection, this is a curated mess of ocean treasures.
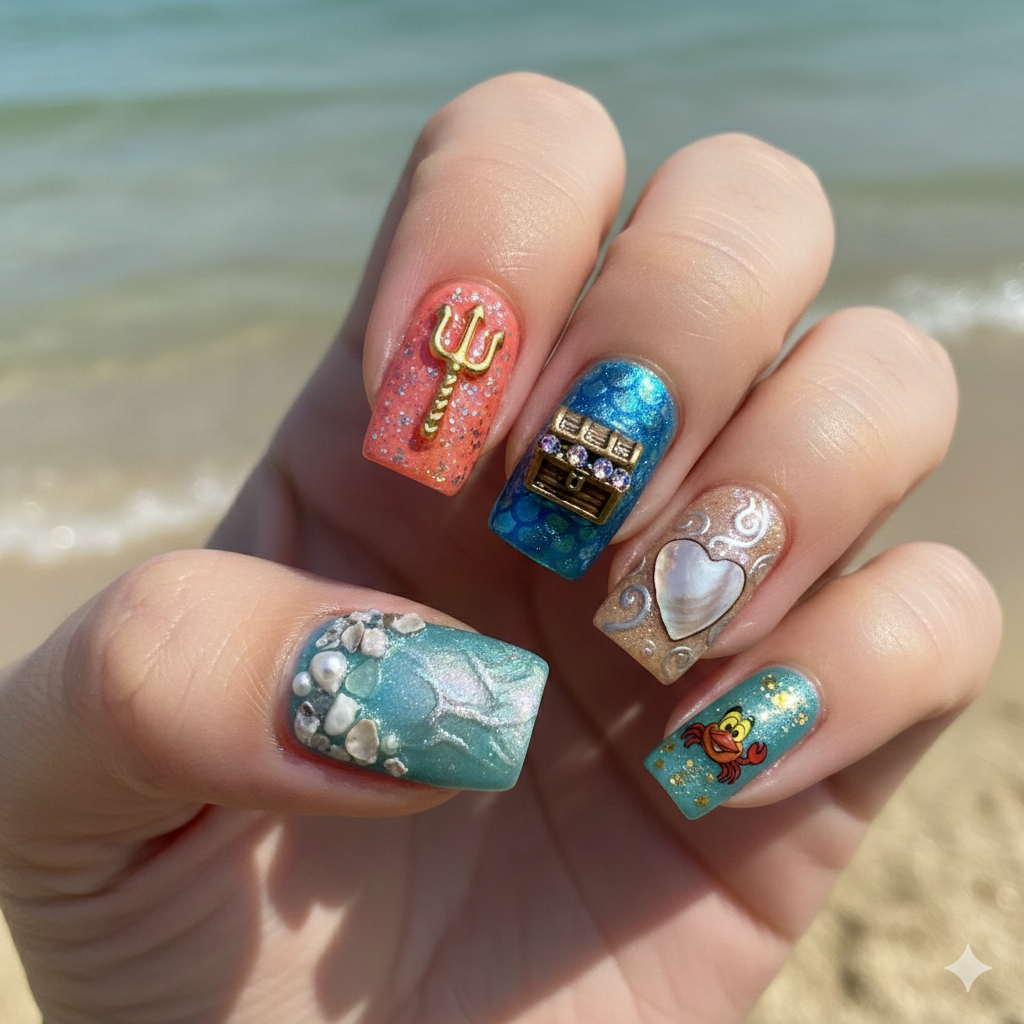
- The Vibe: Maximalist and fun.
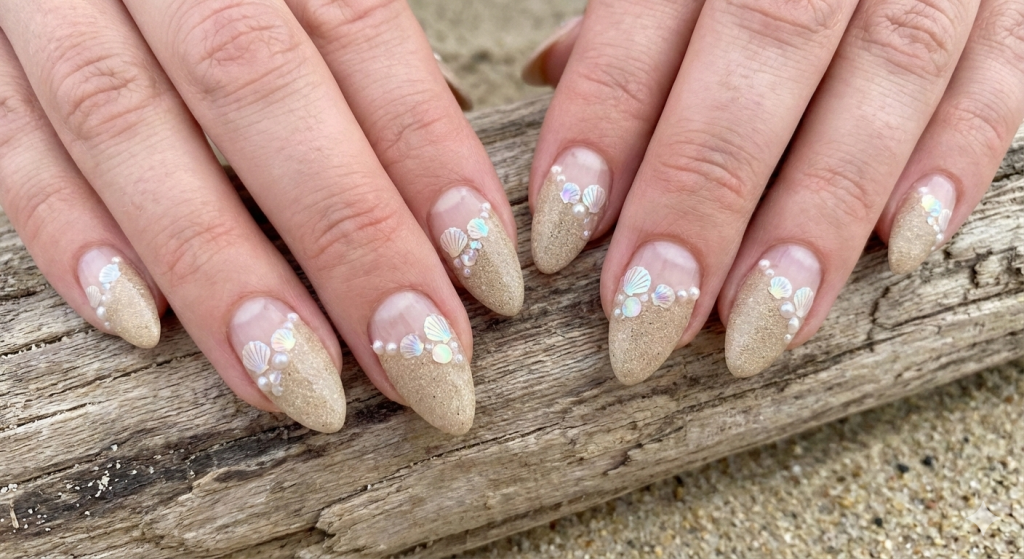
- How to Do It: A sand-colored base. Use nail glue to attach a mix of elements: one tiny shell, one pearl, one starfish stud, and a piece of chain. Don’t arrange them neatly; let them look like a scattered collection.
- Best For: Coffin seashell nails because the wide surface area gives you plenty of room to arrange your “treasure.”
While this puts a beachy spin on the silhouette, if you prefer the classic approach, you can explore our guide on the best French nail designs to perfect your technique.
14. The “Holo Dolphin” Surprise
Okay, strictly speaking, not a shell, but a great pairing. A holographic dolphin jumping over a shell.
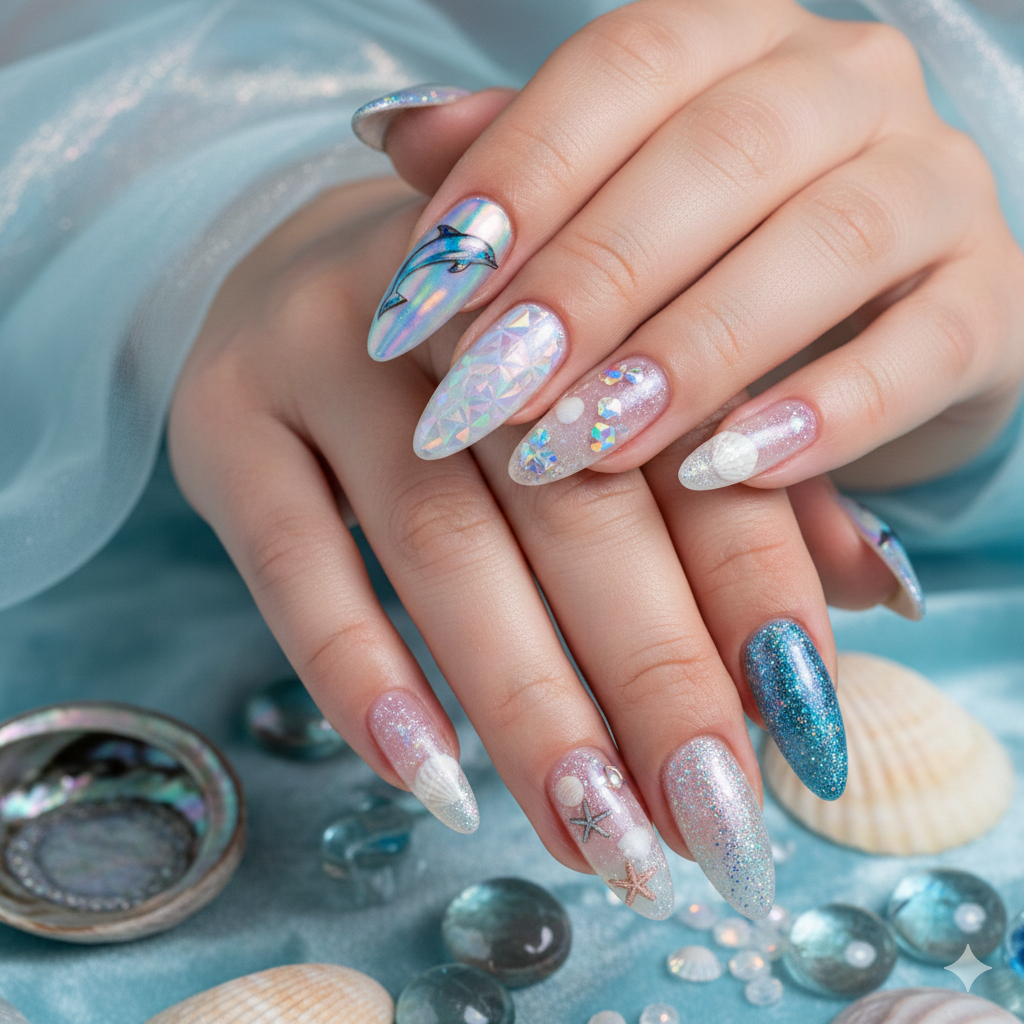
- The Vibe: Y2K nostalgia.
- How to Do It: Chrome blue powder base. Paint a simple white shell silhouette in the corner. Use a thin brush to add a tiny holographic foil dolphin leaping over the shell.
- Why It’s Unique: It adds movement to the static shell design.
15. The “Sea Foam Lace”
Combine the delicacy of lace with the ocean theme.
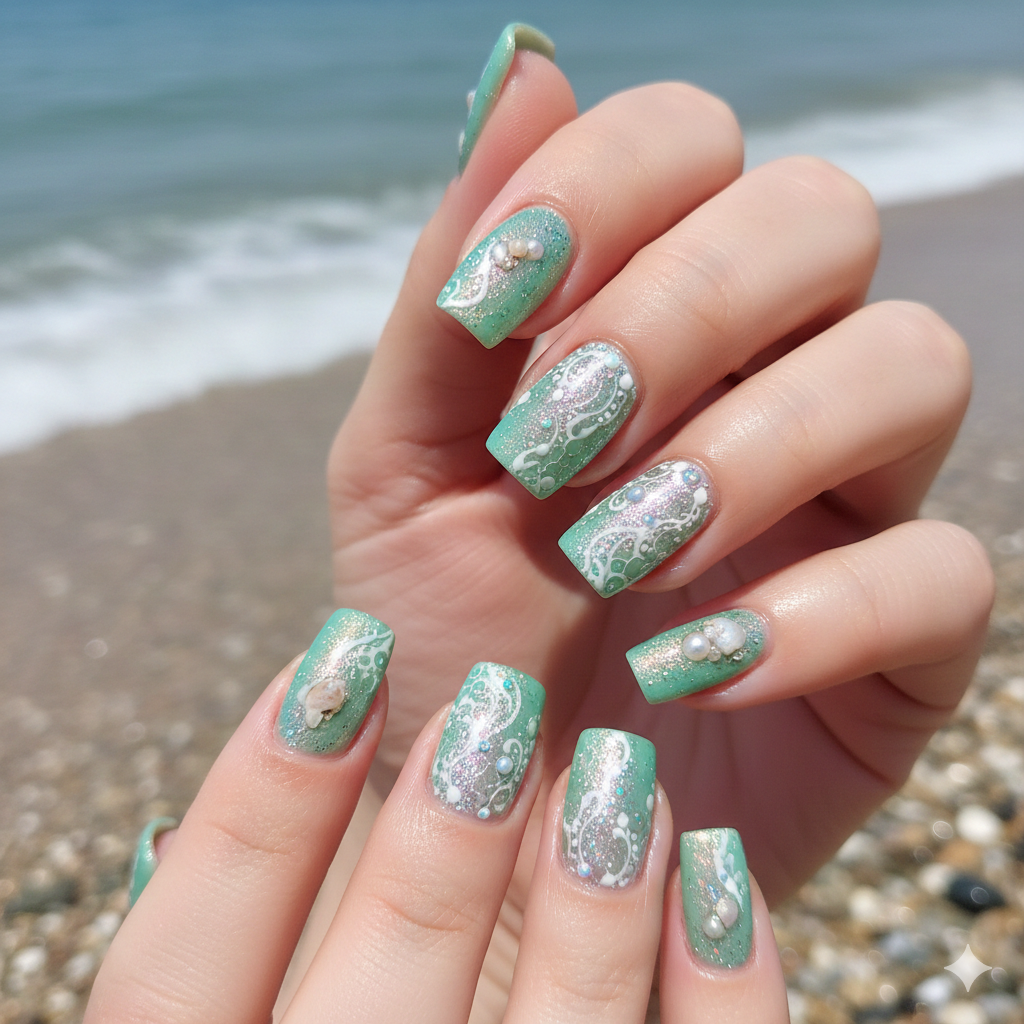
- The Vibe: Bridal and boho.
- How to Do It: Use white nail stamping polish and a lace plate to stamp a lace pattern over a light blue base. In the center of the lace “doily,” place a mother-of-pearl button or a flat shell charm.
- Secondary Keyword: This is a perfect candidate for wedding seashell nail art.
Advanced Beginner Seashell Nail Art Techniques
These require a tiny bit more patience but are still simple seashell nail designs at heart.
16. The “Geometric Coastline”
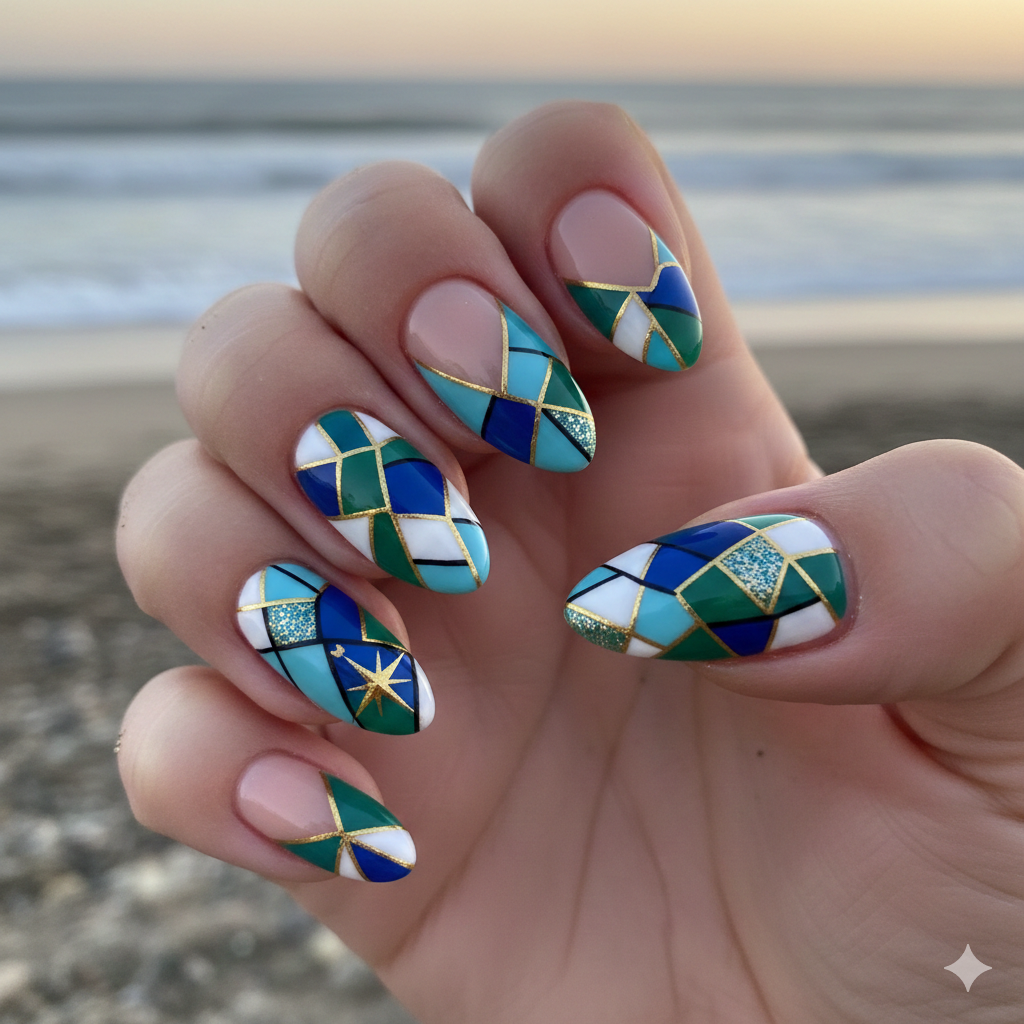
Using striping tape to create sharp, geometric shapes that represent the horizon, sand, and water.
- The Vibe: Modern and graphic.
- How to Do It: Place a strip of tape horizontally across the middle of the nail. Paint the bottom sandy beige and the top blue. Remove tape. In the “sand” section, paint tiny white triangles to suggest jagged shells protruding from the sand.
- Alternative: Blue seashell nails with gold geometric lines overlaid for a very high-fashion look.
17. The “Double Exposure” Shell
This is a very artistic concept where the shell silhouette is filled with an ocean scene.
- The Vibe: Artistic and deep.
- How to Do It: Paint a solid black silhouette of a scallop shell. Inside the black shape, use a fine brush to paint a tiny sunset or waves in light colors. Because the background is black, the colors inside will pop.
- Insight: This is great for short seashell nails because the small canvas makes the tiny details easier to manage.
18. The “Gilded Edge” Conch
Making cheap plastic charms look like expensive gold artifacts.
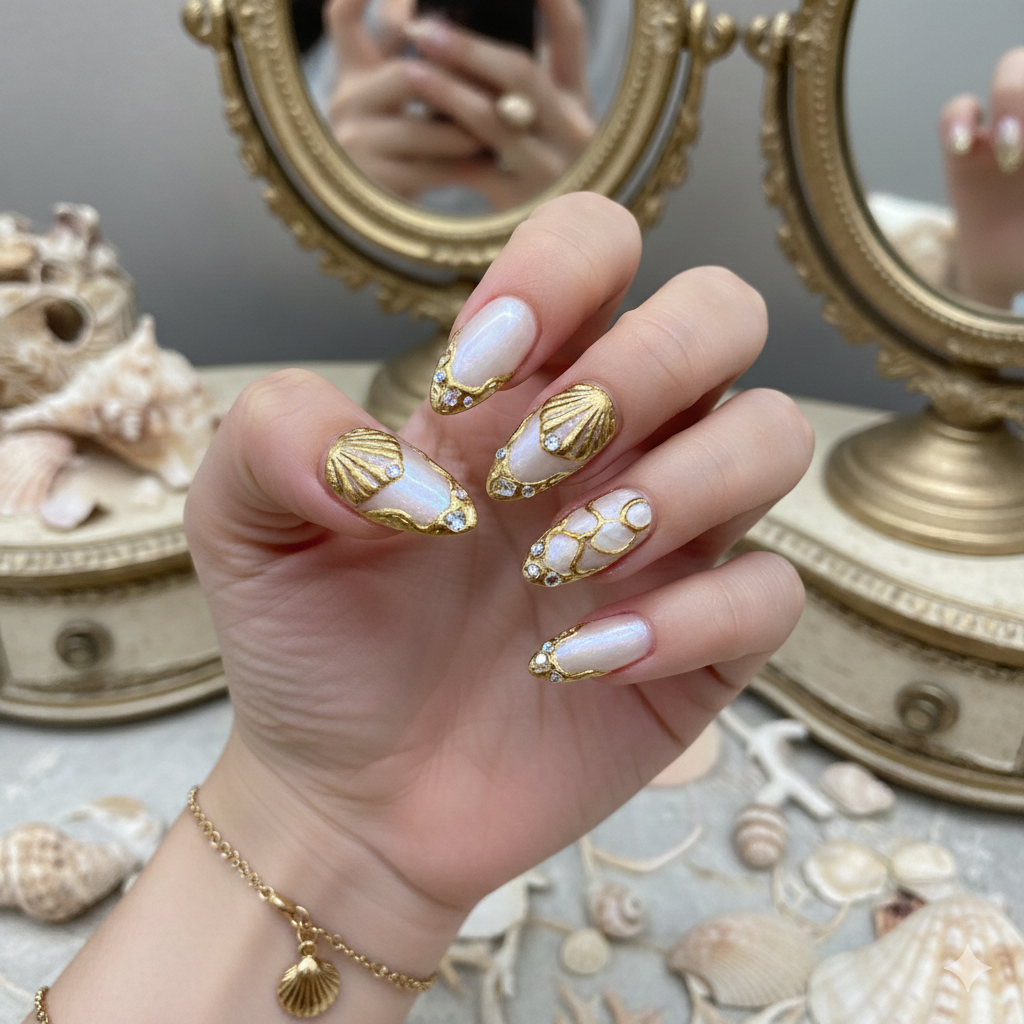
- The Vibe: Expensive and rich.
- How to Do It: Take a plain white conch shell charm. Using a small brush and gold loose pigment (or gold polish), dry-brush the edges and the ridges of the shell. Leave the deep grooves white. This creates an instant antique look.
- Product Focus: Best products for seashell nail art include good-quality loose pigment for this exact technique.
19. The “Abstract Wave Crash”
Capturing the motion of water hitting a shell.
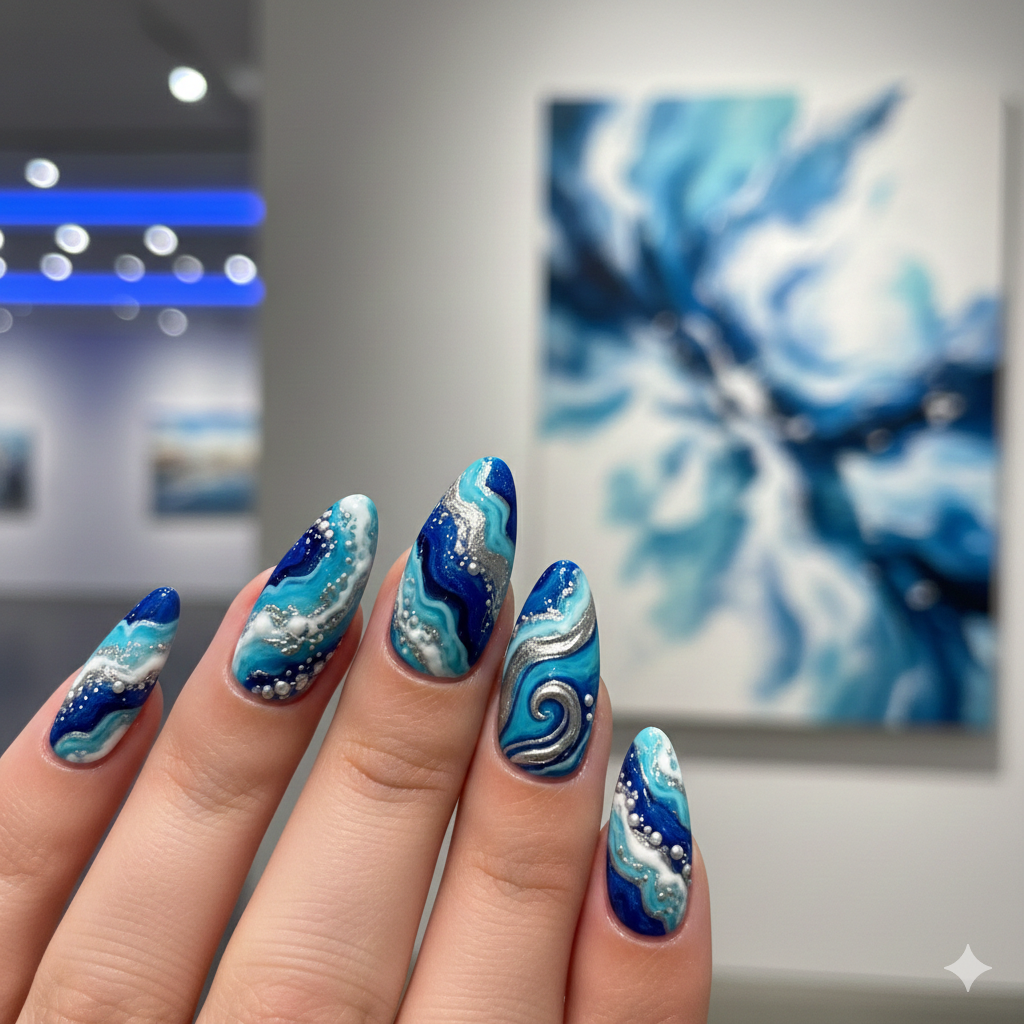
- The Vibe: Dynamic and energetic.
- How to Do It: Paint a blue background. Use a thick white gel polish to create a “slash” across the nail (the wave). Before curing, use a dotting tool to drag the white polish upward to create spray. Place a shell charm “under” the wave.
- Technique: This works best with gel because it doesn’t dry immediately, giving you time to play with the “water.”
20. The “Hidden Treasure” Encapsulation
This is the most durable way to wear charms.
- The Vibe: Sleek and 3D.
- How to Do It: Apply a base of clear gel. Place your shells and pearls upside down (so the flat part touches the nail). Cure. Cover the entire nail with a thick layer of clear builder gel or hard gel. File and shape the surface to make it smooth. The shells look like they are trapped inside the glass of your nail.
- Unique Idea: You can even put dried flowers or sand in there with the shells!
If you’re hungry for even more creative inspiration, be sure to check out Pin It Today to discover your next manicure obsession.
Caring for Your Seashell Nail Art
You’ve spent time creating these easy DIY seashell nails; you want them to last! Seashell nail art often features texture and 3D elements that can catch on clothing.
- Wrap the Tips: When applying your top coat, run the brush horizontally across the free edge of your nail. This “seals” the design and prevents chipping at the tip.
- Gloves for Chores: 3D charms can pop off if exposed to harsh water or chemicals. Wear gloves when washing dishes.
- Matte vs. Glossy: Matte top coats can sometimes make 3D charms look dull. If you use a matte base, try to not put matte top coat directly over the shell charm itself. Use a glossy top coat just on the charm to make it pop.
Conclusion
Creating stunning seashell nail art doesn’t have to be a headache. By breaking down complex ocean themes into manageable steps—like using tape for geometry, flocking powder for texture, or simple negative space for minimalist looks—you can achieve professional results from your living room.
The key is to stop trying to copy the exact photos you see online and start interpreting the beach’s vibe in a way that suits your skill level. Whether you go for the driftwood stripe or the hidden treasure encapsulation, these 20 easy seashell nail art designs perfect for beginners prove that you don’t need to be a pro to have a manicure that looks like a million bucks. So, grab your polish, pick a design, and let the creativity flow like the tide.
FAQs
1. Can I use real seashells from the beach on my nails?
Technically, yes, but it is not recommended. Real shells are often porous and can harbor bacteria. If you really want to use them, you must sanitize them thoroughly with alcohol and seal them with a clear top coat or resin to prevent them from degrading on your nail bed.
2. My 3D seashell charms keep popping off. What am I doing wrong?
The issue is usually surface preparation. Natural nails produce oils that prevent glue from adhering properly. Ensure you wipe your nail with alcohol or nail dehydrator before applying glue. Also, use a nail glue specifically designed for gems (like a gel glue) rather than standard super glue, which can become brittle.
3. How do I remove nail art with heavy glitter or encapsulated shells?
Don’t try to peel it off! Soak cotton balls in 100% acetone, place them on your nails, and wrap each finger in aluminum foil. Let it sit for 15-20 minutes. The acetone will soften the gel/acrylic enough to gently slide the charms and polish off.
4. Is seashell nail art appropriate for formal events like weddings?
Absolutely! Stick to elegant seashell nail designs like the “Siren Scales” or “Pearlescent Drizzle.” Opt for nude, pink, or white color palettes and keep the 3D elements minimal (like just one pearl per nail) to keep it looking classy rather than costume-y.
5. Do I need UV/LED light for these designs?
It depends. If you are using regular polish (lacquer), you do not need a light, but drying time will be longer, and 3D charms are harder to secure. If you are using gel seashell nails, you do need a lamp to cure the polish. Gel is generally recommended for 3D art because it stays wet until you cure it, giving you time to position your shells perfectly.
